Raising baby chicks is mostly about getting three things right in the first six weeks: heat that the chicks regulate themselves, clean dry bedding, and feed matched to their age. Get those right and almost everything else is forgiving. Get the heat wrong and you can lose a whole brooder overnight. I have run a cold-climate flock in Sweden for years, brooded batches in a converted utility room while a −18 °C night sat on the other side of the wall, and graduated more pullets into a live laying flock than I can count. This guide is the whole arc — day-old fluffball to point-of-lay pullet — written from the brooder I actually run, not from a hatchery pamphlet.
The thing nobody tells first-timers is that chicks are not tiny chickens. For the first few weeks they cannot hold their own body temperature, they cannot tell shavings from food, and their immune systems are still booting up. The job is not to fuss over them — it is to build a small, boring, reliable environment and then mostly leave them alone to grow. That is the same systems-reliability instinct I bring to every part of the coop: the brooder is just another machine with living tenants, and the failure modes are knowable.
The Brooder: A Warm, Boring, Reliable Box
A brooder is just a draft-free enclosure that holds heat, bedding, food, and water for the first 4–6 weeks. It does not need to be fancy. I have brooded in a large plastic storage tote, a galvanized stock tank, and a purpose-built plywood box, and the box mattered far less than the heat source and the floor space. The two real rules are: enough room that chicks can get away from the heat, and walls high enough that three-week-olds cannot flutter out (they can, surprisingly early — by week three mine are testing their wings hard). For a full parts list and first-week schedule, the chick brooder setup guide covers container choice, heat source placement, and how to read chick behavior to spot problems before they escalate.
Space is the quiet killer of brooder success. Crowded chicks pick at each other, pile up, and the bedding turns to a damp crust within a day. Plan on roughly half a square foot per chick to start and double that by week three or four. If you find yourself thinking “they look a bit cramped,” they are already too cramped — chicks grow shockingly fast. The same “chicken math” sizing trap that makes a coop-for-six end up holding ten applies to the brooder: build it bigger than the math says.
Bedding should be absorbent and dust-managed. Large-flake pine shavings are my default — they wick moisture, compost beautifully later, and chicks scratch in them happily. Avoid cedar (the aromatic oils irritate developing respiratory tracts) and avoid newspaper or anything slick for the first week, because a slippery floor causes splayed legs in newly hatched chicks. The classic trick is to lay paper towel over the shavings for the first two or three days so the chicks learn that food is food and shavings are not, then pull it once they have the idea.
Brooder Heat: The One Thing You Cannot Get Wrong
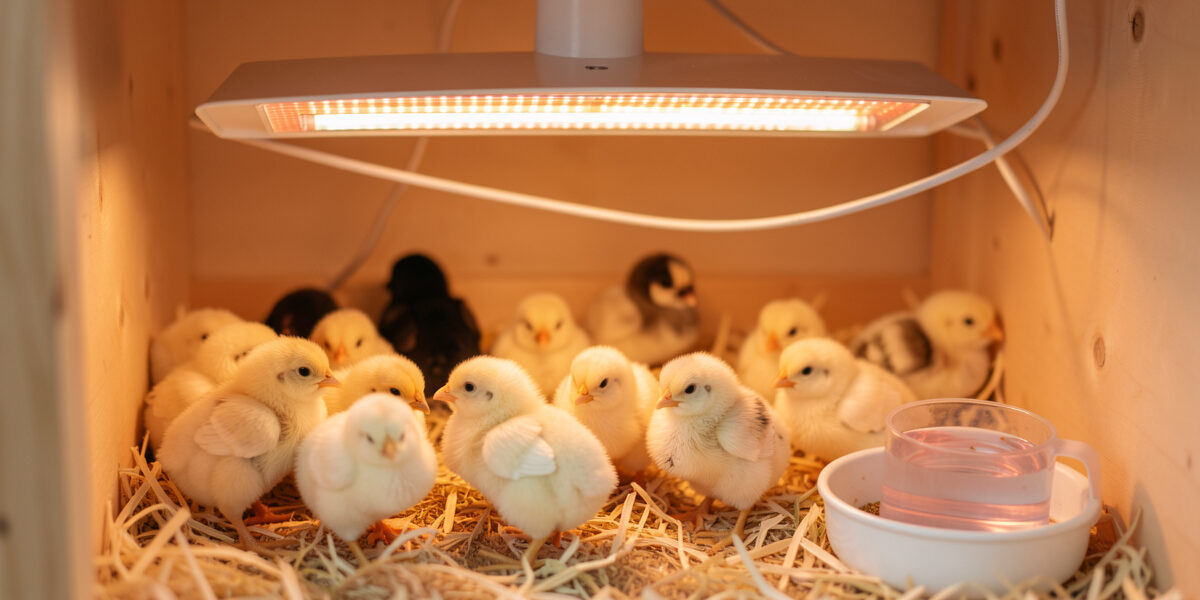
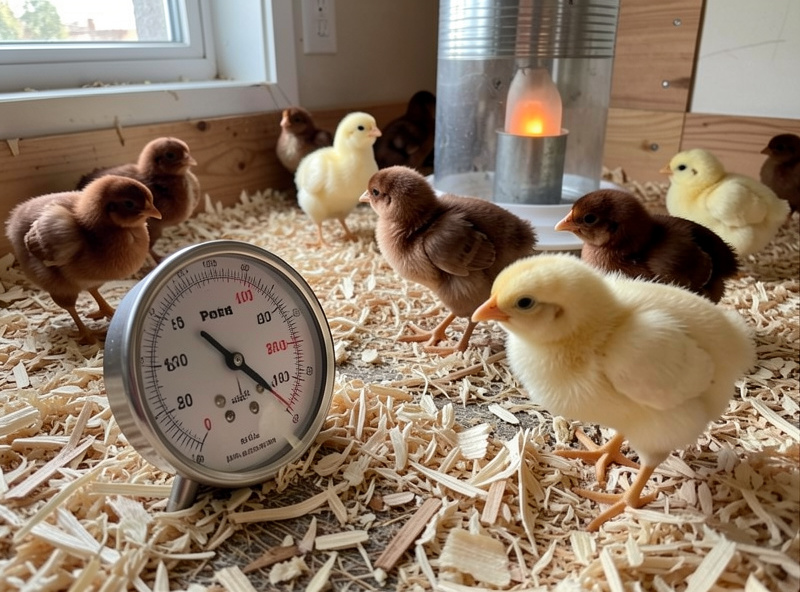
Heat is the single most important variable, and it is where most chick losses come from — either chilling or overheating. Newly hatched chicks need an ambient zone around 95 °F (35 °C) under the heat source in week one, and the standard practice is to drop that by about 5 °F (roughly 3 °C) each week until they are feathered and the brooder matches room temperature, usually around weeks five to six. But here is the part the temperature charts bury: you do not heat the whole brooder — you heat one zone, and you let the chicks choose.
Always set up a heat gradient: hot under the source, cool at the far end. A chick that is too hot needs somewhere to go, and a chick that is too cold needs somewhere to warm up. Then you read the birds, not the thermometer. Chicks piled directly under the heat in a tight pancake are cold — drop the source closer or raise the wattage. Chicks pressed against the far walls, wings held out, panting, are too hot — back the heat off. Chicks spread evenly across the floor, eating, drinking, dozing in loose little clumps, are exactly right. After years of this I barely look at the thermometer; the spread of the flock tells me everything in two seconds.
The choice between a radiant heat plate and a heat lamp is worth thinking through before the chicks arrive. A heat plate mimics a mother hen — the chicks duck under it for warmth and come out to eat — and it runs cool to the touch, uses a fraction of the power, and keeps a natural day/night cycle because it gives off no light. A 250-watt heat lamp is cheaper up front and throws heat across a bigger area, but it is also the single biggest fire risk in chick-keeping: a lamp that falls into the bedding will burn your house down, and every year it does exactly that to someone. If you run a lamp, secure it with two independent fasteners, never just the clamp. I switched to heat plates years ago and have never looked back. The chick heat plate vs heat lamp guide puts the two options side by side on safety, running cost, and the specific brooder sizes where each excels.
| Brooder factor | Heat plate | Heat lamp |
|---|---|---|
| Heat style | Radiant, contact warmth (mimics broody hen) | Radiant overhead, warms whole zone |
| Fire risk | Very low (surface stays cool) | High — leading cause of coop and home fires |
| Power draw | Low (typically tens of watts) | High (often 250 W) |
| Day/night cycle | Natural — gives no light | Disrupts sleep if red/white light runs 24/7 |
| Cold-climate ceiling | Struggles in very cold rooms | Handles colder ambient better |
| Best for | Most home brooders, indoor spaces | Large batches, cold outbuildings (with care) |
Feeding Chicks: Match the Feed to the Age
Chick nutrition is simpler than the feed aisle makes it look, but the protein levels matter and they change as the bird grows. For the first weeks chicks need a high-protein starter feed, then a slightly lower-protein grower as they approach point of lay, and only when they are actually laying do they move to a calcium-rich layer feed. Putting a young pullet on layer feed too early is a genuine mistake: the calcium load is hard on developing kidneys, and they simply do not need it until the egg-making machinery switches on. The exact protein percentages and the transition timing — when to switch from starter to grower to layer — are all in the chick feed stages guide, because the order matters more than any single number.
Two practical points the bags don’t shout about. First, decide early between medicated and unmedicated starter — medicated starter contains a coccidiostat that helps young chicks build resistance to coccidiosis, which is one of the most common chick killers; it is a management choice tied to whether your chicks were vaccinated, and it is worth understanding before you buy. Second, chicks on anything other than a complete crumble need grit to grind it, but they do not need oyster shell or supplemental calcium as chicks — that comes with the layer transition. Keep feed and water available free-choice, keep both clean, and resist the urge to throw treats and scraps at week-old chicks; their digestive systems are not ready for a varied diet yet.
Water deserves a word of its own. Chicks will foul a waterer constantly, walk in it, and kick shavings into it. Use a narrow-lipped chick fount or a horizontal-nipple setup raised slightly off the floor as they grow, and refresh it at least daily. A chilled, soaked chick is a chick at risk, so I keep the water at room temperature, never cold from the tap. Dehydration in the first 48 hours — especially in shipped chicks — is a real risk, and gently dipping each new chick’s beak in the water when you set them in the brooder teaches them where it is.
The First 48 Hours and the First Week
The first two days set the tone. Have the brooder fully up to temperature before the chicks go in — never put cold chicks into a cold box and hope it warms up. Settle them, show each one the water, and then leave them be. Resist the temptation to handle them constantly; they are not toys and stress is a real cost at this age. Over the first week you are watching for three things: are they eating and drinking, are they active and alert, and are their vents clean.
That last one — pasty butt, where droppings cake over the vent and can block it — is the classic first-week problem and it can be fatal if missed. It is usually caused by chilling or stress, and the fix is gentle: soften and wipe the vent clear with a warm damp cloth, then address the underlying temperature. It is normal, it is manageable, and it is one of the half-dozen common chick problems covered in the dedicated guide — see common chick problems and how to fix them for the full troubleshooting reference. The broader principle holds across all of them: a chick problem is almost always an environment problem first. Fix the brooder and most issues resolve.
Sexing, or Why You Might End Up With Roosters
If you bought “straight run” chicks, roughly half will be cockerels — that is what straight run means, unsexed as hatched. “Sexed pullets” or “pullet chicks” are sorted at the hatchery to be female, but even professional sexing is not 100% accurate, so the occasional surprise rooster turns up. Some breeds are sex-linked or auto-sexing, meaning you can tell males from females by colour or down pattern at hatch, which is the most reliable home method by far. Vent sexing, the technique hatcheries use, is genuinely hard and not something I would tell a beginner to attempt. Knowing what you actually bought, and when you can tell, saves a lot of heartbreak when the “hen” starts crowing at sixteen weeks — there is a full guide on the realistic methods — see how to sex chicks for a walkthrough of every method and when each is reliable.

From Brooder to Coop: Growing Out and Integrating
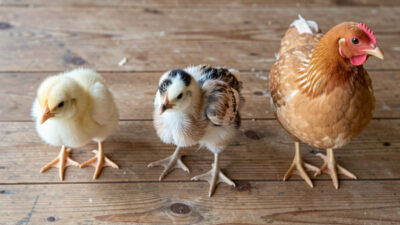
Somewhere around weeks five to six, when the chicks are fully feathered and the brooder temperature has dropped to match the room, they are ready to move to unheated housing — earlier in summer, later if your nights are still cold. Feathering, not age, is the real signal: a fully feathered bird can hold its own heat. This is the point where chicks become pullets (young females not yet laying) and the management shifts from brooder-keeping to growing them out toward point of lay, which lands somewhere around 18–22 weeks for most laying breeds.
If you already have an adult flock, you do not just open the brooder and tip the youngsters in. Chickens enforce a strict pecking order and a sudden introduction can get young birds badly injured or killed. The proven approach is gradual: house the pullets where the flock can see them but not reach them — the “see but don’t touch” setup, often a hardware-cloth-divided section of the run — for a week or two, then allow short supervised mixings, ideally on neutral ground and with enough space and multiple feeders so a bullied bird can escape and eat. Integration is its own skill, and rushing it is the most common way keepers lose a young bird to the existing flock. The dedicated integration guide walks the whole timeline — see integrating chicks into the flock for the step-by-step process.
This is also where the rest of the coop has to be ready for them. Roost space, nesting boxes they will grow into, predator-proof hardware cloth on every opening, and ventilation that dumps moisture without drafting the birds — these are the systems the grown-out pullets are graduating into, and they need to be sorted before the move, not after. A grown flock also wants reliable feed and water delivery, so this is the point to think about automatic feeders and rodent-proof storage rather than the open chick fount you started with.
A Realistic Week-by-Week Timeline
It helps to know what “normal” looks like at each stage so you can spot when something is off. The numbers below are typical for standard laying breeds; bantams and some heavy breeds run a little different, and your mileage varies with feed, warmth, and genetics. The point is the shape of the curve, not hitting any single date.
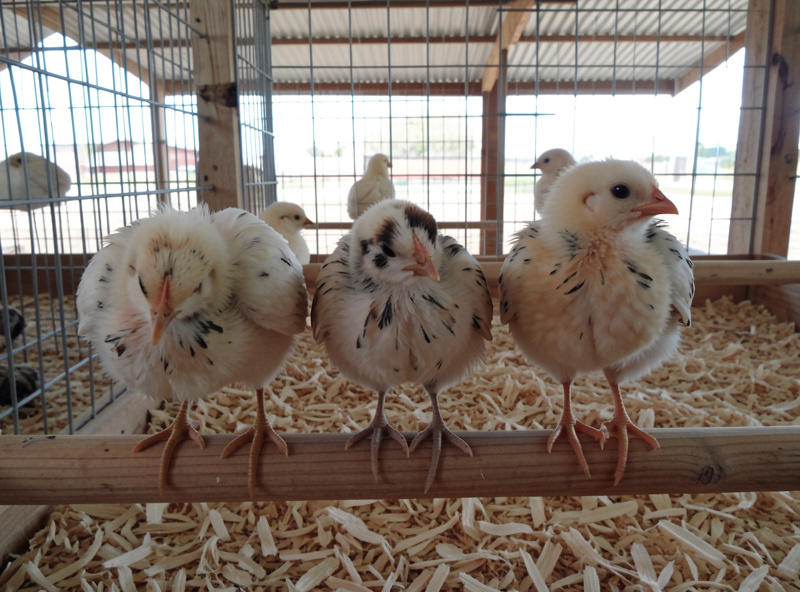
Week 1: Pure fluff, sleeping in heaps, eating and drinking constantly. Warm zone around 95 °F. Watch for pasty butt daily. They look impossibly fragile and mostly are — this is the highest-risk week. Weeks 2–3: Wing and tail feathers start pushing through the down, and the personalities arrive. They begin short flights, test-perch on anything, and the brooder suddenly looks small. Drop the heat a notch each week. Weeks 4–6: Mostly feathered, awkward “teenage” stage, voraciously hungry. Heat steps down to room temperature and comes off entirely once they are fully feathered. This is the brooder-to-coop transition window.
Weeks 6–16: Now they are pullets, growing out on grower feed in unheated housing. Combs and wattles redden slowly, the size gap between cockerels and pullets becomes obvious, and any miss-sexed roosters start to crow and show saddle feathers. Weeks 16–22: Point of lay for most laying breeds. Combs deepen red, the birds start investigating nesting boxes and doing the submissive “squat,” and the switch to layer feed happens as the first eggs appear. The fluffball is now a hen. That full arc — and the breed-by-breed variation in it — gets its own growth-timeline guide below.
What You Actually Need Before the Chicks Arrive
The supply list is short and most of it is cheap. You need a brooder enclosure, a heat source (plate or lamp), a chick-safe waterer, a chick feeder, large-flake pine shavings, a thermometer, and a bag of starter feed. That is genuinely it for the first weeks. Everything else — roost bars, a grow-out pen, the integration panel — comes later as the birds grow into it. The mistake first-timers make is over-buying gadgets and under-buying space; the single best upgrade is always a bigger brooder, not a fancier one.
Have it all set up and the brooder at temperature a full day before pickup or delivery, so you are not scrambling with cold chicks in hand. If you are ordering shipped chicks, have electrolyte-and-vitamin powder for the water ready too — shipped chicks arrive dehydrated and stressed, and the first 48 hours are when you lose the weak ones if the basics aren’t dialed in. Once the brooder routine is running, it takes maybe ten minutes a day: refresh water, top up feed, scan every bird for alert posture and a clean vent, and adjust the heat as they grow.
Where Chicks Fit in the Whole Coop System
I treat the brooder as the first stage of a pipeline that ends with a laying hen in a predator-proofed, automated coop. The chicks I raise this spring are the birds that will be cycling through the automatic pop door next winter, sheltering behind hardware cloth rather than chicken wire, and roosting in a coop sized with the honest square-footage math. Thinking about the destination while they are still in the brooder is what keeps the whole thing coherent — you are not raising chicks, you are raising next year’s flock.
That long view is also why breed choice matters before the chicks ever arrive. If you keep birds in a cold climate, the cold-hardy breeds are the ones worth brooding; if you want reliable eggs, start from the best laying breeds; and if the flock shares space with kids, the friendliest temperaments are worth weighting toward; and the full breed comparison is worth reading before you commit to a hatchery order. The brooder is the cheap, easy stage to get the genetics right for everything that follows.
What the Chicks Become
The reason all of this care matters is what comes out the other end. A well-brooded, properly grown-out pullet becomes a healthy laying hen, and that is when the rest of the system earns its keep: egg production, winter laying, and a flock that mostly runs itself behind an auto-door on a sunrise schedule. Health, too, traces back to these early weeks — the biosecurity habits you build with a new brood and a clean first-aid setup are easier to start now than to retrofit onto a stressed adult flock. And good husbandry from day one is the best defense against the diseases that hit weak, crowded, chilled birds hardest — coccidiosis, the chick killer mentioned above, is covered in depth in the coccidiosis guide, which is exactly why medicated starter is a real decision and not a default.
None of this is hard. It is just specific, and the specifics are knowable. Build a warm boring box, match the feed to the age, read the birds instead of the chart, and grow them out into a coop that is ready for them. Do that and you will graduate a brooder of fluffballs into a laying flock with the loss of very few — which, after years of doing exactly this through Nordic winters, is the only metric I really care about.
Frequently Asked Questions
How long do baby chicks need a heat source?
Most chicks need supplemental heat for about five to six weeks, until they are fully feathered and the brooder temperature has been stepped down to match room temperature. Feathering is the real signal, not a calendar date — a fully feathered bird can hold its own body heat. In a warm summer room they may be ready a little sooner; in a cold space, a little later.
What temperature should a chick brooder be?
Aim for roughly 95 °F (35 °C) in the warm zone under the heat source in week one, then drop it about 5 °F (3 °C) each week until you reach room temperature around weeks five to six. Crucially, only heat one end of the brooder so chicks can move to a cooler zone, and read the birds: evenly spread and active means the temperature is right.
What do you feed baby chicks?
Start with a high-protein chick starter feed for the first weeks, move to a grower feed as they approach point of lay, and switch to a calcium-rich layer feed only once they are actually laying. Keep feed and clean water available free-choice. Avoid layer feed for young pullets — the calcium is hard on developing birds that aren’t yet laying.
When can baby chicks go outside?
Chicks can move to unheated outdoor housing once they are fully feathered and the brooder heat has been stepped down to match ambient temperature, typically around five to six weeks. They can have short, supervised, warm-weather outings sooner, but they should not live outside until they can hold their own body heat without supplemental warmth.
Can I raise baby chicks with my existing flock?
Not directly, and not right away. Adult chickens enforce a strict pecking order and will often attack young introduced birds. Raise the chicks separately, then integrate gradually using a see-but-don’t-touch setup where the flocks share sightlines but not floor space for a week or two, followed by short supervised mixings with plenty of space and multiple feeders.
How many chicks should a beginner start with?
Three to six is a sensible first brood for most backyard keepers — enough that they keep each other warm and social, few enough to manage easily. Remember that straight-run chicks will be roughly half cockerels, and account for local limits on rooster keeping. Also plan for chicken math: most keepers end up wanting more birds than they first intended.
Related Guides
Chick Growth Timeline: From Day-Old to Point of Lay
A chick goes from a fragile day-old fluffball to a laying hen in roughly five months, passing through four recognizable…
Common Chick Problems: Signs, Prevention, and When to Get Help
Almost every common chick problem is an environment problem first — chilling, damp bedding, crowding, or dehydration — which is…
Integrating Chicks Into the Flock Without Bloodshed
You never just tip young birds into an established flock — chickens enforce a strict pecking order and a sudden…