A chick brooder is just a draft-free box that reliably holds heat, dry bedding, food, and water for the first four to six weeks of a chick’s life. That is the whole job. After years of brooding cold-climate batches in a Swedish utility room — sometimes with a −18 °C night pressing on the other side of the wall — I have learned that the container matters far less than the heat, the floor space, and a few details first-timers always get wrong. This is exactly how I set a brooder up, and why each piece is there.
The temptation is to overthink it and buy a fancy kit. Don’t. The two things that actually decide whether your chicks thrive are space and a working heat gradient, and neither is expensive. Everything below is built around getting those two right and then leaving the chicks alone to grow, which is most of good chick-keeping.
As an Amazon Associate I earn from qualifying purchases. The gear links below are husbandry equipment I’d genuinely use; they cost you nothing extra.
Choosing the Container
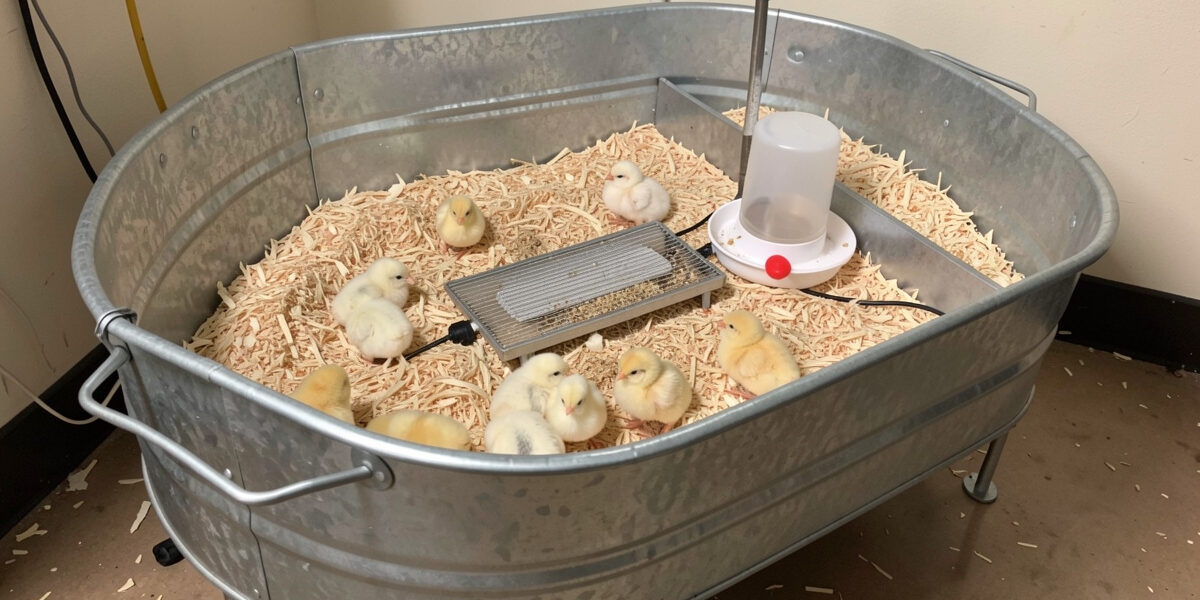
Almost any enclosure works as long as it is draft-free, easy to clean, and tall enough that three-week-old chicks can’t flutter out. I have brooded successfully in a plastic storage tote, a galvanized stock tank, and a purpose-built plywood box. Each has trade-offs, and the right pick depends mostly on how many chicks you are raising and where the brooder lives.
| Container | Pros | Watch out for |
|---|---|---|
| Large plastic tote | Cheap, easy to clean, contains bedding well | Small for more than a few chicks; walls melt near a heat lamp |
| Galvanized stock tank | Roomy, fireproof, tall sides, lasts forever | Heavy, costs more, overkill for 3–4 chicks |
| Purpose-built plywood box | Sized to your space, insulates well in cold rooms | Harder to disinfect; needs a wipeable floor |
| Cardboard brooder ring | Free, expandable, no corners for piling | Single-use, no fire safety near a lamp |
Whatever you use, plan for room to grow. Start with roughly half a square foot per chick and expect to double that by weeks three or four. Crowding is the quiet killer: packed chicks pick at each other, pile in corners, and turn the bedding to a damp crust overnight. The “chicken math” sizing trap that ends with a coop-for-six holding ten birds applies to the brooder too — build bigger than the math says.
The Heat Source: Plate or Lamp
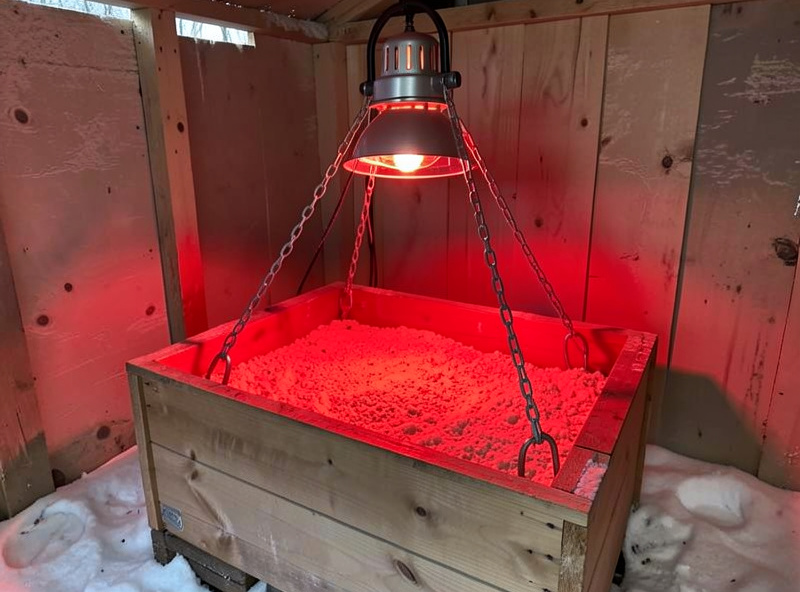
Heat is the part you cannot get wrong, because chilling and overheating are where nearly all brooder losses come from. You have two real options. A radiant heat plate sits on adjustable legs and the chicks duck under it like they would a mother hen — it runs cool to the touch, sips power, and gives off no light so the chicks keep a natural sleep cycle. A 250-watt heat lamp is cheaper and throws heat across a wider zone, but it is the single biggest fire risk in chick-keeping; a lamp that drops into the bedding starts a fire, and every year it burns down someone’s barn or house.
I switched to a radiant brooder heat plate years ago and never looked back — for an indoor brooder it is safer and quieter in every way that matters. If you genuinely need a lamp (a large batch, or a cold outbuilding where a plate can’t keep up), secure it with two independent fasteners, never just the clamp, and hang it well clear of anything flammable.
The non-negotiable rule with either source: heat one end of the brooder, not the whole thing. A chick that is too hot needs a cool zone to escape to, and a chick that is too cold needs a warm one. Then you read the chicks instead of obsessing over the thermometer. Piled tight under the heat means too cold; pressed to the far walls and panting means too hot; spread evenly and busy means it’s right. Keep a simple brooder thermometer in the warm zone as a sanity check — aim for about 95 °F (35 °C) in week one and drop it roughly 5 °F a week — but trust the birds first.
Bedding That Keeps Chicks Dry
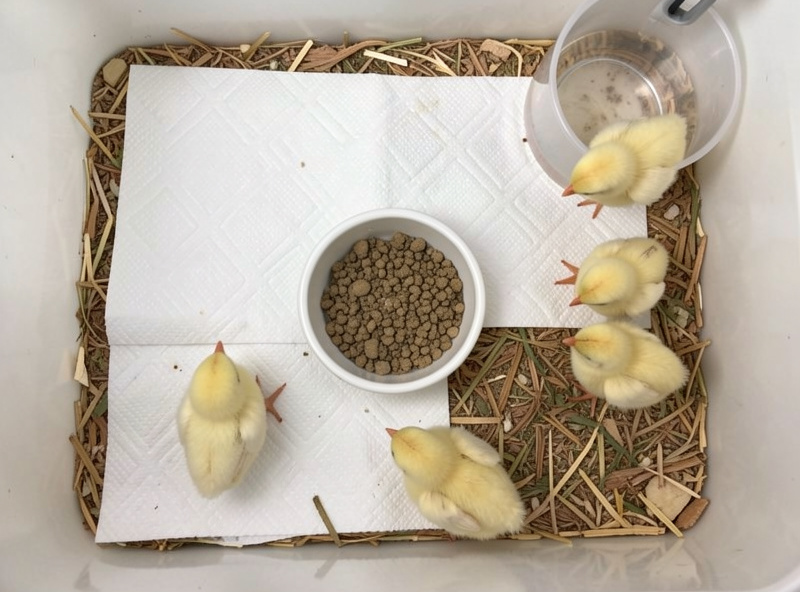
Large-flake pine shavings are my default bedding. They wick moisture, chicks scratch in them happily, and they compost beautifully once the brood graduates. Avoid cedar — its aromatic oils irritate developing respiratory tracts — and avoid anything slick like newspaper for the first week, because a slippery floor causes splayed legs in newly hatched chicks. The standard trick is to lay paper towel over the shavings for the first two or three days so chicks learn that crumble is food and shavings are not, then pull the towel once they have the idea.
Spot-clean daily and do a full bedding change whenever it smells or feels damp. Wet litter is the root of half the problems people blame on bad luck: chilled chicks, pasty butt, and the ammonia that irritates their airways all trace back to bedding that was allowed to stay wet. Dry beats deep — a thinner layer you change often is better than a thick layer you leave.
Feed and Water Without the Mess
Set up feed and water before the chicks go in, and use vessels designed for chicks. A narrow-lipped chick feeder and waterer set stops them from walking through the water and tipping the feed. Chicks foul water relentlessly, so refresh it at least daily and keep it at room temperature, never cold from the tap — a soaked, chilled chick is a chick at risk. As they grow, raise both vessels slightly off the floor to cut down on bedding kicked inside.
For feed, start with a high-protein chick starter and keep it available free-choice. Match the feed to the bird’s age as it grows — starter, then grower, then layer only once they actually lay — which is a sequence worth getting right and one I cover separately. Resist throwing treats and scraps at week-old chicks; their digestive systems aren’t ready for variety yet, and a complete crumble is all they need.
Getting the Brooder Ready Before Pickup
Have the whole thing assembled and up to temperature a full day before the chicks arrive. Never put cold chicks into a cold box and hope it warms up in time — that first chill is exactly what you’re trying to avoid. When the chicks go in, gently dip each one’s beak in the water so it learns where to drink, then settle them and leave them be. Over the first week, watch three things: are they eating and drinking, are they active and alert, and are their vents clean. Get the box right and the chicks mostly raise themselves.
Once the brooder routine is running it takes about ten minutes a day. That calm, boring reliability is the goal — a brooder should be the least dramatic part of keeping chickens. From here the next decisions are the heat-source deep dive, the feed-stage sequence, and eventually moving feathered birds out to the coop. The full arc lives in the complete chick and pullet care guide.
Frequently Asked Questions
How big should a chick brooder be?
Start with roughly half a square foot of floor space per chick and plan to double that by weeks three or four, because chicks grow fast and crowding causes pecking, piling, and damp bedding. It is almost impossible to make a brooder too big, but very easy to make one too small.
Do I need a heat lamp or a heat plate for chicks?
Either works, but a radiant heat plate is safer for most home brooders: it stays cool to the touch, uses far less power, and gives no light so chicks keep a natural sleep cycle. Heat lamps throw more heat over a bigger area but are the leading cause of coop and home fires, so if you use one, secure it with two independent fasteners.
What bedding is best for a chick brooder?
Large-flake pine shavings are the best all-round choice — absorbent, low-dust, and easy to compost later. Avoid cedar shavings, whose oils irritate chick airways, and avoid slick surfaces like bare newspaper in the first week because they cause splayed legs. Keep the bedding dry and spot-clean daily.
What temperature should a brooder be in week one?
Aim for about 95 °F (35 °C) in the warm zone under the heat source for the first week, then lower it by roughly 5 °F each week until it matches room temperature. Only heat one end so chicks can move to a cooler area, and read their behavior: evenly spread and active means the temperature is right.
Can I keep a brooder in the house?
Yes, and many keepers do for the first weeks — a spare room, bathroom, or utility room works well. A radiant heat plate is the better heat source indoors because it is far safer than a lamp and produces no light at night. Expect some dust as the chicks feather, so a room you can clean easily is ideal.
Related Reading
- Raising Baby Chicks: The Complete Chick and Pullet Care Guide — the full arc from day-old to point of lay.
- Best Chicken Coop Bedding: Complete Material Guide — bedding choices for the grown flock.
- Chicken Coop Size Guide — sizing the coop your brooded chicks will graduate into.
Related Guides
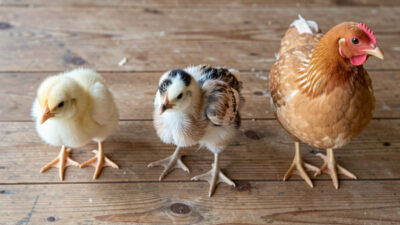
Chick Growth Timeline: From Day-Old to Point of Lay
A chick goes from a fragile day-old fluffball to a laying hen in roughly five months, passing through four recognizable…
Common Chick Problems: Signs, Prevention, and When to Get Help
Almost every common chick problem is an environment problem first — chilling, damp bedding, crowding, or dehydration — which is…
Integrating Chicks Into the Flock Without Bloodshed
You never just tip young birds into an established flock — chickens enforce a strict pecking order and a sudden…