Coop ventilation is the single system I design first, because it is the one that quietly kills birds when you get it wrong. A useful starting target is roughly 1 square foot of permanent vent opening for every 10 square feet of floor, sited high so warm, moist air leaves without ever blowing across the roost.
That number is a floor, not a ceiling. In the insulated walk-in coop I run through Swedish winters, the birds shrug off -20 °C nights and never frostbite — not because the box is warm, but because it is dry. Moisture, not cold, is what turns a comb black. This guide is the whole climate system the way I actually build it: how much air to move, where to move it, how to tell ventilation from a draft, and how I wire the whole thing into Home Assistant so it runs without me standing in the run at 5 a.m.
Why ventilation is the first thing I design, not the last
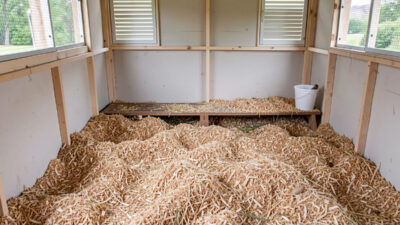
Most coop plans treat ventilation as a couple of afterthought holes drilled near the roof. I build it the other way around: the airflow path comes first, then the roost, nest boxes, and insulation get arranged to respect it. A flock of chickens is a wet, warm, ammonia-producing engine running 24 hours a day. Six hens exhale and excrete several litres of water vapour every night. If that moisture cannot leave, it condenses on the coldest surface in the box — usually the underside of the roof, then drips back onto the birds. That is the mechanism behind winter frostbite and most “mystery” respiratory flare-ups. Get the air path right and half the husbandry problems keepers chase all winter simply never start. Everything downstream depends on it, which is why I refuse to bolt it on at the end.
How much ventilation a coop actually needs
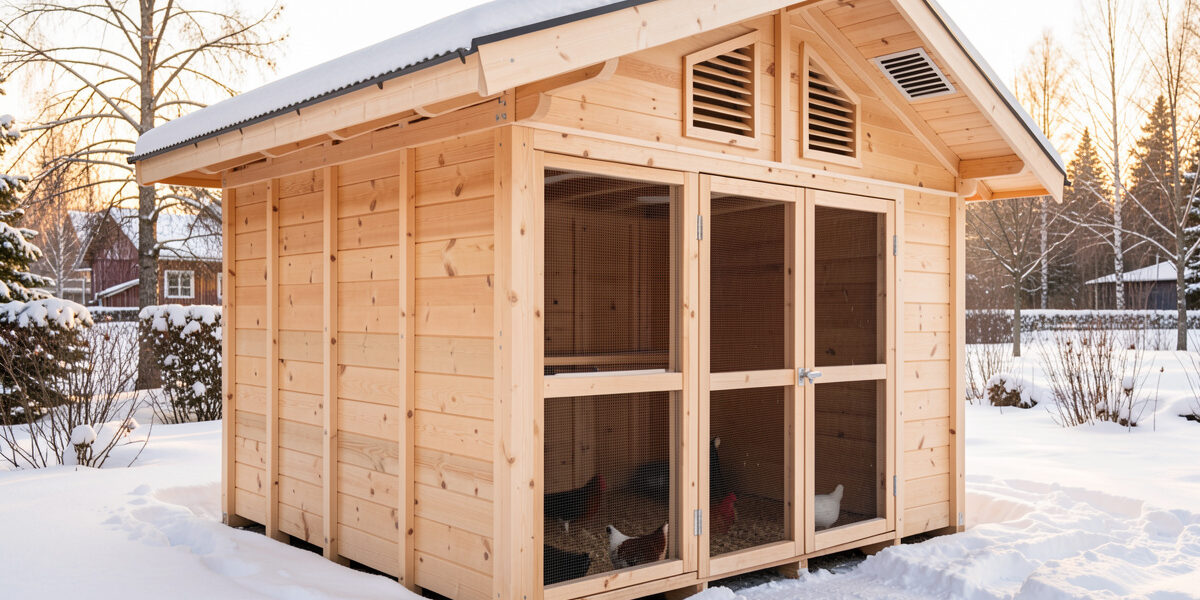
The working rule I size from is 1 square foot of open vent per 10 square feet of floor area, increased for humid or crowded coops. A 4-by-8 walk-in (32 sq ft) wants at least 3.2 sq ft of permanent, never-closed venting — and in a damp climate I push that closer to 4. That sounds like a lot until you remember it is spread high around the eaves where it never drafts a roosting bird. The other half of the math is stocking density: at the standard 4 square feet of floor per bird, a coop built “for six” that quietly fills to ten (chicken math is real) has lost a third of its air budget per bird. When I add birds, I add vent area. Under-ventilation is invisible right up until the morning you find frost on the inside of the roof. The priority order is not mine alone — Cooperative Extension poultry housing resources size coop ventilation around moisture and ammonia removal first, with holding temperature a distant second, which is exactly why the vent area runs higher than newcomers expect.
The four jobs coop ventilation does
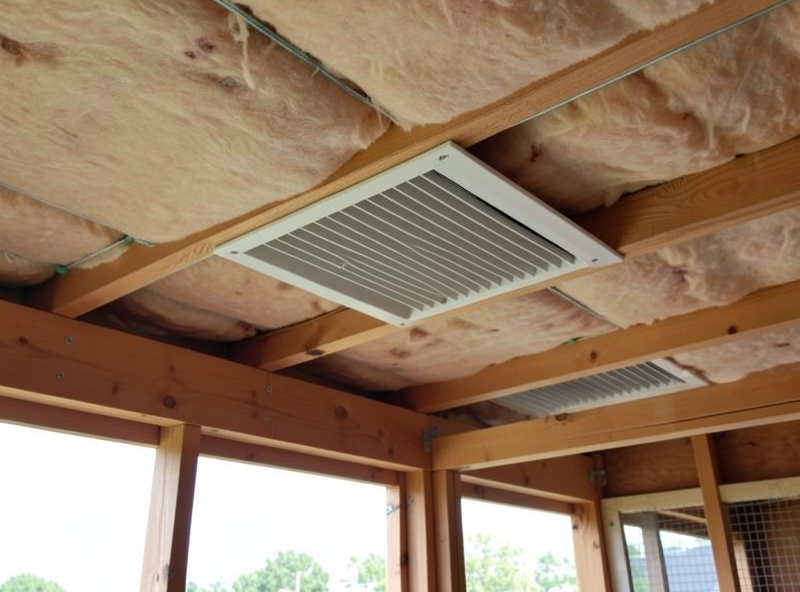
Ventilation is not one task, it is four, and a vent that solves one can worsen another if it is in the wrong place. First, it dumps moisture — the night’s exhaled and excreted water vapour that otherwise condenses and frostbites combs. Second, it clears ammonia rising off the litter, which damages the respiratory tract long before you can smell it. Third, in summer it sheds heat, the more dangerous direction for chickens, who cope with cold far better than with a 35 °C afternoon. Fourth, it supplies plain fresh oxygen to a tightly packed box. The reason high, passive venting works for all four is that warm, moist, ammonia-laden air is buoyant — it rises and leaves on its own if you give it an exit at the top.
Ventilation methods compared
There is no single best vent. I run a passive ridge-and-soffit system as the backbone and add powered exhaust only where summer heat or a closed-up winter coop needs help. Here is how the common approaches actually trade off across the coops I have built and retrofitted.
| Method | How it moves air | Best for | Watch out for |
|---|---|---|---|
| Ridge + soffit (passive) | Buoyancy: warm air exits the ridge, fresh air enters low soffits | Year-round backbone, cold climates | Needs correct sizing; useless if blocked by insulation |
| Gable / eave vents | Cross-breeze high on opposing walls | Adding capacity to an existing coop | Can draft the roost if set too low |
| Operable windows | Manual cross-flow, fully adjustable | Summer day cooling | Easy to forget; never the only night vent |
| Powered exhaust fan | Forces stale air out, pulls fresh in | Summer heat, humid or crowded coops | Needs power and a thermostat or it just runs |
| Hardware-cloth vent panels | Permanent open area, predator-secure | Always-open winter venting | Use ½-inch mesh, never chicken wire |
Ventilation versus draft: the line that saves combs
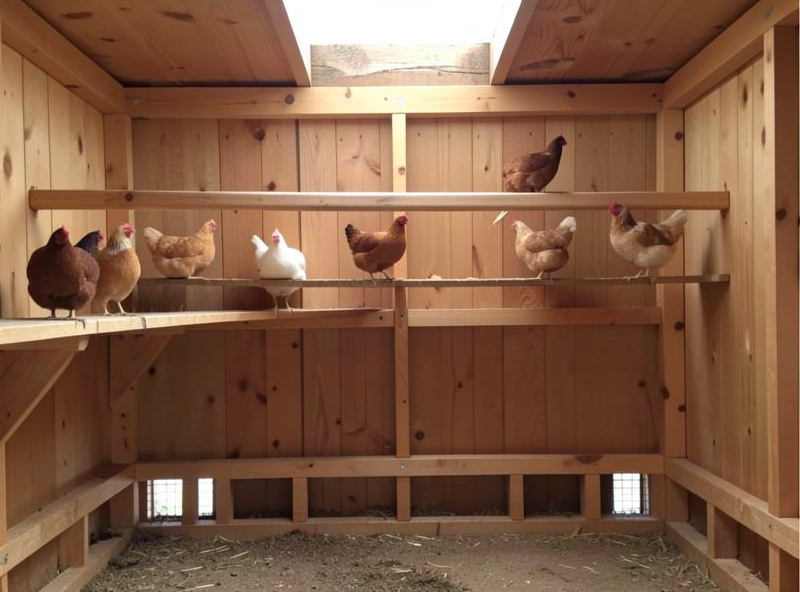
This is the distinction that separates keepers who lose birds to frostbite from those who do not. Ventilation is air moving above the birds; a draft is air moving across them. A roosting hen tucks her head and fluffs to trap a warm air layer against her skin — a draft strips that layer and chills her directly, while doing nothing to remove the moisture pooling at the ridge. So I site every cold-weather vent high, above roost height, and keep the roost out of any direct line between an intake and an outlet. You want the box to “breathe” at the top while staying still at perch level. I cover exactly how I test for this — incense smoke, a cheap anemometer, watching whether the birds shift roost ends — in the ventilation versus draft guide.
Vent placement: high exhaust, low intake
Placement matters more than total area. The pattern that works is high exhaust, low intake: outlets at the ridge or top of the gable where buoyant warm air collects, intakes down at the soffit line where cool fresh air can enter without crossing the roost. Get this backwards — big openings only down low, or vents level with the perch — and you either trap moisture at the top or draft the flock all night. On my coop the soffit intakes run the full length under both eaves and the ridge vent caps the peak, so the whole box flushes itself on buoyancy alone. Nesting boxes go on the cool, low intake side; the roost sits high and central, in the still zone. The full layout, with measurements and the mistakes I made first, is in the vent placement guide.
Climate control across the seasons
The same coop has two opposite jobs depending on the month. In winter the goal is to keep the box dry while holding the birds’ own body heat — that means maximum passive moisture removal up high and zero drafts down low, paired with a heated waterer so it does not freeze solid by 7 a.m. In summer the goal flips to shedding heat as fast as possible, because heat stress kills chickens far quicker than cold does. Cold-hardy, small-comb breeds make the winter half easy; I cover them in the cold-hardy breeds guide. For the warm half, fans, shade, and cool water do the work — the full summer playbook is in cooling a chicken coop in summer, and a deeper look at heat sources for the cold months sits in the winter heating guide.
Ammonia and humidity: monitor, do not guess
If you can smell ammonia in the coop, it is already well past the level that is irritating your birds’ airways — humans notice it around 20-25 ppm, and damage to the respiratory lining begins below the threshold most people register. Penn State Extension poultry resources put the same emphasis on keeping litter dry and air moving to hold ammonia down, since the gas forms wherever wet droppings break down. The two numbers I watch are relative humidity (I aim to keep the coop within about 10 points of outside, comfortably in the 50-70% band) and litter condition. A cheap hygrometer in the coop turns “it feels damp” into a number you can act on. As an Amazon Associate I earn from qualifying purchases. I keep a simple coop hygrometer and thermometer on the wall and a sensor feeding Home Assistant. The deep dive on deep-litter management, airflow, and what actually drives the numbers is in controlling coop ammonia and humidity, and the respiratory side is covered in chicken respiratory illness — diagnosis there belongs to an avian vet, not a blog.
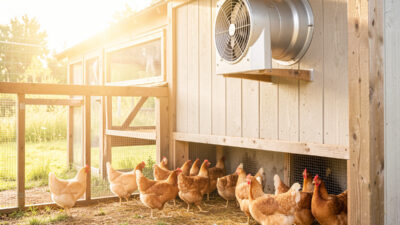
Powering airflow when passive is not enough
Passive venting handles winter and mild summers on its own. When a humid afternoon or a closed-up, crowded coop overwhelms buoyancy, a powered exhaust fan is the fix — but only on a thermostat or it just drones away wasting power and creating the very draft you avoided. I size fans to the coop volume and trigger them on a temperature threshold. The trade-offs between small solar units, low-voltage PoE-style fans, and proper exhaust fans — plus how I mount them so a raccoon cannot reach through — are laid out in the best fan for a chicken coop in summer. Whatever fan you fit, the vent opening it pulls through still needs ½-inch hardware cloth behind it; never trade ventilation for a predator gap, a point I hammer in the hardware cloth guide and the predator-proofing guide.

Wiring climate into Home Assistant
This is where the smart coop earns its name. A vent is dumb; a vent plus a sensor plus a rule is a climate system. In my setup a temperature/humidity sensor in the coop feeds Home Assistant, which flips the exhaust fan on above a set threshold and pushes me a notification, while a separate freeze-watch automation keeps the heated waterer from icing over. The auto-door runs on a sunrise/sunset offset on the same logic — not a dumb timer — so the pop door opens to the actual day length, the same brain that schedules the smart coop door. The monitoring stack, cameras included, is in smart coop monitoring and the alert thresholds I use are in coop temperature alerts. Automation does not replace good passive design — it backstops it.
Retrofitting ventilation into an existing coop
You rarely start from a blank sheet. Most keepers inherit a prefab box with two stamped vents the size of a paperback and wonder why it sweats. Retrofitting is straightforward: cut new high openings near the ridge, add low soffit intakes, and back every cut with ½-inch hardware cloth screwed (never stapled) over the gap. A jigsaw and an afternoon usually triples a cheap coop’s air budget. The materials matter — thin metal coops bake in summer and condense in winter, which is why I cover them in the metal coop guide and the broader coop materials comparison. If you are building fresh, design the airflow in from the start using the build-from-scratch guide or the walk-in plans, and for off-grid sites size the power around the fan and waterer with the off-grid setup guide and the complete smart coop build.
The ventilation mistakes I see most often
Four errors account for nearly every sweating, frostbitten, or wheezy coop I get asked to diagnose. The first is closing all the vents in winter to “keep the birds warm” — that traps the exact moisture that frostbites them, the opposite of the intended effect. The second is venting only at floor level, which drafts the roost while leaving warm wet air pooled at the ceiling. The third is covering openings with chicken wire instead of ½-inch hardware cloth, trading a real predator barrier for an imagined one; a weasel walks through chicken wire. The fourth is sizing vents for the coop you built rather than the flock you now have, after chicken math doubled it. Fix those four and you have fixed most of what goes wrong. None of them cost much — they are design errors, not budget ones, which is why I would rather plan the air path once than chase symptoms every season.
Roost, litter, and ventilation are one system
You cannot tune ventilation in isolation, because the roost height, the litter, and the airflow all feed each other. A deep-litter floor managed well composts in place and stays dry, which keeps both ammonia and humidity down before the vents ever have to work; a wet, packed litter floods the air with both no matter how good the venting. The roost has to sit in the still zone above the intakes but below the exhaust, so the birds rest in calm air while the moisture they throw off rises past them and leaves. Get the roost too high and you push the birds into the draft band near the outlets; too low and they sit in the cold intake stream. I treat the three together: dry deep litter as the first line, a roost placed in the dead-air pocket, and high passive venting carrying the rest away. The bedding choices that make deep litter actually work are in the coop bedding guide.
Balancing intake against exhaust
Total vent area is only half the picture; the balance between intake and exhaust decides whether the box actually flushes. A coop with a generous ridge outlet but starved low intakes cannot pull fresh air in fast enough, so the stack effect stalls and the warm air just sits there. I aim for intake area at least equal to exhaust area — if anything, slightly more intake low down than outlet up high, which keeps the flow moving and prevents the coop from going slightly negative and sucking damp air back down through the ridge. On my walk-in the continuous soffit gap under both eaves comfortably out-areas the ridge vent, and the result is a coop that clears its own moisture overnight with no fan running at all. If you only remember one number past the 1-in-10 rule, make it this: do not build a chimney without a matching air inlet, or you have built a vent that does nothing.
How I check the coop is breathing the way I think it is
Design intent and reality drift apart, so I verify. The cheapest test is a stick of incense held at roost height on a still, cold morning: the smoke should drift gently upward and out, not whip sideways across the perch (draft) and not hang motionless (dead air). A few dollars of hygrometer confirms the humidity is tracking near outside rather than climbing. And the most honest test is the roof itself — run a hand along the inside of the ridge after a cold night; bone dry means the air path is working, beads of condensation mean it is not, full stop. I do this seasonal walk-through every autumn before the cold sets in, because a vent that worked last winter can be quietly blocked by a summer’s worth of dust, a new bag of insulation, or a nest box someone moved. Ventilation is not a build-once item; it is a system I re-check the way I re-check the auto-door and the heated waterer.
If I were setting up ventilation from scratch today
Starting over on a new coop, I would do it in this order and not deviate. First, draw the air path before anything else: a continuous ridge outlet, full-length soffit intakes, and a roost penciled into the still pocket between them. Second, size the openings to the 1-in-10 rule and then add a margin, because I have never once regretted too much high venting and have always regretted too little. Third, back every opening with ½-inch hardware cloth at the build stage, when it is a five-minute job rather than a January retrofit. Fourth, hang a hygrometer the day the birds move in, so the coop is measured from night one rather than guessed at. Only after all of that would I think about a fan or any automation — powered help is a backstop for good passive design, never a substitute for it. Get the holes and the roost right and everything after it is just refinement.
Frequently Asked Questions
How much ventilation does a chicken coop need?
A common starting rule is 1 square foot of permanent vent opening for every 10 square feet of floor area, sited high above the roost. Increase it for humid climates or crowded coops, since under-ventilation causes winter condensation and frostbite.
Can a chicken coop have too much ventilation in winter?
You cannot have too much high, passive ventilation, but you can have too much draft. The goal is air moving above the birds, not across them. Keep all cold-weather vents above roost height so moisture leaves while the roost stays still.
Does a winter coop need to be sealed up tight?
No. Sealing a coop traps moisture, which is what actually causes frostbite, not the cold itself. Cold-hardy birds stay dry and healthy in an open, well-ventilated coop down to well below freezing as long as there is no draft on the roost.
Where should coop vents be placed?
Use high exhaust and low intake. Outlets go at the ridge or top of the gable where warm moist air collects; intakes go low at the soffit line. Keep the roost out of the direct line between intake and outlet so the box breathes without drafting the birds.
Do I need a fan in my chicken coop?
Not in winter or mild weather, where passive ridge and soffit venting is enough. A thermostat-controlled exhaust fan helps in summer heat or in humid, crowded coops where buoyancy alone cannot shed enough heat and moisture.
What humidity should a chicken coop be?
Aim to keep coop humidity within about 10 points of outside and comfortably in the 50 to 70 percent range. If you can smell ammonia, the air is already past the level that irritates the birds’ airways, so a wall hygrometer is worth the few dollars.
Related Guides
Related Guides
Best Fan for a Chicken Coop in Summer
The best fan for a chicken coop in summer is a thermostat-controlled exhaust fan sized to roughly 5 to 8…
Controlling Coop Ammonia and Humidity
Controlling coop ammonia and humidity is mostly about keeping the litter dry and the air moving: ammonia forms when wet…
Chicken Coop Ventilation vs Draft: The Difference That Saves Combs
The difference between ventilation and a draft is direction: ventilation is air moving above your birds, a draft is air…