A walk-in chicken coop built with free blueprints delivers the maintenance-friendly height (6.5+ ft ceiling) most backyard keepers eventually wish their first coop had — and at $700–$1,400 in DIY materials over 30–50 hours of work, it costs roughly 40–60% less than buying a comparable prefab walk-in. The right plan depends on flock size: 6×8 for 8 birds, 8×8 for 10–12 birds, 8×10 for 12–15 birds. This guide covers the three most-popular walk-in blueprint sizes with materials lists, build sequence, and the structural details that distinguish a 25-year coop from a 10-year one.
For overall plan selection, see our DIY chicken coop plans guide. For build sequence basics, see our building a chicken coop step-by-step guide.
Why Walk-In Beats Smaller Coops
Five reasons walk-in height (6.5+ ft) is worth the extra cost and build time:
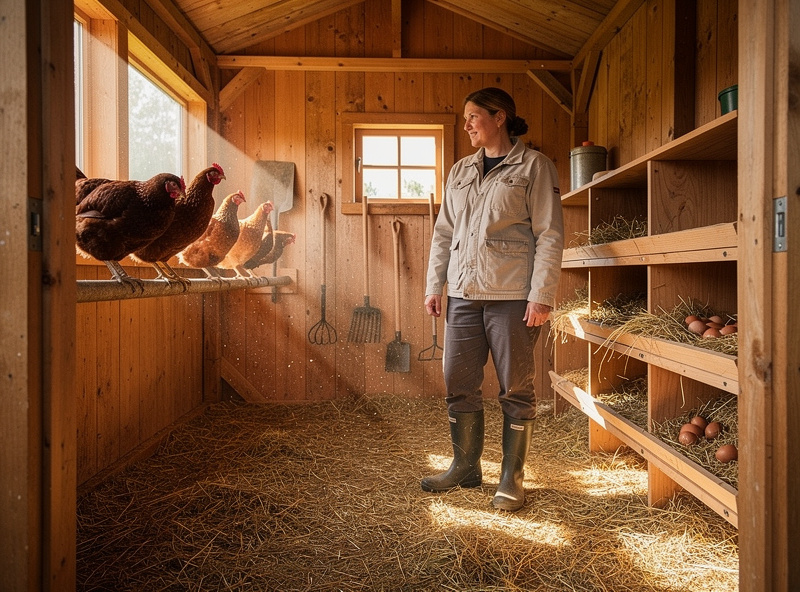
- Daily maintenance is much faster. Crawling through a 4 ft coop on hands and knees turns a 5-minute task into a 20-minute one. Walk-in keeps daily care at 5 minutes.
- Quarterly deep cleans become possible. Standing-height cleaning happens. Crawling-height cleaning gets postponed.
- Catching individual birds for health checks. Easy in walk-in, awkward in low-ceiling coops.
- More vertical storage. Feed bin, supplies, and overflow stuff fits naturally inside.
- Bird behavior improves. Roosting branches at multiple heights match natural chicken behavior; low coops force compressed roost zones.
The trade-off is materials cost (25–40% more than equivalent floor area without walk-in height) and build time (15–25% more for taller walls and roofs). For most backyard keepers serious about chickens, walk-in is the right baseline.
Three Free Walk-In Blueprints
| Blueprint | Floor Area | Capacity | Materials | Build Time |
|---|---|---|---|---|
| 6×8 Walk-In | 48 sq ft | 8 birds | $700–$1,100 | 32–48 hrs |
| 8×8 Walk-In | 64 sq ft | 10–12 birds | $900–$1,400 | 40–60 hrs |
| 8×10 Walk-In | 80 sq ft | 12–15 birds | $1,100–$1,600 | 50–70 hrs |
The 8×8 hits the sweet spot for most readers — comfortable for 10 birds (allowing for flock expansion), uses standard 4×8 lumber dimensions efficiently, and fits in most suburban backyards.
Blueprint 1: 6×8 Walk-In Coop
The smallest practical walk-in size. Two studs deep, three studs wide. Capacity for 8 birds with comfortable spacing.
Materials List
| Component | Quantity | Cost |
|---|---|---|
| Pressure-treated 2x4x8 (floor) | 10 boards | $140–$200 |
| Kiln-dried 2x4x8 (walls) | 30 boards | $210–$300 |
| Kiln-dried 2x4x8 (rafters) | 8 boards | $60–$100 |
| 3/4″ plywood (floor) | 1 sheet 4×8 + 1 sheet 4×4 | $100–$140 |
| 5/8″ T1-11 plywood (walls) | 5 sheets | $280–$420 |
| 5/8″ OSB (roof sheathing) | 2 sheets | $60–$100 |
| Asphalt shingles + felt | 2 bundles + 1 roll | $120–$180 |
| 1/2″ hardware cloth | 40 sq ft | $60–$90 |
| Hinges, latches, screws | — | $120–$160 |
| Concrete blocks (foundation) | 4–6 | $30–$50 |
| Paint (2 gallons) | 2 gal | $60–$100 |
| Total | $1,240–$1,840 |
Realistic 2026 build cost is $700–$1,100 with reasonable lumber pricing — you don’t need every line item at the high end of the range above. The 6×8 walk-in is the most popular first walk-in build.
Blueprint 2: 8×8 Walk-In Coop (Recommended Default)
The “build for life” baseline. 64 sq ft inside, 10–12 birds capacity, full automation zone, room for storage. Uses 4×8 lumber dimensions efficiently.
Key Specifications
- Floor: 8×8 ft on pressure-treated 2×4 framing
- Walls: 6.5 ft tall at peak, 5.5 ft at eaves (gable roof)
- Door: 3 ft wide × 6 ft tall human door, plus separate pop door for chickens
- Windows: Two 18×24″ windows (cross-ventilation)
- Vents: Gable vents at both ends
- Roof: Standard gable, 4:12 pitch (or 6:12+ in snow regions)
- Nesting boxes: 4 boxes (12x12x14″), external access
- Roost bar: 6 ft of 2×4 mounted at 24″ off the floor
Materials Cost
$900–$1,400 in 2026 lumber pricing. The 8×8 takes 40–60 hours over 4–5 weekends for first-time builders, 30–40 hours for experienced builders.
This blueprint is the realistic “I want a coop that lasts 25 years” choice for most backyard keepers. It accommodates flock expansion to 10–12 birds without modification — which matters more than most first-time builders think. My own coop started out sized for a smaller flock than what it holds now; chicken math is undefeated, and building one size larger than your current plan calls for saves you a second build in year two.
Blueprint 3: 8×10 Walk-In Coop (Larger Flocks)
For flocks of 12–15 birds. 80 sq ft inside, more room for nesting boxes and an automation zone.
Key Specifications
- Floor: 8×10 ft on pressure-treated framing
- Walls: 6.5 ft at peak, 5.5 ft at eaves
- Door: 3 ft wide × 6 ft tall human door
- Windows: Three 18×24″ windows for cross-ventilation
- Roof: Gable or salt-box style, 4:12+ pitch
- Nesting boxes: 5 boxes with external access
- Roost bar: 8 ft of 2×4
- Optional storage shelves above one roost area
Cost: $1,100–$1,600. Time: 50–70 hours over 5–7 weekends. Capacity: 12–15 birds with proper sizing.
Pair this with a 12×16 large run from our large chicken run guide for a complete setup.
Universal Build Sequence for Walk-Ins
The construction order is the same for all three blueprints:
- Site prep + foundation (4–6 hrs). Level ground, set concrete blocks at corners and intermediate points (1 block per 4 ft of perimeter).
- Floor framing (4–6 hrs). Build 2×4 floor frame on the ground, lift onto foundation, sheath with 3/4″ plywood.
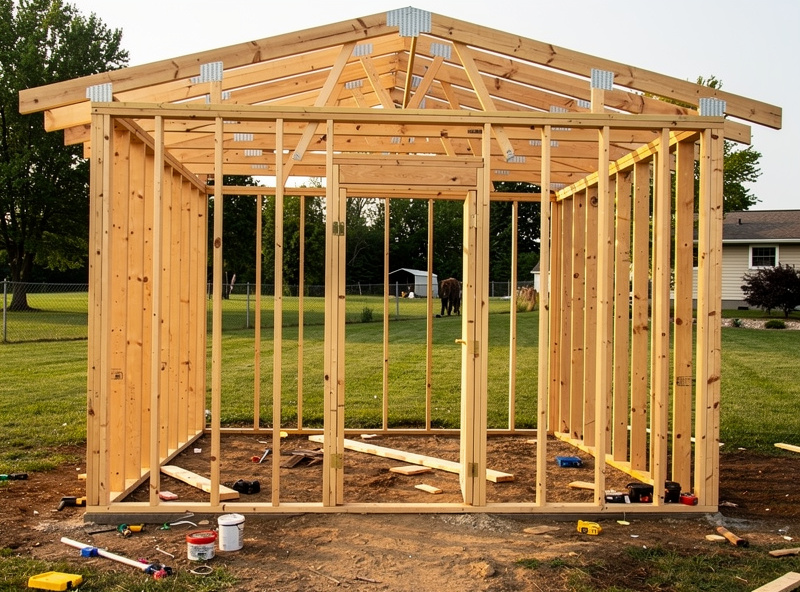
- Wall framing (8–12 hrs). Build all four walls flat, stand them up, screw together at corners.
- Roof framing (6–8 hrs). Set rafters at 16″ or 24″ on center, install collar ties.
- Roof sheathing + roofing (4–6 hrs). OSB sheathing, felt underlayment, asphalt shingles or metal panels.
- Wall sheathing + siding (6–10 hrs). T1-11 plywood on every exterior wall.
- Window and door installation (3–5 hrs). Cut openings, install pre-built windows and doors with proper flashing.
- Predator-proofing (3–5 hrs). Hardware cloth on every opening, buried apron extending 12+ inches outward.
- Interior fit-out (4–6 hrs). Roost bars, nesting boxes (with external access cuts), feeder mounts.
- Exterior finish (3–5 hrs). Paint or stain in two coats, install final hardware.
- Smart-coop wiring (optional, 4–8 hrs). Conduit, AC outlet, 12V distribution. See our smart chicken coop wiring guide.
Total for 8×8: 45–67 hours. Plan toward the high end as a first-time builder.
Foundation Options for Walk-Ins
Walk-in coops weigh 1,500–3,000 lbs and need adequate foundation:
| Foundation Type | Cost (8×8) | Best For |
|---|---|---|
| Concrete blocks at corners + intermediate points | $30–$80 | Permanent location, dry ground |
| Continuous gravel base (4″ deep) | $80–$160 | Moderate drainage, sloped lots |
| Concrete pier blocks at corners | $60–$120 | Frost regions, heavy snow |
| Pressure-treated 4×4 skids | $60–$100 | Need to relocate occasionally |
| Poured concrete slab | $300–$600 | Permanent install, long lifespan |
For most backyards, concrete blocks at corners + intermediate points is the right choice. It supports the structure cheaply, allows airflow under the floor (preventing rot), and keeps the floor 4–6 inches off the ground. Whatever foundation you pick, don’t skip the buried hardware-cloth apron around the perimeter afterward — it’s the upgrade that actually stops the digging predators a raised floor alone won’t.
Roof Style Options
Three common walk-in roof styles:
- Shed roof (single slope). Simplest framing — front wall is taller than back, rafters span between. Cost: $80–$140 for an 8×8. Time: 4–6 hours framing.
- Gable roof (standard pitched). Two slopes meeting at a peak. More aesthetic, slightly more complex framing. Cost: $120–$200. Time: 6–8 hours.
- Gambrel roof (barn-style). Curved or two-pitch profile that maximizes interior height. Cost: $180–$300. Time: 10–14 hours.
For most readers, a standard gable roof at 4:12 to 6:12 pitch hits the right balance of cost, weatherproofing, and aesthetics.
Walk-In Specific Mistakes
- Walls too thin for the height. 8 ft walls without proper bracing rack and lean. Use diagonal corner braces and proper wall sheathing.
- Ridge beam undersized. Long ridge beams (8+ ft) need either a structural ridge beam or collar ties. Skip either and you’re looking at roof sag within a handful of years, not decades — I’ve seen it show up as an early, avoidable failure on coops that were otherwise solid.
- Wall studs at 24″ OC instead of 16″ OC. 24″ works for short walls but creates flex on 6+ ft walls. 16″ OC for any wall over 6 ft tall.
- Forgetting collar ties. Triangular roof framing without collar ties spreads outward over time, pushing walls outward. Always include collar ties on gable roofs over 6 ft span.
- Door undersized. A 30-inch door is too narrow for moving in feed, supplies, or new birds. Use a 36-inch wide door minimum.
- No interior light. Walk-in coops are dim inside. Plan for at least one window per long wall, and consider a small LED light for cleaning.
- Insulation done wrong. Vapor barrier on the wrong side or no vapor barrier at all causes condensation problems. Read up before insulating.
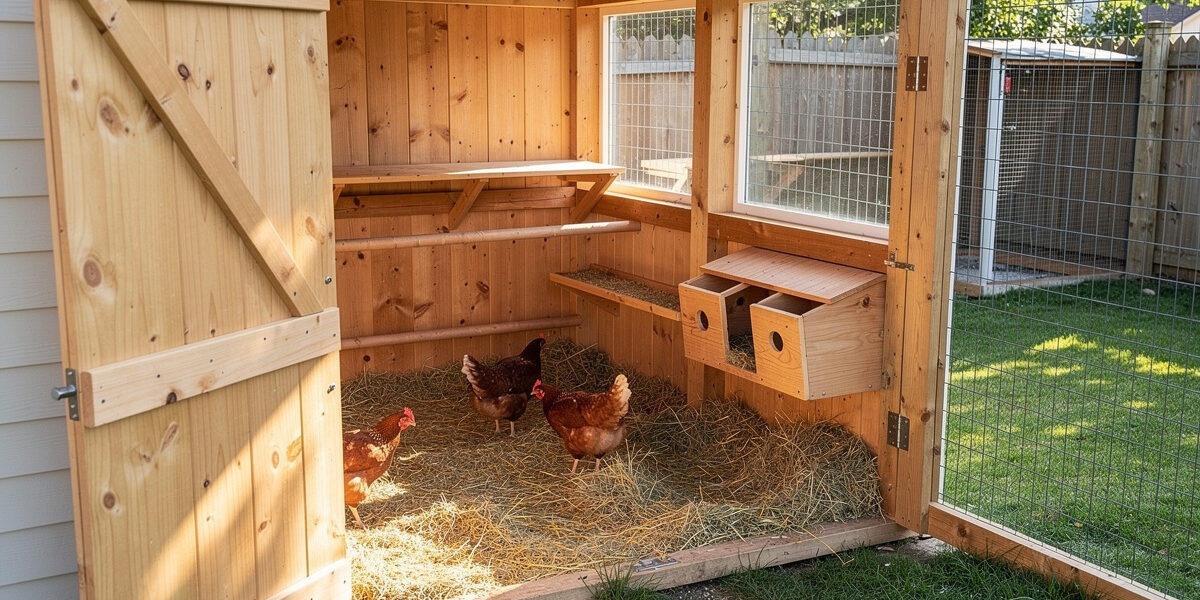
Interior Layout for Walk-Ins
The bigger interior gives you flexibility. Standard layout for an 8×8:
- Back wall (the deep wall): 4 nesting boxes in a vertical stack, external access on the outside
- Two side walls: Two windows for cross-ventilation, lower wall area for feeders and waterers
- Front wall (with door): Pop door at floor level, automation distribution panel mounted at chest height inside
- Center area: Roost bar across the middle, 24″ off floor, allowing 8″ per bird for 10 birds
- Above roost (optional): Storage shelf for feed bin or supplies
This layout gives you everything within easy reach when standing inside. Daily egg collection through the external nesting box doors takes 30 seconds; weekly cleaning takes 10–15 minutes.
Smart-Coop Integration
Walk-in coops are ideal for smart automation because they have plenty of space for the automation zone, easy access for wiring, and structural strength for mounting cameras and sensors.
During the build, plan for:
- 1/2″ PVC conduit through walls during framing. Cheap to add now; expensive to retrofit.
- Reinforced mounting blocks. Add solid 2×4 blocks at planned camera, sensor, and auto door locations.
- Dedicated automation zone. 2×3 ft wall area at chest height inside the front door for the distribution panel.
- Outdoor outlet near the coop. Pre-plan the electrical run; covered in our smart coop wiring guide.
This is the exact list I wish someone had handed me before my own build. I ran conduit and left blocking in the walls during framing, and every camera and sensor I’ve added since — the PoE cameras feeding my home-automation NVR, the door running on a Home Assistant sunrise/sunset offset instead of a dumb timer — has been a bolt-on job instead of an opening-the-wall job.
For full smart-coop integration in a walk-in, see our complete smart chicken coop guide.
Where to Find Walk-In Plans Free
Reliable sources for free walk-in chicken coop blueprints:
- Cooperative Extension publications. Land-grant university extension programs publish free poultry-housing guidance, and some include basic building plans — Virginia Cooperative Extension’s Small-Scale Poultry Housing guide is a solid starting point. Coverage varies a lot by state, so check your own state’s extension office rather than assuming every land-grant university has stamped coop drawings on file.
- BackyardChickens forum. User-submitted plans with photos and lessons-learned commentary.
- Ana White’s website. Several free chicken coop plans with cut lists.
- USDA NRCS. Small-livestock structure plans, especially for cold-climate builds.
- YouTube build-along videos. Pause to capture dimensions; cross-reference with the printable plans listed above.
For paid plans (typically $25–$60 PDF downloads with stamped drawings), search for builder-focused sites like My Outdoor Plans or Chicken Coop Plans.com.
Frequently Asked Questions
How much does it cost to build a walk-in chicken coop?
DIY materials cost: $700–$1,100 for a 6×8 walk-in (8 birds), $900–$1,400 for an 8×8 walk-in (10–12 birds), $1,100–$1,600 for an 8×10 walk-in (12–15 birds). All paths save 40–60% versus buying equivalent prefab walk-ins.
Can a beginner build a walk-in chicken coop?
Yes with realistic expectations. Walk-in coops are at the intermediate-to-advanced end of DIY because of their size and structural requirements. Plan toward the high end of build-time estimates and recruit help for wall raising. The 6×8 size is the most realistic first walk-in build.
How long does it take to build a walk-in chicken coop?
A 6×8 walk-in takes 32–48 hours over 3–4 weekends. An 8×8 walk-in takes 40–60 hours over 4–5 weekends. An 8×10 walk-in takes 50–70 hours over 5–7 weekends. First-time builders should plan toward the high end of these ranges.
What size walk-in chicken coop do I need?
Allow 4 sq ft per bird inside. For 8 birds plan a 6×8 (48 sq ft). For 10–12 birds plan an 8×8 (64 sq ft). For 12–15 birds plan an 8×10 (80 sq ft). Build for 50% larger than starting flock since most keepers expand within 24 months.
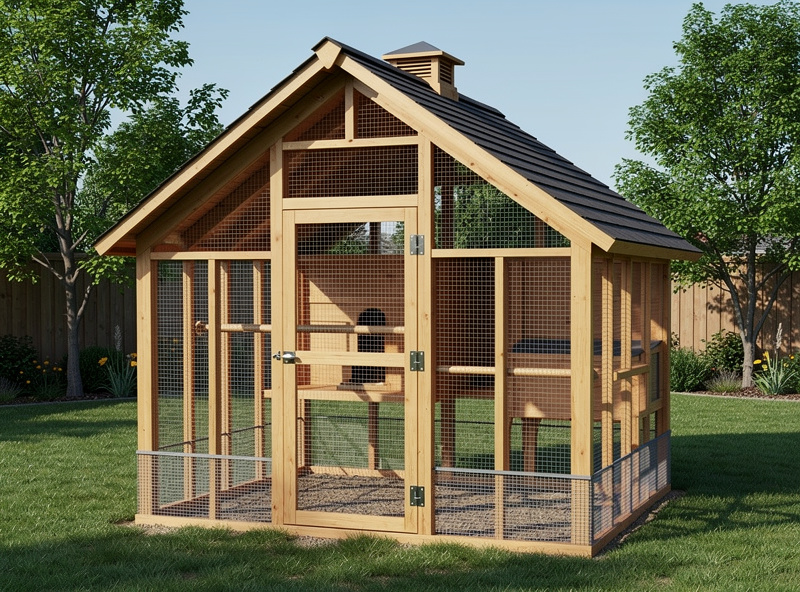
What roof style is best for a walk-in coop?
Standard gable roof at 4:12 to 6:12 pitch hits the right balance of cost, weatherproofing, and aesthetics for most backyards. In heavy-snow regions go to 6:12+ pitch with metal roofing. Gambrel (barn-style) roofs maximize interior height but add 50% to roof framing time and cost.
Do I need a permit to build a walk-in chicken coop?
Often yes. Most US jurisdictions require building permits for accessory structures over 100–200 sq ft. An 8×8 (64 sq ft) often falls below the threshold; an 8×10 (80 sq ft) sometimes triggers permits. Always check your municipal code before starting. See our smart chicken coop permits guide for details.
Related Articles
- DIY Chicken Coop Plans: 12 Free Designs by Skill Level
- Building a Chicken Coop From Scratch: Step-by-Step
- Chicken Coop for 12 Chickens: Best Family-Flock Picks
- Large Chicken Run: Sizing for 12+ Birds
- Smart Chicken Coop Permits & HOA Rules in the US
Related Guides
DIY Chicken Tractor Plans: Free Mobile Coop Builds
A DIY chicken tractor — the mobile coop+run combo on wheels or skids — is one of the most-built backyard…
Chicken Coop Shed Conversion: Garden Shed to Coop
Converting a garden shed into a chicken coop shed takes 8–16 hours and $200–$500 in materials, delivers far better insulation…
DIY Chicken House: 6 Beginner-Friendly Builds
A DIY chicken house — the small enclosed shelter where birds sleep, lay, and wait out bad weather — can…