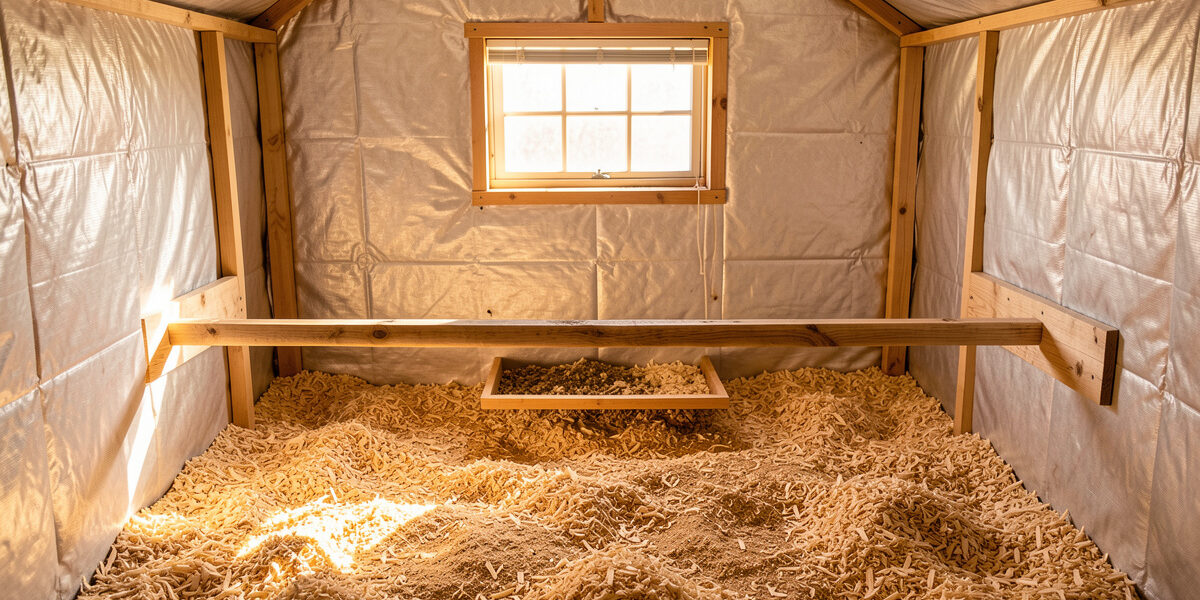
A clean coop is a dry coop, and a dry coop is the single biggest lever you have over flock health. On my flock in Sweden, the maintenance routine that actually matters is short: keep the litter dry, keep the air moving, pull the droppings off the poop board, and do a real deep-clean a couple of times a year. Get those four things right and you almost never smell ammonia, almost never see a mite outbreak, and almost never lose a bird to a respiratory problem that started as damp bedding.
This is the master guide to coop cleaning, bedding, and maintenance — the whole system, not a checklist someone copied off a feed-store flyer. I run a self-built insulated walk-in coop with a deep-litter floor, removable poop boards under the roost, and the whole thing wired into Home Assistant. Most of what follows is what I do every week, every season, and twice a year, plus the parts the glossy starter-kit videos skip: why moisture causes frostbite, why you should never disinfect on a schedule, and how the coop waste turns into the best free compost in the garden.
The Core Principle: You Are Managing Moisture, Not Dirt
The job is moisture management. Chicken droppings are roughly 75–80% water, and a single adult hen produces around 130–150 grams of manure a day (figures consistent with poultry extension resources on manure management). Multiply that by a flock of ten and you are dumping more than a kilogram of wet material into the coop every 24 hours. The bedding’s entire purpose is to absorb that water and let it evaporate out through ventilation. When the bedding can no longer keep up, the coop goes damp, ammonia builds, and the litter mats into a stinking cake.
This reframes everything. “Cleaning” is not about appearances — a coop can look tidy and still be quietly poisoning the air at roost height. The metric that matters is whether the bedding is dry and friable and whether you can kneel at the pop door at 7 a.m. and not catch a sharp ammonia note. If you can smell it, the birds — whose respiratory systems are far more sensitive than ours — have been breathing it for days. Everything in this guide serves that one goal: keep water moving out faster than the flock puts it in.
Bedding Is the Foundation — Pick the Right Material First
Bedding is where most coop problems are won or lost, so it is the first decision. The big four materials — pine shavings, straw, hemp, and sand — behave completely differently on absorbency, cost, dust, and how they compost afterward. There is no universally “best” one; there is the right one for your climate, your floor, and your tolerance for raking.
For a cold, damp climate like mine, large-flake kiln-dried pine shavings are the default: cheap, very absorbent, low-dust if you buy the good stuff, and they break down beautifully in the compost. Hemp is the premium pick — the most absorbent of the lot and almost dust-free — but it costs three to four times as much. Sand is a different philosophy entirely: it doesn’t absorb, it stays cool, and you sift it like a litter box rather than composting it. Straw is the worst pick for a damp climate because it’s hollow, holds little water, and mats fast — though it shines as a winter insulating layer over a deep-litter base.
I go through the full breakdown — absorbency numbers, dust, cost per year, and how each one composts — in the chicken bedding types comparison, and there’s an older material-focused walkthrough in my complete bedding material guide if you want the buyer’s-eye version. Whatever you choose, depth matters more than brand: a thin scatter of shavings over bare plywood is the fastest route to a damp, smelly floor.
Two Bedding Philosophies: Clean-Out vs. Deep Litter
Once you’ve chosen a material, you choose a system. There are really only two, and they ask opposite things of you.
The clean-out method keeps a shallow layer of bedding (5–10 cm) that you fully remove and replace on a schedule — weekly to monthly depending on flock density. It’s simple, predictable, and forgiving of mistakes, but it’s the most physical labor over a year and it sends a lot of carbon to the compost pile in one-off dumps.
The deep litter method is the one I run. You start with a deep carbon base (15–20 cm), let the droppings mix into it, top up with fresh material, and let the whole floor become a slow, cold compost pile in place. Done right, it generates a little warmth in winter, builds a population of beneficial microbes that outcompete the smelly anaerobic ones, and you only do a full clean-out once or twice a year. Done wrong — too wet, not enough carbon, no turning — it becomes an ammonia factory. I cover the exact setup, the carbon-to-manure balance, and the troubleshooting in the deep litter method complete guide, and there’s a winter-specific version in my deep litter for winter warmth writeup.
The Poop Board: The One Upgrade That Halves Your Workload
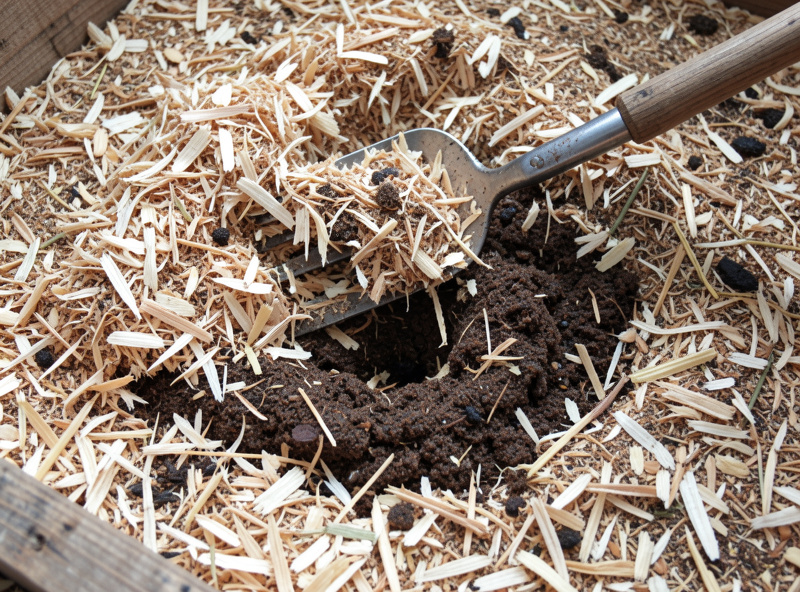
Chickens deposit 60–70% of their daily manure overnight, directly under the roost where they sleep. If you do nothing else from this guide, build a poop board: a removable tray or shelf set 30–40 cm below the roost bars, dusted with a thin layer of sand, pine pellets, or PDZ (a zeolite mineral that traps ammonia). Each morning you scrape the concentrated overnight droppings off the board in about 60 seconds and the rest of the bedding stays clean far longer.
This single change is the difference between deep litter that lasts six months and deep litter that turns sour in three weeks, because it removes the majority of the moisture load before it ever hits the floor. The scraped material goes straight to the compost. A cheap aluminum or plastic-faced board wipes down in seconds; I print custom corner brackets for mine on the same 3D printer that makes the auto-door guide rails. A stiff drywall taping knife is the only tool you need — an inexpensive stainless poop scraper lasts years and won’t gouge the board. As an Amazon Associate I earn from qualifying purchases.
The Cleaning Schedule: Daily, Weekly, Monthly, Seasonal
Maintenance fails when it’s vague. “Clean the coop regularly” means nothing; what works is a tiered schedule where each tier takes a defined, small amount of time. Here’s the rhythm I run, and the full version — with the exact tasks, time budgets, and the deep-clean walkthrough — lives in the chicken coop cleaning schedule.
| Frequency | Task | Time | Why it matters |
|---|---|---|---|
| Daily | Scrape poop board, collect eggs, check waterer, quick litter glance | 3–5 min | Removes 60–70% of daily manure before it spreads moisture |
| Weekly | Turn/top up deep litter, refresh nesting box bedding, wipe waterer | 10–15 min | Keeps litter aerobic and dry; nesting hygiene protects egg quality |
| Monthly | Deep-stir litter, scrub waterer/feeder, inspect roosts for mites | 30–45 min | Catches mite outbreaks early; prevents biofilm in waterers |
| Seasonal (2×/yr) | Full strip-out, scrub, dry, treat roost ends, fresh bedding | 2–3 hrs | Resets the system; spring/autumn pest and moisture control |
Notice what’s not on that list: daily disinfecting. You do not need to bleach a coop every week, and doing so can do more harm than good (more on that below). The seasonal deep clean is where disinfection has a place; the daily and weekly tiers are about moisture and droppings, full stop.
Ventilation: Half of Coop Maintenance Happens in the Air
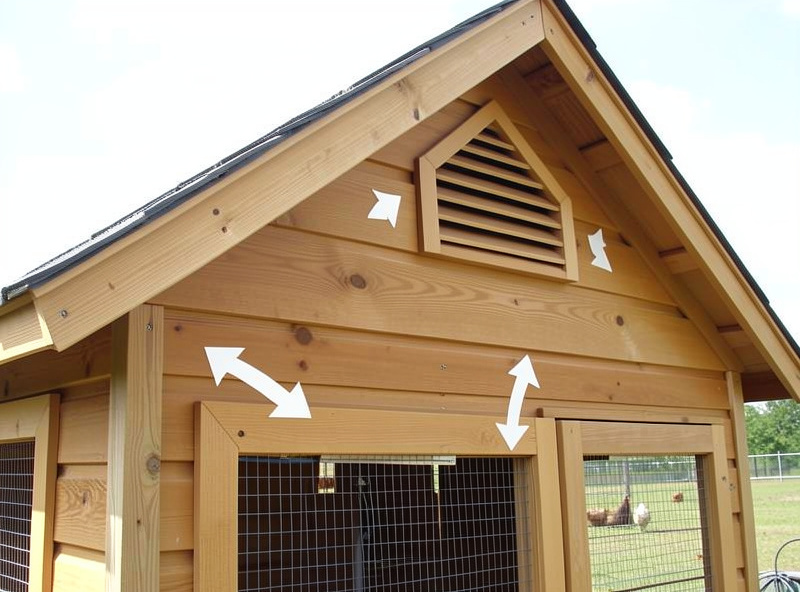
You can keep the cleanest litter in the country and still have a sick, frost-bitten flock if the air doesn’t move. Ventilation is the other half of moisture management — it’s how the water you’re absorbing into the bedding actually leaves the building. The target is passive cross-flow: intake low (soffit vents), exhaust high (ridge or gable vents), sized so warm, moist, ammonia-laden air rises and exits without ever creating a draft across the roosting birds.
This is the part that trips up cold-climate keepers, because the instinct in winter is to seal everything up. That’s exactly backwards. Moisture, not cold, is what frostbites a comb. A sealed coop traps humidity from the birds’ breath and droppings; that moisture condenses on combs and wattles overnight and freezes. A well-ventilated coop at −20 °C with dry air will keep a small-combed cold-hardy bird comfortable; a sealed “cozy” coop at the same temperature will cost you comb tips. I lay out the sizing math and vent placement in the coop ventilation guide and the draft-vs-ventilation distinction in ventilation vs. draft.
Odor Control: Smell Is a Diagnostic, Not a Cosmetic Problem
A healthy coop is not odorless — it smells faintly of earth and warm birds — but it should never smell of ammonia. That sharp, eye-watering note is the byproduct of nitrogen-rich droppings breaking down without enough oxygen or carbon to balance them. When you smell it, the chemistry has already gone anaerobic, and the birds have been breathing irritant gas at roost level for a while.
The fix is never an air freshener or a spray; it’s correcting the underlying imbalance — more carbon (fresh bedding), more oxygen (turn the litter), less standing moisture (fix the leak, the spilled waterer, the dead-air corner), and better ventilation. Zeolite or PDZ on the poop board buys you time by chemically binding ammonia, but it’s a supplement, not a cure. I walk through the full diagnostic ladder — what each smell tells you and how to kill it at the source — in the chicken coop odor control guide.
Pest and Mite Control: The Coop Is the Battlefield
Red mites are the keeper’s nightmare because they don’t live on the bird — they live in the coop. They hide in roost-end cracks, under perch brackets, and in the joints of the structure during the day, then crawl onto the flock at night to feed. This is why dusting the birds alone never solves an infestation: you have to treat the coop. A heavy red-mite load drains a flock’s blood, drops laying, and in severe cases kills birds outright.
Coop-side control means smooth, sealable roosts you can scrub, a permethrin or diatomaceous-earth treatment driven into every crack at the seasonal clean, and routine inspection of the roost ends where they congregate. The clean-coop habits in this whole guide are your first line of defense — mites thrive in deep, undisturbed, dirty litter and die back in a dry, turned, well-managed coop. I cover the full coop-treatment protocol in coop mite and pest control; for signs and treatment on the bird, see my mites and lice on chickens writeup. Anything that looks like illness rather than parasites — route it to an avian vet, not a blog.
Closing the Loop: Coop Waste Becomes Garden Gold
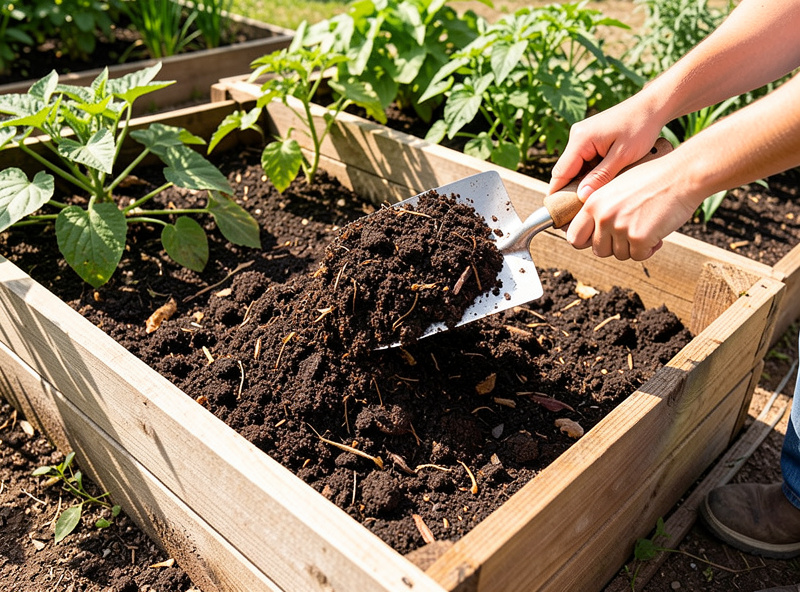
Everything you scrape, rake, and strip out of the coop is not waste — it’s the highest-nitrogen free fertilizer you’ll ever get your hands on. Fresh chicken manure is far too “hot” to put straight on plants; it’ll burn roots and it can carry pathogens. But composted properly — mixed with the carbon-rich bedding it’s already sitting in, turned, and cured for several months — it becomes a balanced, safe, premium soil amendment — the same hot-compost process the US EPA composting guidance describes.
This is where the deep-litter floor pays a second dividend: the bedding and manure come out of the coop already at a workable carbon-to-nitrogen ratio, half-composted. I run the whole cycle — coop to compost bin to garden bed — and the mechanics (hot pile, C:N ratio, turning, cure time, and when it’s safe to use) are in composting chicken manure for the garden. The bigger coop-to-garden loop, including how it feeds my raised beds, lives in the chicken-powered garden cycle.
The Disinfecting Myth: Less Is More
New keepers tend to over-disinfect, scrubbing the coop with bleach every week as if it were a hospital. This is counterproductive. A healthy deep-litter coop runs on a living population of beneficial microbes that actively suppress the harmful, smell-causing anaerobic bacteria. Nuke them weekly with disinfectant and you sterilize the floor of your allies along with everything else, then hand the empty territory back to whatever recolonizes first.
Disinfection belongs to the seasonal deep clean and to disease-response situations, not the weekly routine. When you do disinfect — after a strip-out, or if you’ve had a sick bird — remove all organic matter first (disinfectants are inactivated by manure and bedding), let the coop dry completely, and use a poultry-safe coop disinfectant rather than household bleach, which leaves harsh fumes in an enclosed space. As an Amazon Associate I earn from qualifying purchases. The rest of the year, dry bedding and good airflow do the sanitizing for you.
Automating the Boring Parts
The coop I run is wired into Home Assistant, and a surprising amount of maintenance is really just monitoring you can offload to sensors. A cheap temperature-and-humidity sensor at roost height tells you the thing that actually matters — relative humidity — before your nose does; I get a notification if the coop crosses 70% RH, which is my “the litter isn’t keeping up, go turn it” trigger. A PoE camera lets me eyeball the litter, the waterer, and the nesting boxes without opening the pop door and chilling the coop in winter. The freeze-watch automation on the heated waterer is part of the same logic.
None of this replaces the scraper and the rake — automation can’t turn litter — but it replaces the guessing, which is where most maintenance mistakes start. The same Home Assistant brain that runs the auto-door on a sunrise offset watches the coop’s air for me. If you’re building toward that, my smart coop maintenance checklist ties the sensors to the schedule.
Frequently Asked Questions
How often should I completely clean out my chicken coop?
With a poop board and deep litter, a full strip-out twice a year (spring and autumn) is enough. The daily 60-second poop-board scrape and weekly litter turning handle the routine moisture load, so you avoid the labor of frequent full clean-outs while keeping the air dry.
Does a clean coop need to be disinfected every week?
No. Weekly disinfecting kills the beneficial microbes that suppress odor and harmful bacteria in a deep-litter coop. Reserve disinfectant for the seasonal deep clean or after a sick bird, always removing all bedding first since organic matter inactivates disinfectants.
What is the best bedding for keeping a coop dry and low-odor?
Large-flake kiln-dried pine shavings are the best all-rounder for damp climates: highly absorbent, low-dust, cheap, and they compost well. Hemp absorbs even more and is nearly dust-free but costs three to four times as much. Straw mats and holds little water, so it is the weakest choice for moisture control.
Why does my coop smell like ammonia even though it looks clean?
Ammonia means the droppings are breaking down anaerobically faster than your bedding and ventilation can handle the moisture. A coop can look tidy and still be damp underneath. Fix it with more carbon (fresh bedding), turning the litter to add oxygen, eliminating standing moisture, and improving airflow, not with sprays.
Will keeping the coop too sealed up in winter cause frostbite?
Yes. Moisture, not cold, causes frostbite. A sealed coop traps humidity from the birds breath and droppings, which condenses on combs overnight and freezes. Cold-hardy breeds tolerate sub-zero temperatures fine in a dry, well-ventilated coop but lose comb tips in a humid sealed one.
Can I put chicken coop bedding straight on my garden?
Not fresh. Raw chicken manure is too high in nitrogen and can burn plants and carry pathogens. Compost the bedding-and-manure mix and cure it for several months first. Deep-litter bedding comes out already half-composted at a workable carbon-to-nitrogen ratio, which speeds up the process.
Related Guides
- Deep Litter Method: The Complete Guide
- Chicken Bedding Types Compared: Pine, Straw, Hemp & Sand
- The Chicken Coop Cleaning Schedule That Actually Works
- Coop Mite and Pest Control: Treating the Coop, Not Just the Bird
- Composting Chicken Manure for the Garden
- Chicken Coop Odor Control: A Diagnostic Approach
Related Guides
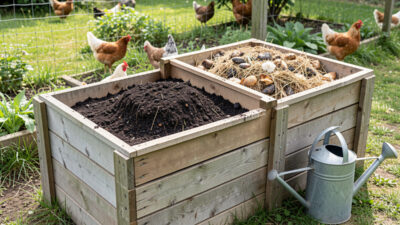
How to Compost Chicken Manure for the Garden
Fresh chicken manure is the richest free fertilizer you’ll ever produce — its nitrogen runs roughly 1.1–1.5%, hotter than cow…
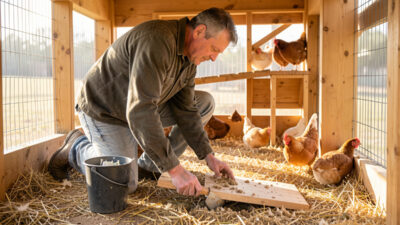
The Chicken Coop Cleaning Schedule That Actually Works
A chicken coop cleaning schedule should take about five minutes a day, fifteen minutes a week, under an hour a…
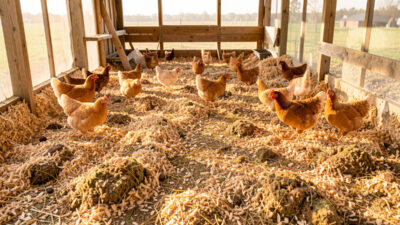
The Deep Litter Method: A Complete Guide for Chicken Coops
The deep litter method is a system where you let the bedding and droppings compost in place on the coop…