Most smart chicken coop mistakes trace to the same nine errors: under-sizing the coop for automation, choosing a cheap timer-only door, wiring without GFCI, mounting electronics in dust zones, skipping the manual override, ignoring sensor placement, building too small, no battery backup, and stopping monthly maintenance. Each mistake has a specific cost — most small, two of them potentially flock-ending.
This guide walks through every mistake with the symptom, the cause, and the fix. I’ve made a couple of these myself on early iterations of my own coop — the dust-zone mounting mistake in particular cost me a camera in the first year. For deeper coverage on each topic, see linked guides. For the full build context, start with our complete smart chicken coop guide.
Mistake 1: Buying a Timer-Only Auto Door
The symptom: Door closes at 8:00 PM on the dot. Slow hens get caught outside. Predator finds them.
The cause: Cheap auto doors ($60–$100) operate on simple timers with no obstruction detection and no light sensor. They cannot adapt to seasonal sunset shifts or know whether all chickens are inside.
The fix: Spend the extra $80–$150 for a door with light sensor + obstruction detection. Set close time 20–30 minutes after sunset. Verify monthly with a wooden dowel test. See our automatic coop door buyer’s guide for specific recommendations.
Cost of the mistake: 1–3 birds over the life of the coop. The “savings” of buying cheap evaporates after the first predator loss.
Mistake 2: Skipping the GFCI
The symptom: Damp coop + 110V outlet + unfortunate chicken or human contact = serious shock. Or a wiring fault burns down the coop unnoticed because nothing tripped.
The cause: The National Electrical Code requires GFCI protection on outlets in damp and wet locations, and recent code cycles have widened that requirement to more outdoor and hard-wired equipment, not narrowed it (this NEC 210.8 rule-change breakdown covers the outdoor-outlet expansion). Plenty of DIY coop wiring skips it anyway — the coop seems “indoor enough” so the builder uses a standard outlet.
The fix: Install a GFCI breaker at the house panel that feeds the coop. Optionally add a GFCI outlet at the coop for redundancy. Test quarterly. Detailed wiring approach in our smart chicken coop wiring guide.
Cost of the mistake: Worst case, life-changing. Best case, a coop fire and dead flock. There is no acceptable shortcut here.
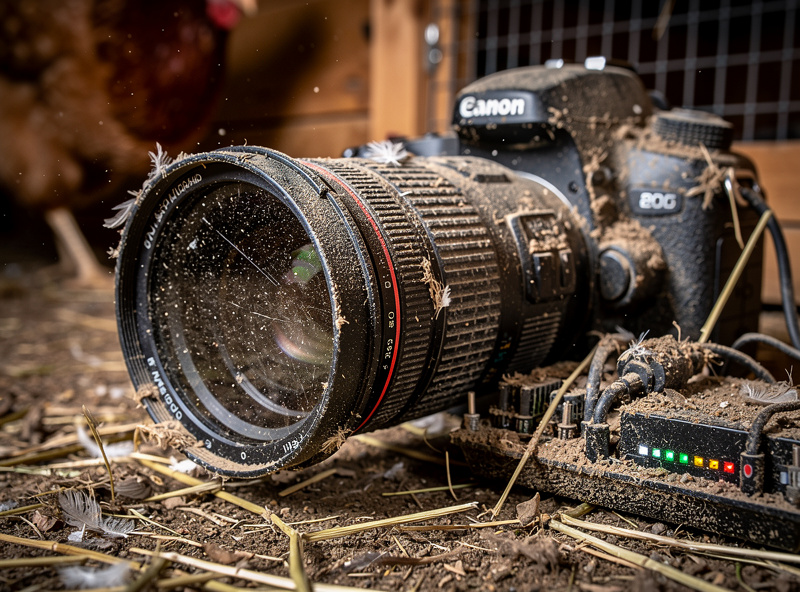
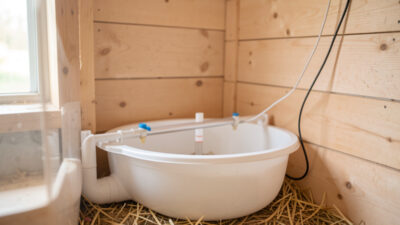
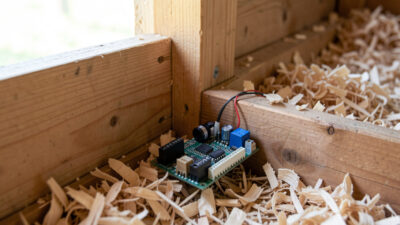
Mistake 3: Mounting Electronics in Dust Zones
The symptom: Camera image hazes over within 60 days. Sensors report wrong values. Power supply fan clogs and overheats.
The cause: Coops are dusty environments. Chickens kick up bedding particles all day; ammonia and feather dander suspend in the air. Electronics mounted at floor level or near nesting boxes get coated fast.
The fix: Mount cameras and sensors at 6+ feet of height, away from roosts and feeders. Place power supplies and distribution blocks in a dust-protected enclosure (a hinged plywood box or small wall-mount electrical enclosure). Wipe lenses and vents at the monthly check.
Cost of the mistake: $100–$300 in early replacement of components that should have lasted 5 years. My first coop camera lasted about four months at floor height before the lens haze made night footage useless — moving it up onto the wall fixed it for good.
Mistake 4: No Manual Override
The symptom: Power outage at 2 AM. Auto door is closed (good) but stuck in software-locked state. Chickens cannot get out at dawn. Or worse — door is half-open and you cannot manually close it without electricity.
The cause: Buyer skipped the door’s manual override option to save $20, or never tested the override and discovered it was rusted/broken when needed.
The fix: Choose only auto doors with manual override (hand crank, removable cord, or release lever). Test the override at fall winter prep — covered in our smart coop safety guide with full failsafe details.
Cost of the mistake: One stressful overnight crisis where you cannot tend the flock manually. Possible bird loss if compounded with bad weather.
Mistake 5: Ignoring Sensor Placement
The symptom: Temperature alarms trigger from a sunny spot on the wall, not actual coop temperature. Humidity sensors read wildly different numbers depending on time of day. Door sensors say “closed” when door is open by 2 inches.
The cause: Sensors were mounted wherever convenient, not where they would read true. A temperature sensor in direct sunlight measures sunlight, not air temp.
The fix:
- Temperature sensors: shaded location, away from heat sources, 4–6 feet off floor
- Humidity sensors: same general placement; avoid waterer splash zones
- Door state sensors: magnet within half an inch of the reed switch; verify alignment monthly
Detailed placement in our monitoring guide.
Cost of the mistake: Constant false alerts that train you to ignore the system, or quiet failures that hide real problems. Trust in automation drops to zero.
Mistake 6: Building Too Small
The symptom: 6 months after build, you are crammed into a 4×4 coop trying to fit power supply, sensor wires, and 6 chickens. Maintenance is awkward. Adding hardware later means tearing out walls.
The cause: Followed the manual-coop “3 sq ft per bird” guideline without adjusting for automation hardware footprint.
The fix: Add 30–50% to manual-coop sizing for smart builds. Plan a dedicated automation zone (12–18 inches deep along one wall). Build for a flock 50% larger than your starting size. Full sizing math in our smart coop size guide.
Cost of the mistake: Tearing out walls to upgrade or rebuilding entirely — often $1,500+ in lost work and materials.
Mistake 7: No Battery Backup
The symptom: Power drops at 4 PM. Auto door stays open through the night because controller has no power. Predator gets in.
The cause: Builder assumed auto door’s internal battery would handle outages. Did not realize the door controller needs the network/light sensor input from the smart hub, which lost power.
The fix: Either (a) verify the auto door’s standalone mode works without network connectivity, or (b) add a $100–$200 UPS on the AC-to-DC power supply. Detailed in our smart chicken coop battery backup guide.
Cost of the mistake: Same as Mistake 1 — predator loss during outage. Particularly bad in storm-prone regions where outages cluster with predator activity.
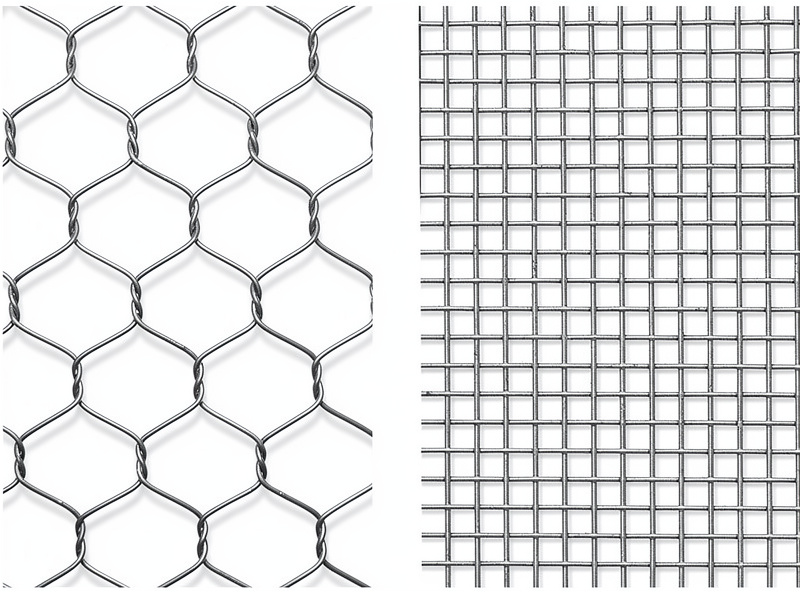
Mistake 8: Cheap Hardware Cloth Substitution
The symptom: Raccoon reaches through 1″ chicken wire, opens latch from inside, kills entire flock. Smart automation does not detect the breach until camera shows the carnage.
The cause: Smart coop hype glossed over the mundane reality that automation does not stop predators with paws. Builder used chicken wire (which is for keeping chickens IN, not keeping predators OUT) on the run perimeter and ventilation openings — the distinction is well documented in the keeper community (The Chicken Chick’s hardware cloth vs. chicken wire breakdown), but it’s still the mistake I see repeated most on brand-new builds.
The fix: 1/4″ or 1/2″ hardware cloth on every opening, every vent, every gap. Buried apron extending 12″ out from the run perimeter. No chicken wire anywhere. Period.
Cost of the mistake: Total flock loss. The mistake that ends most new chicken-keeping experiments.
Mistake 9: Stopping Monthly Maintenance
The symptom: Smart coop runs flawlessly for 8 months. Then in month 9 the door light sensor gets covered in spider webs. Door does not close at sunset. Predator finds opportunity.
The cause: Automation creates the illusion of “set it and forget it.” Owner does the monthly checklist for the first three months, then trails off.
The fix: Calendar reminder for monthly check, 15–25 minutes. The most critical task is wiping the door light sensor and obstruction detector — both fail silently and both prevent predator-proofing. Full checklist in our smart chicken coop maintenance guide.
Cost of the mistake: A flock-ending event that was 100% preventable with 3 minutes of cleaning.
The Two “Flock-Ending” Mistakes
Of the nine mistakes above, only two regularly result in total flock loss: cheap chicken wire instead of hardware cloth (Mistake 8) and skipped monthly maintenance leading to door failure (Mistake 9). Get those two right and your worst-case smart coop scenarios are nuisances, not disasters.
The other seven are real but recoverable. Money lost, components replaced early, occasional bird injury — bad but not flock-ending. In my own automation log, hardware cloth and the monthly sensor wipe-down are the only two items I genuinely will not let slide, no matter how well the rest of the system has been running.
The 80/20 Mistake Prevention Checklist
Eight items. Five minutes per month. Catches most of the above:
- Wipe the door light sensor and obstruction detector (Mistake 9)
- Verify GFCI test/reset on all coop circuits (Mistake 2)
- Check sensor battery levels in the app (Mistake 5 indirectly)
- Test manual override on auto door (Mistake 4)
- Verify camera image is clear (Mistake 3)
- Check for chew damage on cables (general)
- Visual inspection of run hardware cloth (Mistake 8)
- Confirm UPS or battery backup is connected and charging (Mistake 7)
This 5-minute monthly pass eliminates 80% of preventable mistakes. Combine it with the seasonal deep clean from our maintenance guide and you cover effectively 100%.
Mistakes That Are Not Actually Mistakes
Three things people worry about that do not matter much:
- Choosing the “wrong” smart-home platform. SmartThings, Apple Home, Google Home, Home Assistant — they all work. The platform you actually use day-to-day is more important than the theoretically-best platform you abandon after a month.
- Buying the cheapest sensor. $15 Aqara/Sonoff sensors work well in coops. Premium sensors do not last meaningfully longer in this environment. Spend on the door and camera, save on sensors.
- Wiring color choice. As long as you label everything, it does not matter whether you used white-and-black or red-and-black for 12V. Labeling matters; color convention matters less.
If You Have Already Made One of These Mistakes
Most are recoverable:
- Mistakes 1, 4, 7 (door, override, backup) — replace the component. $100–$300.
- Mistake 2 (no GFCI) — install today. Do not wait. $30–$80 + 20 minutes.
- Mistake 3 (electronics in dust) — relocate. Half-day of work, no parts cost if components still work.
- Mistake 5 (sensor placement) — move sensors. 15 minutes per sensor.
- Mistake 6 (too small coop) — depends on severity. Sometimes salvageable with a bump-out, sometimes requires rebuild.
- Mistake 8 (chicken wire) — replace with hardware cloth immediately. $100–$200 in materials, one weekend.
- Mistake 9 (no maintenance) — start the monthly checklist this week. No cost, just habit.
Most readers will spot 2–3 of these in their own setup on a careful inspection. Address the worst ones first (especially Mistakes 2 and 8) and work down the list.
Frequently Asked Questions
What is the most common smart chicken coop mistake?
Skipping monthly maintenance — particularly forgetting to wipe the auto-door light sensor. Spider webs and dust over the sensor cause more ‘door won’t close at dusk’ failures than any other single issue. A 3-minute monthly cleaning prevents it.
Can a cheap automatic coop door cause problems?
Yes — timer-only doors without obstruction detection close on the dot regardless of whether all chickens are inside. They cause crush injuries and miss slow hens at dusk. Pay the extra $80–$150 for a door with light sensor and obstruction detection.
Why do smart coop electronics fail early?
Coops are dusty, ammonia-rich environments. Electronics mounted near floor level or close to roosts get coated within 60 days. Mount cameras and sensors at 6+ feet, place power supplies in dust-protected enclosures, and wipe vents and lenses monthly.
Do I really need a GFCI on my chicken coop circuit?
Yes — required by NEC code for any 110V outlet in damp/wet locations. Skipping it creates electrocution risk and fire risk. Install a GFCI breaker at the house panel that feeds the coop. Test it quarterly with the test button.
Is chicken wire okay for a smart coop?
No. Chicken wire keeps chickens in but does not keep predators out — raccoons, foxes, and weasels defeat it easily. Use 1/4 inch or 1/2 inch hardware cloth on every opening, vent, and gap. Smart automation cannot compensate for wire failure.
What is the worst smart coop mistake to make?
Tied: using chicken wire instead of hardware cloth (predators kill the entire flock through wire) and skipping monthly maintenance (auto door fails silently leaving chickens exposed). Both regularly cause total flock loss in cases that were 100% preventable.
Related Articles
Related Guides
Water-Level and Flow Sensors: Knowing the Waterer Is Empty Before They Do
A coop water-level sensor tells you the drinker is going dry — or freezing solid — before the flock does,…
Ammonia Sensors for the Coop: Catching Air Problems Before You Smell Them
An ammonia sensor belongs at the birds’ breathing height, close to the litter where the gas is generated, because that…

Node-RED vs Home Assistant Automations for the Coop: When to Use Which
Use native Home Assistant automations for the coop’s simple, safety-critical rules — the sunrise door, the freeze-watch waterer — and…