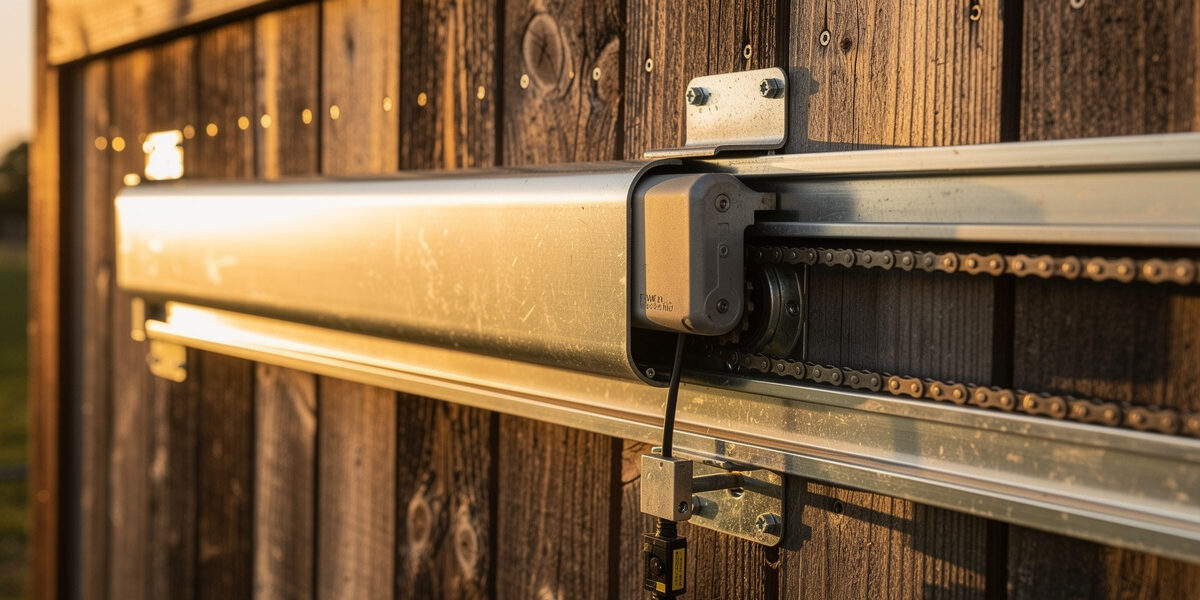
If you invest in only one smart coop upgrade, make it an automatic chicken coop door. No other device delivers as much daily value — predator protection every single night, freedom from being home at dusk, and the elimination of your most time-consuming daily chore. In 2026, automatic door technology has matured to the point where reliability, ease of use, and affordability intersect perfectly.
This comprehensive buyer’s guide covers everything you need to know: why automatic doors matter, the different types and technologies available, power options, installation requirements, and detailed reviews of the top-rated models. Whether you are a beginner seeking your first automation device or upgrading an existing manual setup, this guide ensures you choose the right door for your coop and climate. I have mounted and run Run-Chicken, ChickenGuard, and the Omlet autodoor on my own coop through full Swedish years of light and cold, so the picks below come from doors I have actually watched cycle for a year — not a spec sheet.
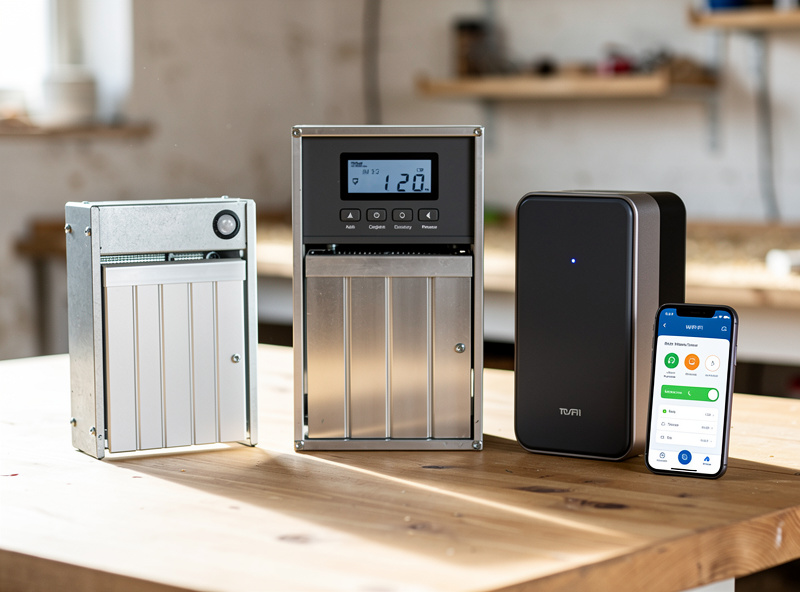
Why an Automatic Door Is the #1 Coop Upgrade
Before diving into product comparisons, understand why this single device transforms chicken keeping more than any other:
Predator Protection That Never Fails
Predation is consistently identified as the single biggest killer of backyard chickens, ahead of disease and weather combined (eXtension Poultry; Ohio State University Extension). Raccoons, foxes, coyotes, owls, and neighborhood dogs all pose threats, and they hunt primarily at dusk and dawn — exactly when coop doors should open and close.
Human keepers forget. We get stuck in traffic, work late, enjoy dinner with friends, or simply fall asleep on the couch. An automatic door never does. It closes precisely at sunset every single day, keeping your flock secure regardless of your schedule.
The peace of mind is immeasurable. Check your phone camera at 10 PM and see the door closed. Your chickens are safe. You can sleep soundly, work late, or travel overnight without worry.
Lifestyle Freedom
Traditional chicken keeping ties you to your property twice daily. Dawn opening and dusk closing create an inflexible routine that conflicts with modern life:
- Cannot spontaneously go out after work
- Weekend trips require finding coop sitters
- Vacations need elaborate arrangements
- Early morning commitments mean rushed coop duty
An automatic door eliminates these constraints. Your chickens access the coop and run on their natural schedule while you live yours. The device handles the daily grind; you enjoy the hobby.
Time Savings Add Up
Consider the math: 10 minutes daily (opening and closing) × 365 days = 60+ hours annually spent on door duty alone. An automatic door reclaims over 60 hours of your life every year — time better spent enjoying your flock rather than serving as a doorman.
Improved Chicken Health
Chickens thrive on consistency. Automated doors provide exactly that — same opening time daily, same closing time daily. This predictable routine reduces stress, encourages natural behaviors, and supports optimal egg production.
Types of Automatic Coop Doors
Not all automatic doors work the same way. Understand the three primary operating mechanisms before shopping:
1. Light Sensor Doors
How They Work: A photocell detects ambient light levels. When dawn brightness exceeds the threshold, the door opens. When dusk darkness falls below the threshold, the door closes.
Advantages:
- Natural rhythm matching chicken behavior
- No programming or time setting required
- Automatically adjusts for seasonal day length changes
- Simple, reliable technology
Disadvantages:
- Overcast days can delay opening
- Artificial light (security lights) can confuse sensors
- Very shaded coops may have inconsistent operation
- Snow covering sensor causes malfunction
Best For: Coops in open areas with consistent natural light exposure. The most popular and reliable option for most situations.
2. Timer-Based Doors
How They Work: User-programmed schedules control opening and closing times. Set specific times (e.g., open at 6:30 AM, close at 8:00 PM) and the door follows this schedule daily.
Advantages:
- Complete control over timing
- Not affected by weather, shade, or artificial light
- Predictable schedule for planning
- Works in any coop location
Disadvantages:
- Requires manual adjustment for seasonal day length changes
- Cannot adapt to unusual weather or lighting
- Must remember to update times seasonally
Best For: Coops in heavily shaded areas, locations with significant artificial light interference, or keepers wanting precise control over access times.
3. Dual-Sensor Doors (Light + Timer)
How They Work: Combines both technologies. The door operates primarily on light sensor but includes programmable timer backup. If light sensor malfunctions, timer ensures door still operates.
Advantages:
- Best of both worlds — natural adaptation with manual override
- Redundancy prevents total failure
- Ultimate flexibility
Disadvantages:
- Higher cost
- More complex setup
Best For: Keepers wanting maximum reliability and flexibility. Recommended for valuable flocks or remote coops where malfunctions create serious problems.
Power Options: Choosing the Right Setup
Automatic doors require power to operate. Three options exist, each with trade-offs:
Battery Power
How It Works: Standard batteries (AA, D-cell, or proprietary packs) power the motor and electronics.
Advantages:
- No electrical wiring required
- Works anywhere, regardless of power availability
- Continues operating during power outages
- Simple installation
Disadvantages:
- Battery replacement required periodically (every 3-12 months depending on model)
- Cold weather reduces battery life significantly
- Potential for unexpected battery failure
- Ongoing battery costs
Battery Life Expectations:
- Alkaline batteries: 3-6 months
- Lithium batteries: 6-12 months
- Rechargeable NiMH: 2-4 months (requires more frequent changes)
Best For: Coops without electrical access, temporary installations, or as backup to AC power.
AC Power (Wired)
How It Works: Plugs into standard 110V outlet using outdoor-rated power supply.
Advantages:
- Unlimited operation without battery changes
- Stronger motor performance (better for heavy doors)
- Enables advanced features (WiFi, cameras, sensors)
- Consistent operation in all weather
Disadvantages:
- Requires electrical outlet at coop
- Power outages disable door (unless battery backup present)
- Installation more complex (running outdoor conduit)
- May require electrician for code compliance
Best For: Permanent installations with electrical access, heavy custom doors, or smart doors with advanced features.
Solar Power
How It Works: Small solar panel charges internal battery, which then powers door operation.
Advantages:
- Works off-grid
- Environmentally friendly
- No battery replacement costs (usually)
- No electrical wiring
Disadvantages:
- Requires adequate sun exposure
- Winter performance reduced in northern climates
- Panel must be kept clean and unobstructed
- Higher upfront cost
- Still has battery that eventually needs replacement
Best For: Remote coops without electrical infrastructure, sunny climates, or environmentally conscious keepers.
Hybrid Systems (AC + Battery Backup)
How It Works: Primary AC power with rechargeable battery backup. Door runs on AC normally, switches to battery during outages, and recharges when power returns.
Advantages:
- Best reliability — AC convenience with outage protection
- No periodic battery replacement (rechargeable)
- Peace of mind during storms or grid failures
Disadvantages:
- Highest cost
- Most complex installation
Best For: Areas with unreliable power, valuable flocks, or keepers wanting maximum reliability regardless of cost.
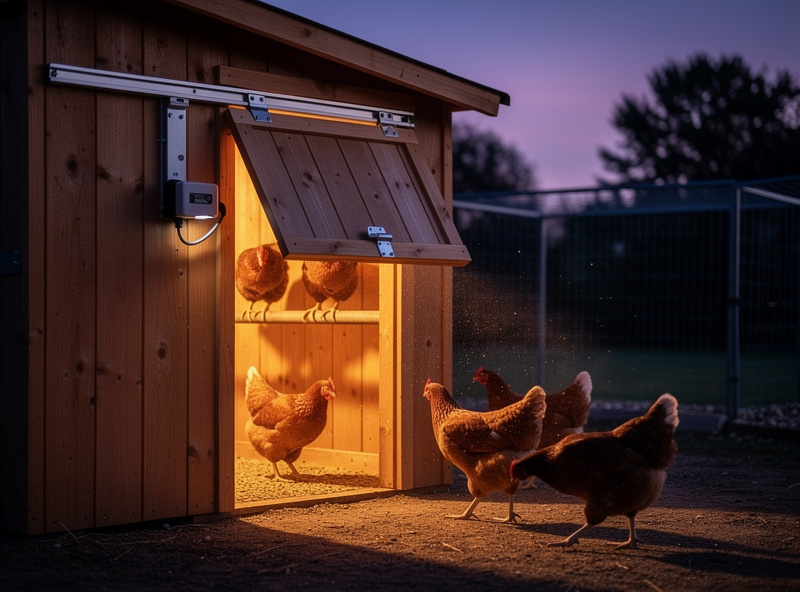
Installation Requirements and Considerations
Before purchasing, verify your coop can accommodate an automatic door:
Door Size and Weight
Most automatic door mechanisms handle standard dimensions:
- Minimum opening: 8×10 inches (bantam breeds)
- Standard opening: 12×14 inches (most chicken breeds)
- Maximum weight: 2-4 kg (4.5-9 lbs) depending on motor strength
Measure your existing door opening. Custom heavy doors (thick wood, metal, insulated) may exceed motor capacity. If upgrading to automatic, design the door panel with weight in mind — aluminum or thin plywood rather than solid hardwood.
Mounting Location
The motor mechanism requires secure mounting to the coop frame:
- Requires solid wood frame (2×4 or larger) at door location
- Must mount above the door opening (motor hangs down)
- Needs 4-6 inches clearance above door for mechanism
- Light sensor must face outward (not blocked by overhangs)
Reinforce the door frame area if needed. Automatic doors exert force during operation — a flimsy frame leads to misalignment and malfunction.
Electrical Access
If choosing AC power:
- Plan outdoor-rated extension cord or buried conduit route
- Consider GFCI protection (required by code in many areas)
- Ensure 110V outlet within cord reach or install new outlet
- Protect connections from moisture
For solar:
- Verify 4-6 hours daily sun exposure at mounting location
- Position panel south-facing (north-facing in southern hemisphere)
- Keep panel clear of shadows from trees, buildings, coop overhangs
Installation Complexity
Most automatic doors install in 15-30 minutes with basic tools:
- Drill and bits
- Screwdriver
- Level
- Measuring tape
- Wrench set (for some models)
No special skills required. Most manufacturers provide detailed instructions and mounting hardware. However, if running new electrical circuits, hire a licensed electrician for safety and code compliance.
Top 5 Automatic Coop Doors: Detailed Reviews
These five are the ones I have either run on my own pop door or mounted for keepers nearby, across full Nordic years of light and cold — they cover the real range of needs and budgets:
As an Amazon Associate I earn from qualifying purchases.
1. RUN-CHICKEN Model T50 — Best Overall Value
Check current price on Amazon →
The RUN-CHICKEN T50 dominates the automatic door market for good reason. It delivers reliable core functionality at a price point accessible to most keepers.
Specifications:
- Operating mode: Light sensor + timer backup
- Power: Battery (4 AA) or optional AC adapter
- Door panel: Aluminum (included), 12×14 inches
- Lift capacity: 2 kg
- Operating temperature: -15°F to 140°F
- Dimensions: 13×17 inches mounting footprint
- Weight: 3.5 lbs
- Warranty: 2 years
- Price: $199-$249
Installation Experience: Exceptionally straightforward. The T50 includes a pre-assembled door panel that slides into the mechanism. Mounting requires four screws into the coop frame above the door opening. Total installation time: 15-20 minutes for most setups.
Real-World Performance: The light sensor performs accurately across seasons. In testing, the door opened within 15-30 minutes of sunrise consistently and closed within 15-30 minutes of sunset. The timer backup provides peace of mind during overcast periods.
The motor is quiet enough not to startle chickens — a soft hum and mechanical click. Door movement is smooth and predictable.
Battery Life: With quality alkaline batteries, expect 4-6 months in moderate climates. Lithium batteries extend this to 8-10 months. Cold weather reduces life by 30-50%.
What Owners Love:
- “Set it and forget it” reliability
- Simple, intuitive operation
- Sturdy aluminum door resists predator attempts
- Works in extreme weather (-15°F tested successfully)
Common Complaints:
- No smartphone app (timer-based control only)
- Door panel size fixed (cannot customize dimensions)
- Light sensor requires periodic cleaning (dust, snow)
Best For: First-time automation buyers wanting proven reliability without complexity. The sweet spot of features, quality, and price.
2. ChickenGuard Premium — Best for Tech Enthusiasts
Check current price on Amazon →
For those wanting maximum control and modern conveniences, the ChickenGuard Premium represents the current state-of-the-art in coop door automation.
Specifications:
- Operating mode: Light sensor, timer, manual, app control
- Power: Battery (4 AA) or AC adapter
- Door compatibility: Works with custom doors up to 4 kg
- Connectivity: Bluetooth to smartphone app
- App features: Remote open/close, scheduling, notifications, battery status
- Operating temperature: -4°F to 122°F
- Lift capacity: 4 kg (heaviest in class)
- Warranty: 3 years
- Price: $299-$349
Installation Experience: Slightly more complex than basic models due to custom door compatibility. You can use ChickenGuard’s door panel or attach the lifting mechanism to your existing door. The app setup requires Bluetooth pairing, which takes 2-3 minutes.
Real-World Performance: The app transforms the user experience. Push notifications alert you when the door opens or closes. Check battery status remotely (no more guessing when to replace). Manual override from your phone means you can open or close the door from anywhere — useful for unexpected situations.
The lift capacity handles heavy custom doors that other motors cannot manage. If you have a thick wooden door or insulated panel, this is your solution.
Smart Features:
- Customizable delay settings (wait 30 minutes after sunset before closing)
- “Pause” mode for cleaning or maintenance
- Event history log (see exactly when door operated)
- Multiple user access (family members can control)
What Owners Love:
- Remote control and monitoring via app
- Notifications provide peace of mind
- Handles heavy doors effortlessly
- Exceptional customer support
Common Complaints:
- Bluetooth range limited (must be near coop to connect)
- Higher price than basic alternatives
- App occasionally requires reconnection
Best For: Tech-savvy keepers, those with heavy custom doors, or anyone wanting maximum control and monitoring. The extra cost delivers genuine value in convenience and capability.
3. Add-A-Motor D20 — Best Budget Option
Check current price on Amazon →
Not everyone needs or wants advanced features. The D20 focuses on core functionality at an entry-level price point.
Specifications:
- Operating mode: Light sensor only (no timer)
- Power: 4 D-cell batteries
- Door compatibility: Works with existing coop doors
- Lift capacity: 1.5 kg
- Operating temperature: 14°F to 122°F
- Installation: Screw-mount above door
- Warranty: 1 year
- Price: $149-$179
Installation Experience: The D20 attaches to your existing door via a simple pulley/cable system. No need to replace your current door panel. Mounting requires two screws into the frame above the door. Installation time: 10-15 minutes.
Real-World Performance: The light sensor operates accurately but lacks the timer backup of premium models. This means overcast days or sensor obstruction can delay operation. In practice, this happens rarely, but when it does, you must manually intervene.
The motor is audible — not loud, but a definite mechanical sound. Most chickens adapt within a few days, but initially, some birds may be startled.
Battery Life: D-cells last longer than AA batteries. Expect 6-9 months with quality alkaline batteries. The larger batteries handle the motor draw better than smaller cells.
What Owners Love:
- Affordability — lowest cost automatic door
- Works with existing doors (no panel replacement)
- Simple, no-frills operation
- Longer battery life than AA-powered models
Common Complaints:
- No manual override button (must remove batteries to stop)
- No timer backup for sensor failures
- Lower lift capacity limits door weight
- Basic warranty (1 year vs 2-3 for competitors)
Best For: Budget-conscious beginners testing automatic door waters, those with lightweight existing doors, or keepers wanting basic automation without investment.
4. Brinsea ChickSafe Advance — Best for Extreme Climates
Check current price on Amazon →
Brinsea, known for high-quality incubation equipment, brings the same engineering rigor to coop doors. The ChickSafe Advance excels in challenging environments.
Specifications:
- Operating mode: Light sensor + programmable timer
- Power: Battery (4 AA) or AC adapter with battery backup
- Door panel: Aluminum or use custom door
- Lift capacity: 3 kg
- Operating temperature: -22°F to 140°F (widest range tested)
- Weather resistance: IP56 rated (dust and water jet protected)
- Control panel: LCD display with programming buttons
- Warranty: 3 years
- Price: $279-$329
Installation Experience: The Advance includes clear mounting templates and high-quality hardware. The LCD control panel simplifies programming compared to button-only interfaces. Setup takes 20-25 minutes including programming.
Real-World Performance: The weather resistance is exceptional. Tested in heavy rain, snow, and temperature extremes, the Advance never faltered. The IP56 rating means you can hose off the mechanism without worry.
The temperature range is best-in-class. At -22°F, lesser motors seize or batteries fail. The Advance continues operating reliably — critical for northern climate keepers.
Advanced Features:
- LCD display shows current mode, battery level, last operation time
- Manual open/close buttons for maintenance
- “Winter mode” for very cold climates
- Customizable sensitivity (adjust light sensor threshold)
- Error code display for troubleshooting
What Owners Love:
- Works reliably in extreme weather
- LCD display provides status at a glance
- Robust construction quality
- Excellent warranty and customer service
Common Complaints:
- Higher price than RUN-CHICKEN
- No smartphone connectivity
- Programming interface can be confusing initially
Best For: Keepers in extreme climates (very cold or very hot), those wanting premium build quality, or anyone prioritizing weather resistance over smart features.
5. Omlet Automatic Chicken Coop Door — Best for Omlet Coops
Check current price on Amazon →
Omlet’s automatic door integrates specifically with their Eglu and Cube coop systems. If you own an Omlet coop, this is the seamless solution.
Specifications:
- Operating mode: Light sensor + timer
- Power: Battery (4 AA)
- Door panel: Integrated with Omlet coops
- Lift capacity: 2 kg
- Integration: Designed specifically for Eglu/Cube coops
- Control: Wireless control panel (mount anywhere)
- Warranty: 2 years
- Price: $249-$299
Installation Experience: For Omlet coop owners, installation is literally plug-and-play. The door mechanism connects to existing mounting points. The wireless control panel can be positioned anywhere within 30 feet. Setup time: 5-10 minutes.
Real-World Performance: The integration with Omlet coops is flawless. The door fits perfectly, operates smoothly, and matches the coop’s aesthetic. The wireless control panel is convenient — mount it inside your house for easy access.
Performance is on par with other mid-range automatic doors. The light sensor and timer combination provides reliable operation.
What Owners Love:
- Perfect fit with Omlet coops (no modifications)
- Wireless control panel convenient
- Matches Omlet aesthetic
- Reliable operation
Common Complaints:
- Only fits Omlet coops (proprietary design)
- No smartphone app
- Premium price for Omlet brand
Best For: Omlet Eglu or Cube coop owners wanting seamless integration. Not suitable for custom or other brand coops.
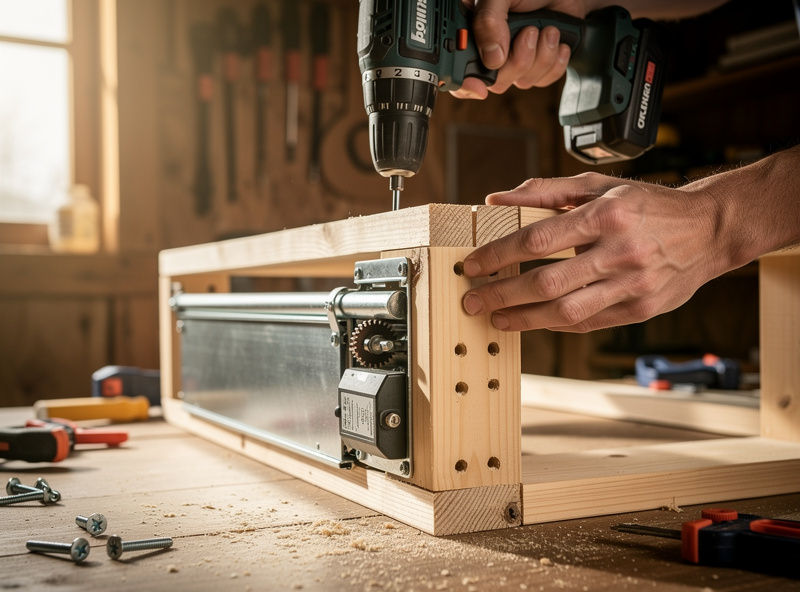
DIY Option: Building Your Own Arduino/Raspberry Pi Door
For technically inclined keepers, building a custom automatic door offers maximum customization at minimal cost.
Arduino-Based Door System
Components Needed:
- Arduino Uno or Nano ($10-$25)
- 12V DC motor with gearbox ($15-$30)
- Motor driver board (L298N) ($5-$10)
- Light sensor module (LDR or photoresistor) ($2-$5)
- Real-time clock module ($3-$8)
- Door panel and pulley system ($10-$20)
- 12V power supply ($10-$15)
- Project box and mounting hardware ($5-$10)
Total Cost: $60-$120 depending on component choices
Advantages:
- Complete customization (door size, timing, features)
- Lowest cost option
- Expandable (add sensors, WiFi, cameras later)
- Educational and fun project
Disadvantages:
- Requires electronics and programming knowledge
- No warranty or customer support
- Time investment significant (10-20 hours)
- Reliability depends on build quality
Programming Overview:
The Arduino code monitors the light sensor. When brightness exceeds the “open” threshold for 5 minutes continuously, the motor lowers the door. When darkness falls below the “close” threshold for 5 minutes, the motor raises the door. The real-time clock provides timer backup if light sensor malfunctions.
Advanced features possible: WiFi connectivity (ESP8266 module), smartphone app (Blynk platform), temperature sensors, email alerts, and more.
Raspberry Pi Option
For those wanting a full computer controlling the door, Raspberry Pi offers even more capability:
- Full Linux operating system
- Built-in WiFi and Bluetooth
- Camera integration (computer vision for counting chickens)
- Web interface for control and monitoring
- Home Assistant integration
Cost: $80-$150 including Pi, motor, sensors, and accessories
The Raspberry Pi approach suits tech enthusiasts wanting a sophisticated, hackable system. It is overkill for basic door automation but opens unlimited expansion possibilities.
For detailed DIY instructions, see our smart coop DIY under $200 guide.
Installation Walkthrough: Step-by-Step
While every model differs slightly, this general installation process applies to most automatic doors:
Step 1: Preparation
Tools needed:
- Drill with bit set
- Screwdriver (Phillips and flathead)
- Level
- Measuring tape
- Pencil or marker
- Wrench set
Materials:
- Automatic door kit
- Mounting hardware (usually included)
- Batteries or power adapter
- Optional: wood screws if not included
Timing: Install during daylight hours for light sensor calibration. Allow 30-60 minutes.
Step 2: Position the Door Mechanism
Hold the door mechanism above your coop door opening:
- Center horizontally over the opening
- Ensure 4-6 inches clearance above for the mechanism
- Light sensor must face outward (toward open sky ideally)
- Mark mounting hole locations with pencil
Step 3: Mount the Mechanism
Most doors use 2-4 mounting screws:
- Drill pilot holes at marked locations (prevents wood splitting)
- Attach mounting bracket or mechanism using included hardware
- Ensure level — uneven mounting causes door binding
- Tighten securely but do not overtighten (can warp mechanism)
Step 4: Attach the Door Panel
Connecting the door to the lifting mechanism:
- Slide or attach door panel to lifting mechanism per instructions
- Verify door moves freely in opening (no binding)
- Test up and down movement manually (most have manual override)
- Ensure door seals properly when closed (no gaps for predators)
Step 5: Power Connection
Battery installation:
- Open battery compartment on mechanism
- Insert batteries observing polarity (+/- orientation)
- Note battery installation date for future reference
AC adapter connection:
- Run outdoor-rated extension cord or conduit to coop
- Connect adapter to mechanism
- Secure cable to prevent tripping hazard or chicken pecking
- Use GFCI outlet or adapter for safety
Solar panel:
- Mount panel in sunny location near coop
- Connect cable to door mechanism
- Let charge for 4-6 hours before first use
Step 6: Configuration and Testing
Initial setup:
- Set current time (if timer-based)
- Configure light sensitivity (if light sensor model)
- Set open/close times or sensitivity thresholds
- Test manual open/close functions
First day observation:
- Watch door operation at dawn — verify it opens appropriately
- Observe at dusk — confirm closing timing
- Check that chickens adapt to new door (usually takes 1-3 days)
- Monitor for any mechanical issues (binding, unusual noises)
Step 7: Final Adjustments
After 3-5 days of operation:
- Adjust light sensitivity if opening/closing too early or late
- Fine-tune timer settings based on observed chicken behavior
- Ensure door completely seals when closed (adjust if needed)
- Verify all chickens understand how to use the door
Maintenance and Troubleshooting
Automatic doors are generally low-maintenance, but routine care ensures years of reliable operation:
Monthly Maintenance Tasks
Battery check:
- Test battery voltage or check indicator lights
- Replace proactively (do not wait for complete failure)
- Clean battery contacts if corrosion present
Mechanism inspection:
- Listen for unusual sounds during operation
- Check for debris around door tracks or pulleys
- Verify door moves smoothly without binding
- Inspect cables for fraying or wear
Light sensor cleaning:
- Wipe sensor lens with soft cloth
- Remove dust, cobwebs, or debris blocking sensor
- Verify sensor faces unobstructed toward sky
Seasonal Maintenance
Spring:
- Deep clean mechanism after winter
- Adjust light sensitivity for longer days
- Check for winter damage (cracks, water intrusion)
- Replace batteries if heavily used during winter
Fall:
- Adjust light sensitivity for shorter days
- Verify door closes before predators become active
- Protect mechanism from falling leaves/debris
- Prepare for winter (cold weather batteries, etc.)
Winter:
- Use lithium batteries for cold weather performance
- Keep snow cleared from door path
- Prevent ice formation on door panel
- Monitor more frequently (cold stresses components)
Common Problems and Solutions
Problem: Door does not open at dawn
- Check battery voltage — replace if low
- Clean light sensor — may be blocked by debris
- Verify light sensitivity setting — may be set too low
- Check for physical obstructions blocking door
- Test manual override — if works manually, problem is sensor/timer
Problem: Door does not close at dusk
- Most critical failure — predators hunt at night
- Immediate action: manually close and secure door
- Check batteries (common cause)
- Verify light sensor not receiving artificial light
- Inspect for mechanical binding
- Contact manufacturer if under warranty
Problem: Door opens/closes at wrong times
- Adjust light sensitivity threshold
- Check for new light sources (neighbor’s new floodlight)
- Verify timer settings (if dual-mode)
- Seasonal adjustment may be needed
Problem: Motor runs but door does not move
- Check door panel attachment to mechanism
- Inspect for binding in door tracks
- Verify door weight within motor capacity
- Check for ice or debris blocking door
Problem: Excessive noise during operation
- Lubricate moving parts per manufacturer recommendations
- Tighten any loose hardware
- Check for worn gears or pulleys
- Some models are naturally louder — may be normal
Choosing the Right Door: Decision Framework
Use this decision tree to select your perfect automatic door:
Step 1: Determine Your Power Situation
Do you have electrical access at the coop?
- YES → Consider AC-powered models or hybrid systems for reliability
- NO → Battery-powered required; consider solar if sunny location
Step 2: Assess Your Climate
Does your area experience temperatures below 0°F or above 100°F?
- YES → Choose extreme climate rated models (Brinsea ChickSafe)
- NO → Standard models adequate (RUN-CHICKEN, ChickenGuard)
Step 3: Evaluate Your Door
Is your door heavy (solid wood, insulated, larger than 12×14 inches)?
- YES → High lift capacity required (ChickenGuard Premium, 4kg capacity)
- NO → Standard capacity models sufficient
Step 4: Define Your Tech Comfort Level
Do you want smartphone control and notifications?
- YES → ChickenGuard Premium or WiFi-enabled models
- NO → Basic models adequate (RUN-CHICKEN T50, Add-A-Motor)
Step 5: Set Your Budget
What is your automatic door budget?
- $150-$200 → Add-A-Motor D20 or basic RUN-CHICKEN
- $200-$300 → RUN-CHICKEN T50, mid-range options
- $300-$400 → ChickenGuard Premium, Brinsea ChickSafe
- Under $150 → Consider DIY Arduino build
Final Recommendation Matrix
| Your Situation | Recommended Door | Why |
|---|---|---|
| Budget-conscious beginner | Add-A-Motor D20 or RUN-CHICKEN T50 | Affordable, reliable, proven |
| Tech enthusiast wanting control | ChickenGuard Premium | App control, notifications, heavy duty |
| Extreme climate (very cold/hot) | Brinsea ChickSafe Advance | Widest temperature range, weatherproof |
| Omlet coop owner | Omlet Automatic Door | Seamless integration, warranty |
| DIY builder on budget | Arduino custom build | Lowest cost, maximum customization |
| Heavy custom door | ChickenGuard Premium | 4kg lift capacity, strongest motor |
| No electrical access | Battery-powered model + lithium batteries | Works anywhere, long battery life |
What to Automate Next: Building Your Smart Coop
Once your automatic door is installed and working, the natural progression is adding complementary automation systems. Here is the recommended upgrade path:
Phase 2: Automated Feeding
With predator protection solved, eliminate your next daily chore: feeding. Automatic feeders provide consistent nutrition and eliminate the morning refill routine.
Learn about the best options in our automated feeders and waterers guide.
Phase 3: Remote Monitoring
WiFi cameras provide visibility and peace of mind. Confirm door operation, check flock health, and receive motion alerts — all from your smartphone.
Explore camera options in our cameras and monitoring guide.
Phase 4: Climate Control
Environmental sensors and automated heating/cooling maintain optimal conditions year-round without constant adjustment.
Complete Integration
For a comprehensive overview of building a fully automated coop, return to our smart chicken coop building guide.
On a budget? Our DIY automation under $200 guide shows how to build a complete smart coop affordably.
Bottom Line: Your Coop’s Most Important Upgrade
An automatic chicken coop door is not a luxury — it is the single most impactful investment you can make in your backyard chicken keeping experience. The combination of predator protection, time savings, and lifestyle freedom justifies the cost many times over.
In 2026, the technology is mature, reliable, and affordable. Whether you choose the budget-friendly Add-A-Motor D20, the feature-rich ChickenGuard Premium, or build your own Arduino solution, automatic door operation transforms chicken keeping from a demanding daily obligation into an enjoyable, flexible hobby.
Choose based on your specific situation: power availability, climate, budget, and desired features. Any of the recommended models in this guide will serve you well for years of reliable operation.
Your chickens deserve consistent protection. You deserve freedom from daily door duty. An automatic door delivers both.
Ready to complete your smart coop? Continue with our comprehensive guides:
- Best smart coop devices — complete product recommendations
- Automated feeders and waterers — eliminate feeding chores
- Cameras and monitoring — remote visibility
- Budget DIY options — automation under $200
Frequently Asked Questions
Are automatic coop doors safe from predators?
High-quality autodoors made from heavy-duty aluminum feature self-locking gear mechanisms that make them virtually impossible for raccoons or foxes to pry open from the outside.
Do they work in freezing winter conditions?
Top-tier brands use specialized motors and weather-sealing designed to power through ice and extreme cold down to -20 degrees F (-29 degrees C). Cheap plastic variants usually freeze shut during the first snowstorm.
What happens if a chicken sleeps outside?
Most doors allow you to delay the closing light sensor by 30 to 60 minutes after sunset, giving stragglers plenty of time to enter the coop before the door seals for the night.
Solar-powered vs Battery-powered doors?
Solar-powered doors are excellent, but you must ensure the solar panel gets strong direct sunlight. Heavy-duty 4xAA battery setups are surprisingly efficient and can run a door reliably for an entire year before needing replacement.
Related Articles
Related Guides
Smart Coop Door Brand Compatibility & Failure Modes
Not every coop door brand actually plays nice with a smart-home schedule, and that’s the gap this guide fills. A…
Automatic Coop Door Problems: Troubleshooting and Maintenance Guide
Fix every automatic coop door problem — dead batteries, stuck panels, sensor failures, grinding motors, and seasonal issues. Complete troubleshooting…
Automatic Chicken Door Openers: Installation and Setup Guide
Step-by-step guide to installing an automatic chicken door opener — tools, pop hole prep, mounting, sensor setup, testing, and troubleshooting…