Smart chicken coop size starts with the same square-foot-per-bird math as any coop — 3–4 sq ft inside, 8–10 sq ft of run per bird — but adds 6–10 sq ft of “automation zone” for the auto door clearance, sensor mounting, camera coverage, electrical access, and ventilation fan placement. Skipping this adder is the most common reason smart coops feel cramped 6 months after install — the mistake I see most often on coops I’ve been asked to retrofit for other keepers.
This guide covers the smart-specific sizing factors that the general chicken coop size guide does not address: where automation hardware actually goes, how it changes your interior layout, and what to plan for future expansion. For overall flock-count math, start with the general guide first, then come back here for the smart adders.
The Smart Coop Footprint Adder
A 4×6 coop sized for 6 birds at 4 sq ft per bird is technically code — but stuffing automation into 24 sq ft creates problems. The realistic smart coop minimum:
| Flock Size | Manual Coop | Smart Coop | Adder Reason |
|---|---|---|---|
| 3–4 birds | 4×4 (16 sq ft) | 4×6 (24 sq ft) | Door clearance, sensor mount, electrical box |
| 5–6 birds | 4×6 (24 sq ft) | 4×8 (32 sq ft) | Adds camera mount, ventilation fan, vapor barrier room |
| 7–8 birds | 4×8 (32 sq ft) | 6×8 (48 sq ft) | Walk-in becomes optional, easier maintenance access |
| 9–12 birds | 6×8 (48 sq ft) | 8×8 or 8×10 (64–80 sq ft) | Multi-zone climate control, dual auto doors |
| 13–20 birds | 8×10 (80 sq ft) | 8×12 or 10×12 (96–120 sq ft) | Service aisle, dedicated electrical bay |
The smart coop adder runs 30–50% larger than a comparable manual coop. The cost premium is small ($150–$400 in extra lumber) and the benefit is big: maintenance and inspection become easy instead of crawl-space awkward.
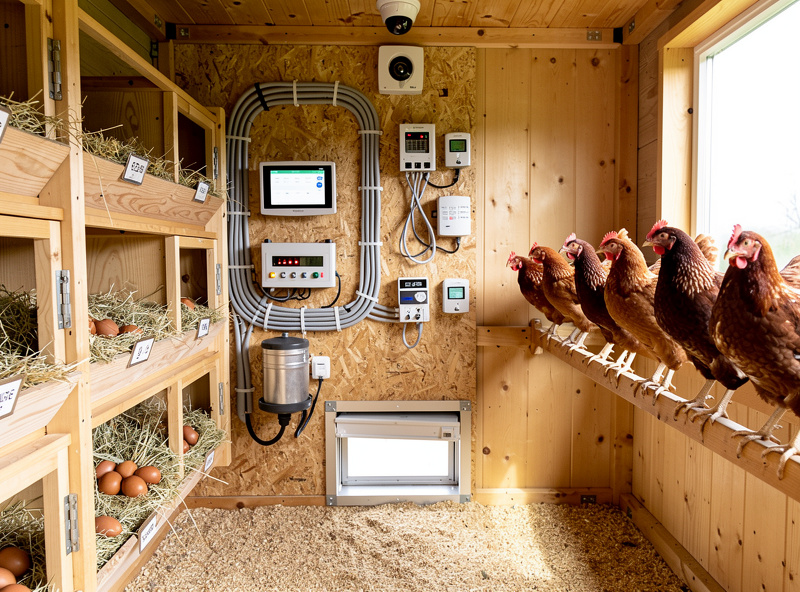
The Automation Zone
Plan a dedicated “automation zone” inside the coop — typically 12–18 inches deep along one wall — that holds:
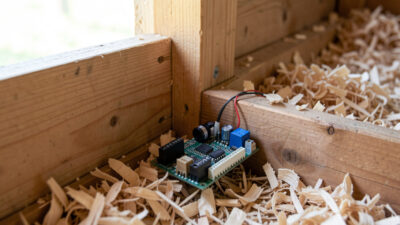
- The 12V distribution block and fuses
- The AC-to-DC power supply (or battery + charge controller for off-grid)
- WiFi access point or repeater (if signal needs boost)
- Cable termination and labeling card
This zone goes inside the coop in a dust-protected enclosure (a small wall-mounted electrical box or a hinged plywood compartment). It needs:
- Adequate ventilation to keep electronics cool
- Distance from waterer splash (3+ feet)
- Wall-mounted, never floor-mounted (cold air pools low)
- Easy access without removing nesting boxes or roosts
Most builders find a 2×3 ft area on the inside of the people door — at chest height when the door is open — works perfectly. It is reachable, dry, and out of the chickens’ way. For wiring layout details, see our smart chicken coop wiring guide.
Auto Door Clearance Zone
Auto doors need room to operate that manual doors do not:
- Vertical track clearance: 6–8 inches above the door opening for the gear mechanism. Most coop walls are 6 ft tall, leaving 5’4″ usable above a 16″ door — fine.
- Inside floor clearance: 2–3 feet of unobstructed space inside the door so chickens can enter and exit without traffic jams. Roosts and feeders should not block this lane.
- Outside ramp/platform: A 12×18 inch landing platform at door height prevents wet/muddy ground at the door from soaking into the coop.
Skipping the inside clearance creates the #1 frustration: bossy hens block timid hens at the door, and the timid hens get caught outside at dusk. A 3-foot interior runway in front of the auto door eliminates this.
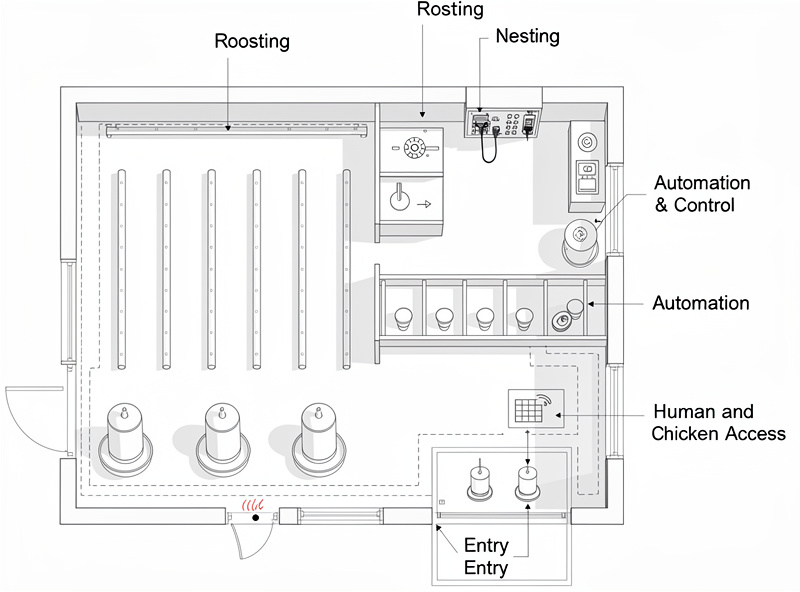
Camera Coverage Geometry
For one camera to cover the roost, door, and feeding area in a single frame, the room shape matters:
| Coop Shape | Camera Position | Coverage |
|---|---|---|
| Square (4×4, 6×6) | One corner, high | Full, ideal |
| Long rectangle (4×8) | Short-end corner, high | Full but narrow angle |
| Wide rectangle (6×8) | One corner, high | Full, slightly stretched |
| Walk-in (8×10+) | Two cameras: roost end + service aisle | Full with two angles |
Walk-in coops over 64 sq ft typically need two cameras for full coverage. Plan that into the wiring during the build — running a second cable later means wall-fishing, which is a half-day of work.
Ventilation Fan Sizing and Placement
Smart coops with climate control need a controllable ventilation fan. The fan size depends on coop volume:
- Small coop (under 32 sq ft): A single 80mm 12V computer fan (15–25 CFM) handles ventilation for $15–$25. Usually mounted high on a back wall.
- Medium coop (32–64 sq ft): A 120mm 12V fan or a small attic-style 4″ inline fan (50–80 CFM). $25–$45.
- Large coop (64+ sq ft): 6″ inline fan, two 120mm computer fans, or a small dual-fan setup with thermostatic control. $45–$90.
Plan fan placement during the build — high on the gable end, with intake vents low on the opposite wall. Dust filtering on the intake (a basic foam filter) extends fan life from 2 years to 5+.
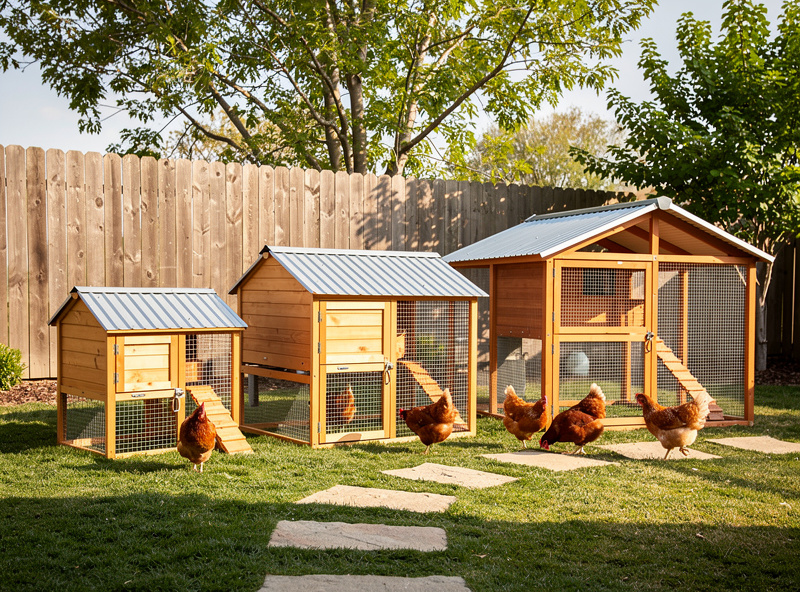
Future Expansion Planning
The single biggest sizing mistake is matching coop size to current flock. “Chicken math” is close to a universal law among backyard keepers — most who start small end up adding birds within a year or two, whether by design or because a hatchery minimum-order forced their hand. Build for a flock 50% larger than what you start with:
| Starting Flock | Build For | Why |
|---|---|---|
| 3–4 birds | 6 birds | You will add 2 birds within a year |
| 4–6 birds | 8 birds | Common growth path, lets you handle losses |
| 6–8 birds | 10–12 birds | Egg-share with neighbors, integrate younger flock |
| 10+ birds | 15+ birds | Production becomes the focus, plan for breed mix |
The marginal cost of building 30–50% larger upfront is small. The cost of expanding a smart coop later — running new wiring, recalibrating sensors, repositioning cameras — typically equals 60–80% of building the right size from scratch.
Climate Zone Sizing Adders
Zone numbers below follow the USDA Plant Hardiness Zone Map — the same zones gardeners use, based on average annual extreme minimum winter temperature. On my own cold-climate Swedish winters, the interior-space adder is the one I’d never skip; it’s what buys room for the heated waterer bay without crowding the roost.
| Climate | Adder | What It Buys |
|---|---|---|
| Zone 3–4 (very cold) | +15–20% interior space | Insulation thickness, larger heated water bay |
| Hot/humid (zone 8–10) | +20–25% ventilation cross-section | Larger vents, room for misting system, shade structure |
| Heavy snow load (40+ psf) | +25% for steeper roof pitch | Snow shedding, structural integrity |
| High wind | +10% for thicker framing | Wind resistance, anchor points |
These compound. A zone 3 coop with heavy snow load adds 35–40% to the standard smart coop footprint compared to a temperate-climate equivalent.
Run Sizing for Smart Coops
The 8–10 sq ft per bird run guideline still applies, but smart coops add three considerations:
- Outdoor camera coverage. An external camera on the run side covers the door area but needs a power and cable run. Plan its mount during framing.
- Predator deterrent zones. Motion-sensor lights work best at the run perimeter, not inside the coop. Plan light pole or eave mount locations.
- Maintenance access. A smart run is bigger than a manual run because you need walking room to clean, inspect, and refresh. Add 20% to the bare-minimum run footprint.
For a 6-bird flock: standard run 60 sq ft, smart-friendly run 72–80 sq ft. The extra space is forgiving when chickens hide eggs in run corners or when you need to catch one for inspection.
The “Built Right” Sizes
If you take only one set of numbers from this guide, use these — the realistic, future-proof smart coop sizes most readers should target:
| Flock | Coop Size | Run Size | Total Footprint |
|---|---|---|---|
| 4–6 birds | 4×8 (32 sq ft) | 8×10 (80 sq ft) | ~120 sq ft |
| 6–8 birds | 6×8 (48 sq ft) | 10×10 (100 sq ft) | ~150 sq ft |
| 8–12 birds | 8×8 (64 sq ft) | 10×12 (120 sq ft) | ~190 sq ft |
| 12–20 birds | 8×12 (96 sq ft) | 12×16 (192 sq ft) | ~290 sq ft |
These are sized for current flock + expected expansion + automation hardware. The cost premium over manual-coop sizing is 15–25% — recovered in maintenance ease and resale value.
Common Sizing Mistakes
- Building exactly to current flock count. Chicken math catches most keepers — the flock that started at 4 becomes 6 or 8 within a year or two. The undersized coop becomes obsolete fast.
- Forgetting service aisle on walk-ins. A walk-in coop needs 24–30″ of human walking space. Subtract that from your interior square footage.
- Ignoring vapor barrier room. Insulated walls add 4–6″ of thickness. A 4×8 framed coop has only 3’4″ x 7’4″ of interior floor space if walls are insulated 2×4.
- Sizing the run too small. Chickens spend 80% of waking hours in the run. Cramped runs = bored, picking flocks. Always go bigger on run space if you have to choose.
- Putting the coop in the wrong orientation. Door facing east/southeast gives best morning light for auto-door sensors. On the light-triggered doors I’ve mounted facing north, winter trigger timing runs noticeably later and less consistent — an astro-schedule (sunrise/sunset offset, not a raw light sensor) sidesteps the problem entirely.
Frequently Asked Questions
How big should a smart chicken coop be for 6 chickens?
A 4×8 coop (32 sq ft) plus a 8×10 run (80 sq ft) is the right size for 6 chickens with full smart automation. The extra footprint over a manual 4×6 covers the automation zone, ventilation fan placement, and easy maintenance access without crowding the flock.
Do smart chicken coops need more space than regular coops?
Yes, typically 30–50% more interior space. Manual coops can run 4 sq ft per bird; smart coops need 5–6 sq ft per bird to accommodate the automation zone, sensor mounts, ventilation fans, and proper service access without crowding the chickens.
How much space do automation components take up inside a coop?
Plan a 12–18 inch deep automation zone along one wall plus a 24×36 inch wall area for the distribution block, power supply, and labeling. Total dedicated space runs 6–10 sq ft for a typical 4–8 bird coop, separate from the chicken living area.
Should I build my smart coop bigger than my current flock needs?
Yes — chicken math means most keepers who start small end up adding birds within a year or two. Build for a flock 50% larger than your starting size. The extra lumber adds $150–$400 upfront; expanding a smart coop later costs 60–80% of building right initially because of wiring and sensor recalibration.
What size run does a smart chicken coop need?
The standard 8–10 sq ft per bird still applies, plus 20% for human maintenance access. For a 6-bird flock, plan an 80–100 sq ft run. Cramped runs cause boredom and pecking — when in doubt, prioritize run size over coop size for healthier birds.
Where should the automation electronics go in the coop?
Mount the distribution block, power supply, and any WiFi gear at chest height on the inside of the people door, in a dust-protected enclosure. Stay 3 feet from waterer splash zones, never floor-mount (cold pools low), and ensure adequate ventilation around any electronics.
Related Articles
Related Guides
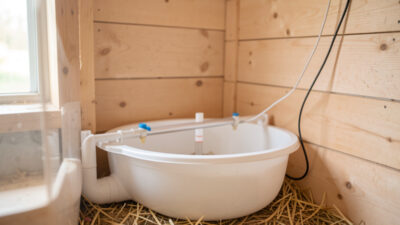
Water-Level and Flow Sensors: Knowing the Waterer Is Empty Before They Do
A coop water-level sensor tells you the drinker is going dry — or freezing solid — before the flock does,…
Ammonia Sensors for the Coop: Catching Air Problems Before You Smell Them
An ammonia sensor belongs at the birds’ breathing height, close to the litter where the gas is generated, because that…

Node-RED vs Home Assistant Automations for the Coop: When to Use Which
Use native Home Assistant automations for the coop’s simple, safety-critical rules — the sunrise door, the freeze-watch waterer — and…