Smart chicken coop wiring typically combines a single 20-amp 110V circuit from the house panel for AC loads with a separate low-voltage 12V loop for door, sensors, and camera. Run both in conduit, fuse every device, and label every conductor — coop wiring fails most often from corrosion and rodent damage, not undersizing.
This guide covers the electrical layout that supports a full smart automation stack: conduit routing, wire gauges, GFCI placement, low-voltage runs, and the small details (drip loops, drain holes, junction box rated for damp locations) that separate a five-year install from a five-month one. For the bigger build context, see our complete smart chicken coop guide.
As an Amazon Associate I earn from qualifying purchases.
The Two-Circuit Approach
Modern smart coops almost always run on two parallel electrical systems. Mixing them on a single voltage causes three problems: corrosion accelerates on AC connections in damp environments, low-voltage devices waste power through inverter conversion, and a single fault can take everything offline.
The clean approach is:
- 110V AC circuit — single dedicated 20-amp breaker from the house panel feeding a weatherproof outlet inside the coop. Powers heat lamps, heated waterers, AC cameras, occasional shop tools.
- 12V DC loop — a separate distribution block fed by either an AC-to-DC power supply (if grid-tied) or a solar/battery setup (if off-grid, see our off-grid solar setup guide). Powers automatic doors, sensor hubs, LED strips, 12V cameras.
Each system handles what it does well. AC delivers high-wattage heat efficiently. DC runs sensitive electronics on regulated voltage with no inverter losses or surge concerns.
Sizing the AC Feed from the House Panel
For a 4–8 bird smart coop with full automation, a single 20-amp 110V circuit is enough. The realistic peak load is 1,200–1,500W (heated waterer + heat lamp + a few small electronics), well under the 1,920W safe continuous capacity of a 20-amp circuit at 80% derating.
Wire gauge depends on the run length from the house panel:
| Run Length | Wire Gauge | Voltage Drop at 16A | Notes |
|---|---|---|---|
| Under 50 ft | 12 AWG | 2.5% | Standard 20-amp circuit, indoor or outdoor rated |
| 50–100 ft | 10 AWG | 2% | Worth the upsize; one wire size handles future expansion |
| 100–150 ft | 10 AWG (or 8 AWG) | 3% | Step to 8 AWG if running near 16A peak loads |
| Over 150 ft | 8 AWG minimum | 2.5% | Consider a sub-panel at the coop instead |
Voltage drop above 3% causes problems for inductive loads (motors, compressors) and shortens the life of AC-to-DC power supplies feeding the low-voltage loop. The extra cost of one wire size up is small — a 100-foot run of 10 AWG vs 12 AWG UF-B cable is roughly $25 more.
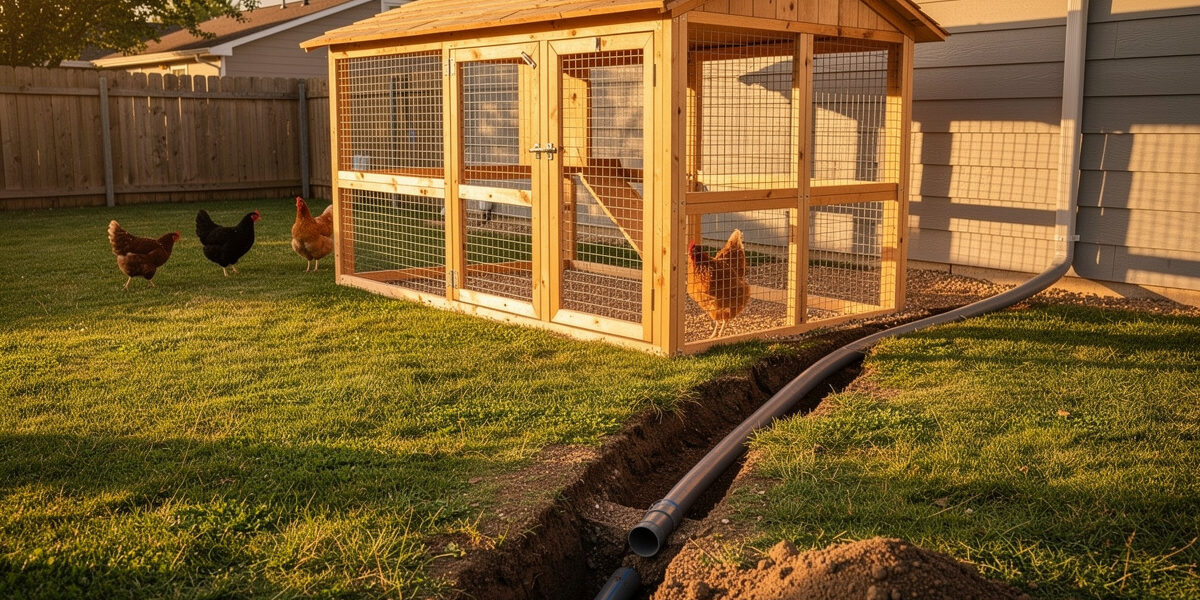
Conduit and Burial
For coops more than 10 feet from the house, run the AC feed in conduit and bury it. Direct-burial UF-B cable buried 24 inches deep without conduit is code-legal in most US jurisdictions but a bad idea around livestock — predators dig, rodents chew, and ground frost cycling damages insulation over 5+ years.
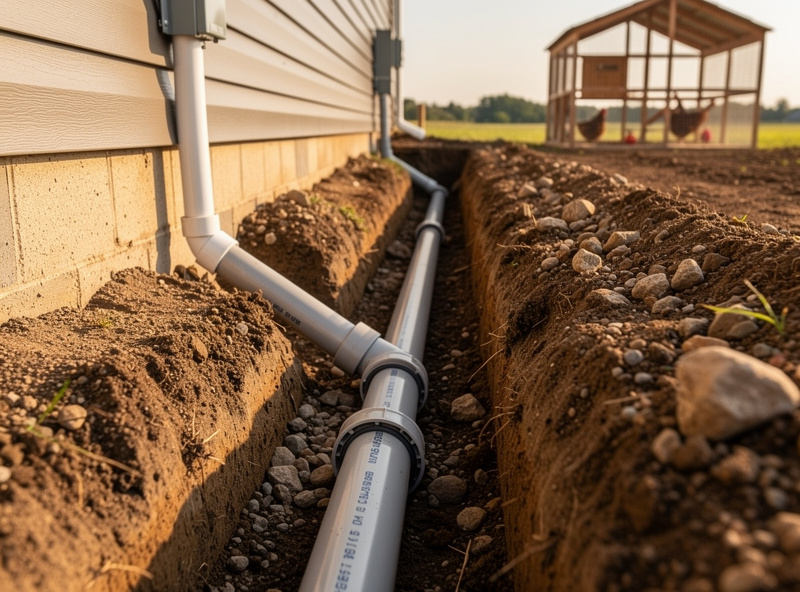
Three burial options work for backyard coops. Per NEC Table 300.5, PVC conduit generally needs 18 inches of cover, but a residential 120V circuit at 20A or less with GFCI protection — which is exactly the setup this guide sizes — qualifies for a 12-inch minimum regardless of wiring method. I still run 18 inches on my own trenches even where 12 would pass inspection; a few extra inches of cover is cheap insurance against a shovel or a future fence-post auger, and it is not extra money once you are already renting a trencher for the day.
- 3/4″ PVC schedule 40 conduit, 18″ deep — code-compliant for residential branch circuits, $0.85/foot for conduit plus dig labor. The standard choice.
- 1/2″ liquid-tight flexible nonmetallic conduit (LFNC), 12″ deep — for short runs where rigid PVC is awkward, using the GFCI-protected depth allowance above. Slightly more expensive but bends around obstacles.
- 1″ PVC conduit, 18″ deep — pulls double duty: 12 AWG AC inside, low-voltage cable also pulled later. The smartest choice for new builds.
That last option matters. Pulling low-voltage cable through a separate conduit costs you another full trench day. Pulling it through the same 1″ conduit later (with the AC wire already in place) takes 30 minutes. Run a fish tape and a pull string in every conduit you bury, even ones you think are full.
Where the AC Circuit Lands at the Coop
The AC feed should terminate at a single weatherproof in-use cover (the bubble-style cover that lets you plug things in while keeping the cover closed). Mount it inside the coop or in an attached overhang — never on an exterior wall exposed to direct rain.
From that outlet:
- One GFCI breaker at the house panel protects the entire run — NEC 210.8 requires GFCI protection on any 15- or 20-amp 110V outlet in a damp or wet location, which a coop outlet always is.
- One in-use cover at the coop — protects the plug when raining or snowing.
- One short extension cord (12 gauge, outdoor rated) from that outlet to the AC-to-DC power supply that feeds the 12V loop. Or hardwire it into a junction box.
Avoid the temptation to chain a power strip off that single outlet. Use a small load center if you need multiple AC devices, or run a second circuit. Power strips are not rated for damp-location permanent installation and they fail quietly.
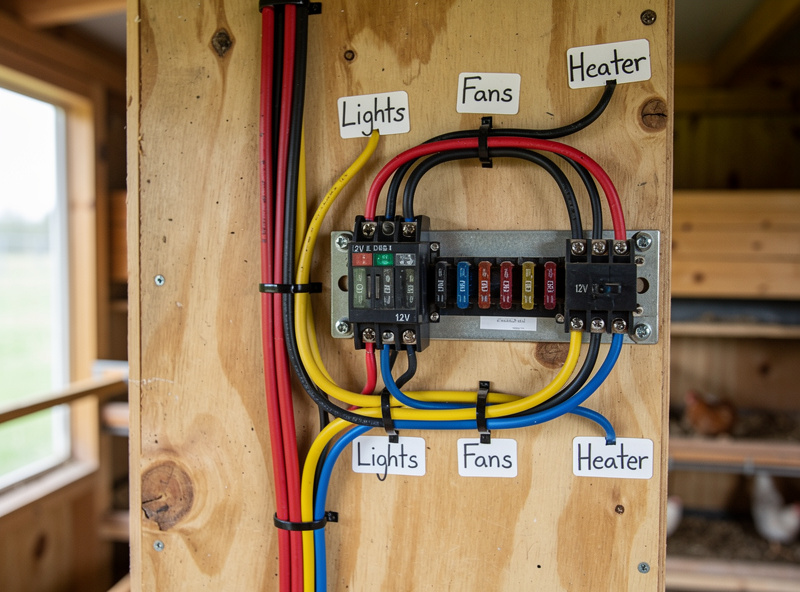
The 12V Distribution Block
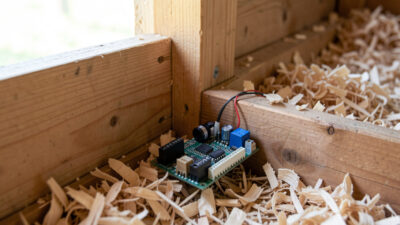
Inside the coop, a fused 12V distribution block is the heart of the smart system. A typical layout:
- Power source — 60W AC-to-DC power supply (12V, 5A) sized to peak DC load with headroom. $25–$45 for a quality unit with a metal enclosure. For off-grid setups, this is replaced with a battery + charge controller — a 12V solar panel kit does the same job without a house-panel feed at all; see the off-grid solar setup guide for sizing.
- Distribution block — 6 to 12 fused circuits, ATC-style blade fuses. $20–$35.
- Common ground bar — single-point ground for all 12V negative returns. Eliminates ground loops that cause camera and sensor noise. This one is worth taking seriously: the first time I ran a PoE camera feed into my Home Assistant NVR without a proper single-point ground, I got a faint rolling bar across the night-vision feed for two weeks before I traced it back to a return path fighting itself through two separate grounds.
Each device gets its own fuse sized to the device’s max draw plus 25%: a 5W camera (0.4A) gets a 1A fuse, a 10W door motor gets a 2A fuse, a 30W LED strip gets a 5A fuse. Fuses are cheap insurance — a single shorted wire without a fuse can cook the power supply, the wiring, and any device on the same rail.
Low-Voltage Wire Gauges
Voltage drop matters more on 12V than 110V because percentages add up fast. Here is the real-world wire chart for typical smart coop devices:
| Device | Current | Run Length | Wire Gauge |
|---|---|---|---|
| Auto door (active) | 1A | Under 25 ft | 18 AWG |
| WiFi camera (12V) | 0.5A | Up to 50 ft | 20 AWG |
| LED light strip (10ft) | 2A | Up to 25 ft | 16 AWG |
| LED light strip (10ft) | 2A | 25–50 ft | 14 AWG |
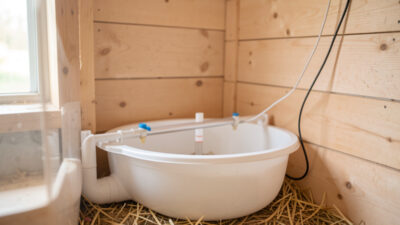
| Heated waterer base (12V) | 3.5A | Up to 25 ft | 14 AWG |
| Sensor hub trunk | 0.5A | Any length | 18 AWG twisted pair |
One mistake first-timers make is using 22 or 24 AWG “thermostat wire” for everything because it is cheap. It works for low-current sensors but causes voltage sag on cameras and LED strips that makes them flicker or shut down at full load. 18 AWG is the practical floor for any device with a real load.
Data and Network Cabling
Most modern smart coops use WiFi for camera and sensor backhaul, but a single CAT6 ethernet drop into the coop solves three problems at once: it gives a stable hard-wired option for a 4K camera, it provides PoE (power over ethernet) for any PoE-enabled device, and it future-proofs the coop for mesh node placement. For range and signal-strength sizing, see our forthcoming chicken coop WiFi guide.
If you run ethernet:
- Outdoor-rated CAT6 (UV-resistant jacket) in the same conduit as the AC feed (separate conduit if local code requires).
- Surge protector at both ends — a $20 inline ethernet surge protector at the house panel prevents lightning damage from carrying back into your home network.
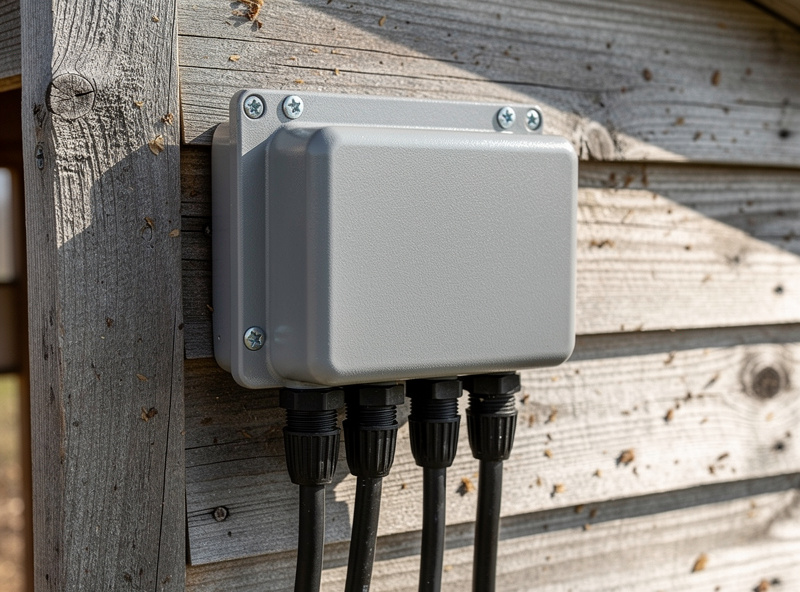
- Termination inside the coop in a weatherproof enclosure — never leave a bare jack exposed to coop dust and ammonia.
Weatherproofing Details That Matter
The wiring failures that show up at the 18-month mark almost always trace back to four issues:
- No drip loops. Cables entering the coop from above should hang in a U shape so water runs off the low point of the loop, not down the cable into the wall penetration.
- No drain holes in junction boxes. Sealed boxes condense moisture inside and trap it. A single 1/8″ drain hole at the lowest point of every outdoor box prevents standing water and corrosion.
- Cheap connectors. Wire nuts in damp environments fail in 1–2 years — I know this one first-hand, because a wire-nutted junction on an early sensor run corroded green inside eighteen months and took a temperature probe down with it. Use silicone-filled connectors (DryConn, Wago 221 with gel) or proper waterproof cable connectors for any outdoor or below-grade splice.
- Unprotected wire entries. Where any cable enters the coop, use a strain relief gland or a cordgrip — not just a hole drilled through plywood. Rodent-chewed cables are the #1 fire risk in coops.
Labeling and Documentation
Every conductor and every device gets a printed label. Five years from now when a sensor flakes out, you want to know which fuse it sits behind without tracing wires through a dusty crawl space.
The minimum standard:
- Each fuse on the distribution block: device name + amp rating
- Each cable at both ends: source and destination (e.g., “DIST → CAM-1”)
- One laminated card on the inside of the access panel: full circuit diagram with device list, fuse map, and the date it was installed
This is the single highest-payoff 30 minutes of the entire wiring job. My own laminated card has saved me twice — once tracing a nuisance-tripping fuse back to a shorted LED strip in under five minutes instead of an afternoon, and once handing a neighbor the map when I was out of the country and a sensor needed swapping. A good baseline diagram template lives in our main smart coop guide under documentation.
Total Wiring Cost
| Tier | What It Includes | Materials Cost |
|---|---|---|
| Minimum (existing nearby outlet) | Outdoor extension cord, single outlet, 12V power supply, 6-circuit distribution block | $80–$130 |
| Standard (new dedicated circuit) | 50ft 12 AWG UF-B in 3/4″ conduit, GFCI breaker, in-use outlet, 12V loop | $220–$320 |
| Full smart-ready (new circuit + ethernet) | 50ft 10 AWG in 1″ conduit + outdoor CAT6, surge protectors, 12-circuit DC distribution | $380–$540 |
| Long run with sub-panel | 150ft 8 AWG in conduit, small sub-panel at coop, GFCI breakers, full DC loop | $650–$950 |
The standard tier covers most backyard installs. The smart-ready tier is the better value for new builds — the conduit upsize and ethernet drop during initial trenching cost $80–$110 more and save a future trench day.
When to Hire an Electrician
Pulling a new branch circuit from your house panel is licensed-electrician work in most US jurisdictions. A typical 50–100 ft branch circuit with GFCI protection and a single outlet runs $350–$700 in labor on top of materials.
Where you can DIY without a permit (in most areas):
- Plugging a 12V power supply into an existing outlet
- Running 12V/24V low-voltage wiring inside the coop
- Installing fused distribution blocks and connecting smart devices
- Mounting and connecting low-voltage cameras and sensors
The DIY-only side covers the 12V smart loop entirely. If you have an existing outlet within 50 feet of the coop, you can build a complete smart automation stack without ever pulling permits. Our DIY automation under $200 guide works through that path step by step.
Frequently Asked Questions
Can I run a chicken coop on a single extension cord?
For temporary or seasonal use only. Continuous extension cord use to a coop violates NEC code, voids most homeowner insurance, and creates trip and chew hazards. A dedicated 20-amp branch circuit with GFCI protection is the correct long-term solution.
Do I need a permit to wire a chicken coop?
Most US jurisdictions require a permit for any new branch circuit from your home panel, including coop circuits. Low-voltage 12V wiring downstream of a UL-listed power supply typically does not need a permit. Check your local building department before starting.
What size circuit breaker do I need for a smart chicken coop?
A single 20-amp 110V circuit handles a typical smart coop, including a heated waterer, heat lamp, and the 12V loop. Run a 30-amp circuit only if you plan multiple high-wattage devices or want to expand to a small barn-style structure later.
Should chicken coop wiring be in conduit?
Yes for any run more than 10 feet from the house, and yes for the entire underground portion. Direct-burial UF-B cable is code-legal but fails faster around livestock from rodents, frost cycling, and digging predators. PVC schedule 40 conduit at 18 inches is the standard.
How do I protect chicken coop wiring from mice and rats?
Run all cables in metal or PVC conduit, seal every wall penetration with steel wool plus silicone, use rodent-resistant outdoor cable jacket where available, and never leave bare wire spans inside the coop. Rodent-chewed wiring is the leading cause of coop fires.
Can I mix 110V and 12V wiring in the same conduit?
No. NEC code requires separation between AC line voltage and low-voltage wiring inside the same conduit. Run them in parallel conduits, or use a single conduit with an internal divider rated for the application. Most installs use two separate runs because conduit is cheap.
Related Articles
Related Guides
Water-Level and Flow Sensors: Knowing the Waterer Is Empty Before They Do
A coop water-level sensor tells you the drinker is going dry — or freezing solid — before the flock does,…
Ammonia Sensors for the Coop: Catching Air Problems Before You Smell Them
An ammonia sensor belongs at the birds’ breathing height, close to the litter where the gas is generated, because that…

Node-RED vs Home Assistant Automations for the Coop: When to Use Which
Use native Home Assistant automations for the coop’s simple, safety-critical rules — the sunrise door, the freeze-watch waterer — and…