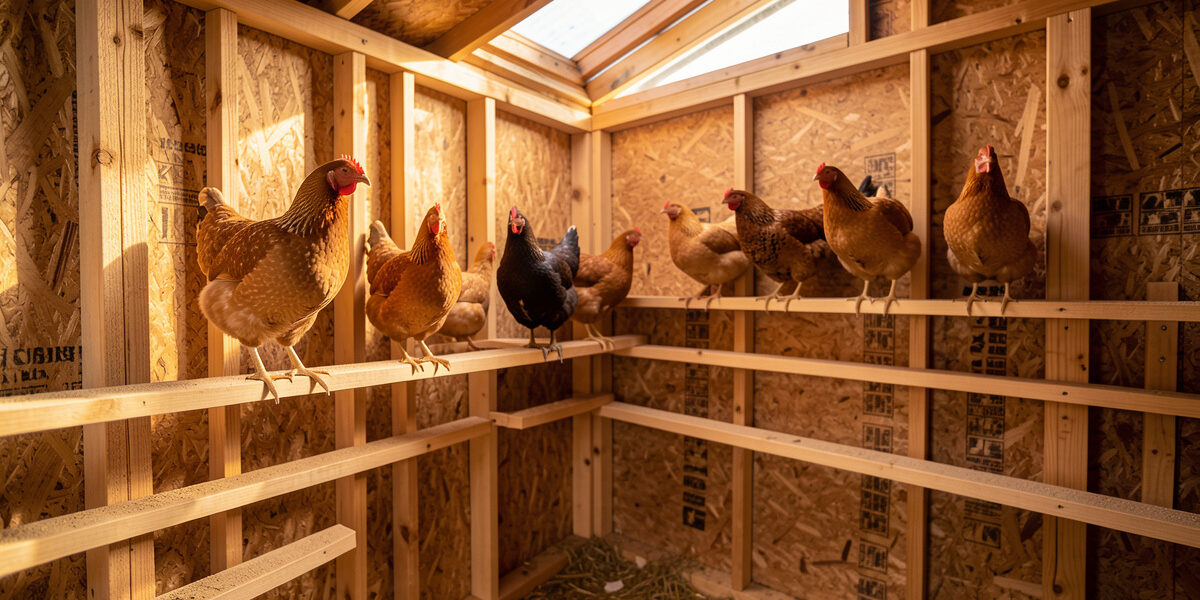
A good chicken roost is a flat bar, 2 to 3 feet off the floor, higher than every nest box, with 8 to 10 inches of perch length per standard hen. Get those four numbers right and most of the coop problems keepers blame on their birds simply disappear — the floor eggs, the frostbitten toes, the 5 a.m. squabbling.
I’ve torn out and rebuilt the roost in my own coop three times. The first version was a round closet rod because a starter-kit article told me chickens “grip like wild birds.” My hens hated it, half of them slept jammed in the nest boxes instead, and by January two combs and a run of toes had frost damage. The roost is the single most-slept-on square foot in the whole coop — a hen spends more than half her life on it — and it’s the part the glossy “cute coop” content gets most consistently wrong.
This is the master guide to roost design and ergonomics for a backyard flock: height, spacing, bar shape, material, layout for mixed-size birds, and how to build the thing so you can pull it in ten seconds to check for mites. Each section links out to a deep-dive on that one number. Let’s start with what actually makes a roost work.
What Makes a Good Chicken Roost?
A good roost lets a hen sit flat-footed with her breastbone taking the weight, her toes covered by her own belly feathers, and enough length beside her that a lower-ranking bird isn’t forced onto the floor. It’s about ergonomics and thermoregulation, not looking rustic. Everything below is a variable in that one equation.
Chickens don’t perch like songbirds. A songbird’s tendons lock its toes around a thin branch; a chicken is a heavy ground bird that rests on a perch rather than gripping it. Watch a hen settle for the night — she shuffles forward until her keel bone is bearing weight and her feet flatten out. That’s the behavior a roost has to accommodate. Force her to wrap her toes around a narrow round bar and two things happen: her feet stay exposed to the air all night, and the constant grip fatigues the same footpad that later develops pressure sores in a damp coop.
The three failure modes I see over and over are a roost that’s too low (birds sleep in the nest boxes instead), too narrow (frostbite and toe stress), and too crowded (bullying, and a bird stuck roosting on the floor where predators and cold find her first). Fix those three and the rest is finish carpentry. Poultry housing guidance collected by the Cooperative Extension poultry program lands on the same core specs I’ve arrived at through a decade of rebuilds.
How Do Chickens Decide Where to Sleep?
Chickens choose a sleeping spot by two instincts working together: get as high as possible, and get as close to flock-mates as the pecking order allows. Understanding that is the whole key to roost design, because you’re not persuading a bird to use a roost — you’re making the roost the obvious winner of an instinct the bird already has.
At dusk, watch the sequence. The dominant birds move to the highest, most central position first. Everyone else negotiates outward and downward from there, with the lowest-ranked hen taking whatever’s left. This is why a single-level bar keeps the peace — it removes the “highest spot” prize entirely — and why a poorly placed nest box becomes a dormitory. If a box is higher than the roost, an ambitious hen reads it as the penthouse. I’ve watched my top Wyandotte march the length of the bar to claim the exact center inch every night for two years; she is utterly consistent, and the flock arranges itself around her like iron filings around a magnet.
They also face outward and shuffle until the keel bone bears the load. A roost that respects those behaviors — flat, high, long enough — gets used without a fight. One that fights the instincts gets you floor-sleepers, and a floor-sleeping hen in a Swedish January is a cold, exposed, and eventually sick bird. Design with the instinct, not against it.
How High Should a Chicken Roost Be Off the Floor?
Set the roost 18 inches to 3 feet off the coop floor for standard breeds, and — this is the rule that matters most — higher than the top of your highest nest box. Chickens instinctively seek the highest safe point to sleep. If the nest boxes are the highest thing in the coop, that’s where they’ll sleep, and where they’ll poop all night.
In my walk-in coop the main bar sits at 30 inches. That’s a compromise: high enough that the birds treat it as the premium sleeping spot, low enough that a heavy Orpington isn’t jumping down 4 feet onto packed litter every morning and risking a bumblefoot bruise on landing. Big, heavy dual-purpose breeds and anything with short legs do better under 24 inches. Light, flighty breeds will happily use a bar at 4 feet, but you’re then obligated to give them a clear, unobstructed landing zone and ideally a lower step to break the drop.
The height relationship between roost and nest box is the single most common fix I recommend to keepers fighting floor eggs and filthy boxes — it has its own dedicated breakdown in the roost-versus-nest-box height rule. If your boxes and your roost are at the same level, you will lose that argument with your hens every single night.
How Much Roost Space Does Each Chicken Need?
Give each standard-size hen 8 to 10 inches of linear roost length; bantams can share at 6 inches each, and broad breeds like Brahmas or Jersey Giants want a full 10 to 12 inches. Measure the usable bar, divide by that number, and that’s your real capacity — not the marketing number on the coop box.
Here’s where “chicken math” bites. My coop was built for six birds and now holds eleven, which is completely normal and completely predictable. When I sized the roost I ran a full length of 2×4 down one wall — 8 feet of usable bar — deliberately giving myself 96 inches so that even at eleven hens everyone has more than 8 inches. In winter this reverses: cold-hardy birds pack tight to share body heat, so they choose to bunch, but the space has to exist for the nights one bird is broody-cranky and wants distance.
Undersize the roost and the lowest hen in the pecking order gets shoved off. She’ll sleep on the floor or wedge into a nest box, and now you’ve got a cold, vulnerable bird and dirty eggs. I lay out the exact linear-inch numbers by breed size — bantam through giant — in the per-chicken roost space guide. If you keep a mixed flock, size to your biggest breed, not the average.
What Shape and Width Should a Roost Bar Be?
Use a flat 2×4 laid on its wide face — 3.5 inches across the top — with the top edges sanded to a soft radius, not a round pole or dowel. The flat surface lets a chicken sit down onto her feet so her belly feathers blanket her toes overnight. In a cold climate this is the difference between intact toes and frostbite by February.
This is my hill to die on, because I learned it the expensive way. A 2-inch round dowel forces the bird’s toes to wrap and stay exposed; a flat 2×4 lets them lie flat and get covered. Frostbite in a coop is driven by moisture and exposure, not raw temperature — the same physics the Merck Veterinary Manual describes for extremities — and an exposed, damp toe on a round bar at −18 °C is a toe you’re going to lose. Since I switched every bar in my coop to a flat 2×4 with eased edges, I haven’t had a single frostbitten toe, only the occasional comb tip on a big single-combed rooster.
The “actual” dimensions matter here: a nominal 2×4 is really 1.5 by 3.5 inches, a standard the American Wood Council codifies, so laid flat you get a 3.5-inch perch and stood on edge you’d get 1.5 inches — too narrow, don’t do that. The full case for the flat profile, with the frostbite mechanism spelled out, is in flat 2×4 versus round roost.
Single-Level or Ladder Roost for a Mixed Flock?
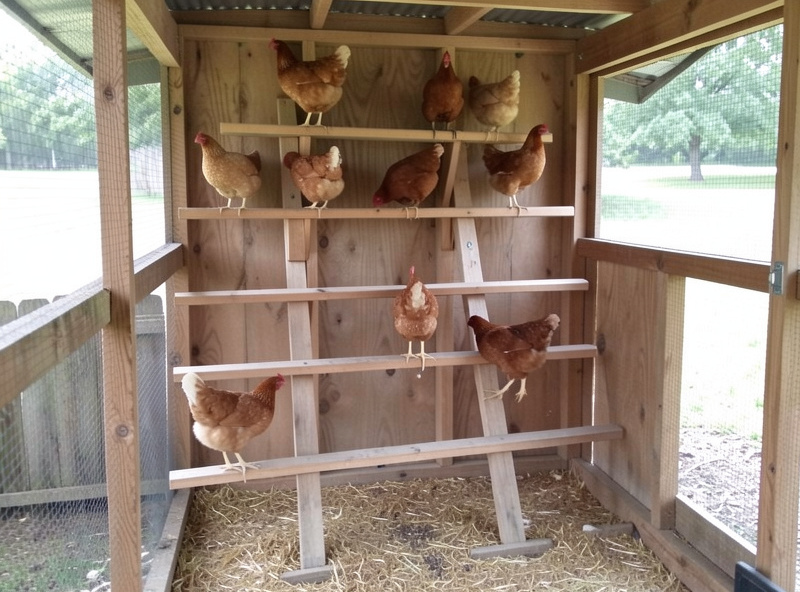
A single-level roost keeps every bird at the same height and eliminates the nightly fight to reach the top bar, which is why I run one long horizontal bar for a mixed-size flock. A ladder roost — staggered bars at rising heights — saves floor space and suits flighty light breeds, but it hands your top-ranked hens the high rungs and exiles the timid ones to the cold bottom.
In a flock that mixes heavy Orpingtons with agile Easter Eggers, the single level is the peacekeeper. Nobody can claim a “better” spot because there isn’t one. Where floor space is genuinely tight, a ladder works, but you have to accept that the pecking order maps directly onto vertical position, and the bird on the lowest rung is the coldest and most exposed. I break down the trade-offs — and the one hybrid layout I actually recommend — in ladder roost versus single-level. For most backyard coops under a dozen birds, one bar wins.
Why Roost Height Beats Nest Box Height Every Time
If your hens sleep in the nest boxes, the fix is almost never the boxes — it’s that the roost isn’t decisively higher than them. Chickens sleep at the highest point they can reach, so the roost has to win that contest by a clear margin, ideally 6 to 12 inches above the top box.
Birds that sleep in nest boxes foul the bedding with overnight droppings, and that’s how clean eggs turn into stained ones and how you end up scrubbing boxes daily. It also encourages hens to lay wherever they sleep, feeding the floor-egg problem. The moment I raised my main roost a clear foot above the boxes, the overnight box-sleeping stopped inside three nights. My nest box setup — including roll-away boxes and box curtains — only works because the roost sits above all of it. If you’re building both at once, read the height rule that stops floor eggs before you fasten anything.
What’s the Best Material for a Roost Bar?
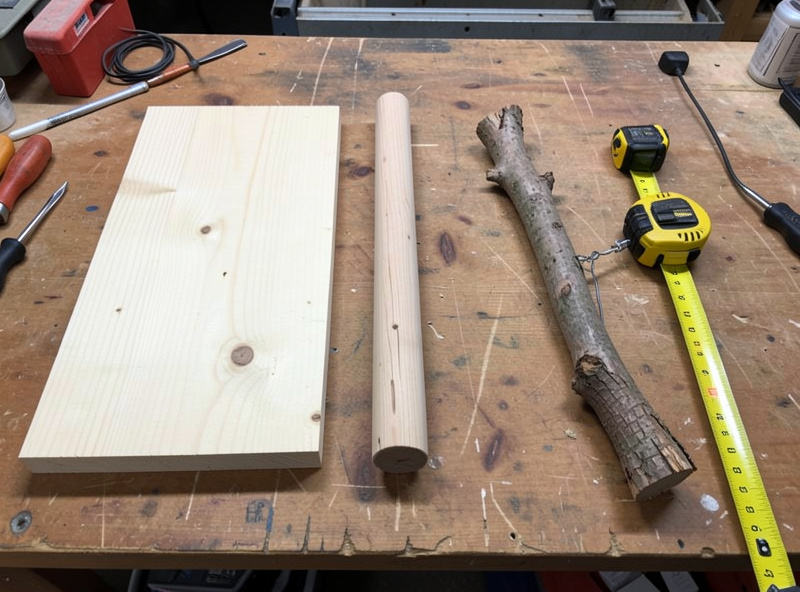
Untreated softwood lumber — a plain pine or spruce 2×4 — is the best all-round roost material: warm to the foot, cheap, easy to replace, and non-conductive so it doesn’t wick heat out of a bird’s foot the way metal or plastic does. Natural hardwood branches work if they’re thick enough and debarked. Metal, plastic, and PVC pipe are the materials to never use.
Metal and PVC are slick — birds slide off — and metal is a thermal disaster in winter, pulling heat straight out of the foot. Pressure-treated lumber is a hard no near livestock; there’s no reason to invite that chemistry into the coop. A sturdy debarked branch has genuine charm and a varied grip surface, but check it for splinters and re-check it yearly for rot and mite harborage in the bark cracks. I keep a full ranked breakdown — every material I’ve tried and the two you should never bolt into a coop — in the roost material showdown. The table below is the short version.
| Roost material | Winter warmth | Grip / footing | Durability | My verdict |
|---|---|---|---|---|
| Pine/spruce 2×4 (flat) | Good — non-conductive | Excellent flat-footed | 3–5 yrs, cheap to swap | Best all-round; what I run |
| Hardwood 2×4 or 2×3 | Good | Excellent | 5+ yrs | Great if you have offcuts |
| Debarked natural branch | Good | Good, varied | 2–4 yrs, watch for rot | Fine if 2 inch+ thick, sanded |
| Round dowel / closet rod | Fair | Poor — toes exposed | Long | Frostbite risk; avoid in cold |
| Metal pipe / rebar | Terrible — wicks heat | Poor — slick | Long | Never in a cold coop |
| PVC / plastic pipe | Poor | Terrible — slippery | Long | Never — birds slide off |
How Do I Keep Roosts Clean and Mite-Free?
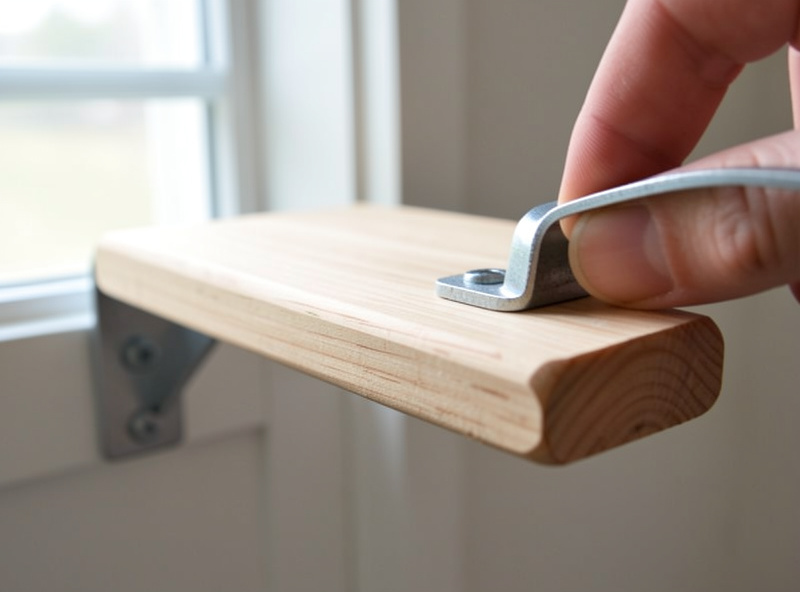
Build the roost bars to lift out without tools. A drop-in bar sitting in open U-brackets or notched supports pulls free in seconds, which turns the two chores everyone dreads — scraping droppings and checking for red mite — into a 30-second job you’ll actually do. Fixed, screwed-down bars are how mite infestations get established, because nobody wants to disassemble the coop to look.
Red mites hide in the cracks and joints of a roost during the day and feed on the birds at night, and the first place they colonize is the underside of the bar where it meets the bracket. If I can lift the bar, flip it, and run a flashlight along the seam in the time it takes the coffee to brew, I catch an infestation at ten mites instead of ten thousand. My poop board sits directly under the roost to catch the overnight droppings — that’s where 60-plus percent of a coop’s manure lands — and both the board and the bars are removable. The exact bracket design, cut list, and the mite-check routine are in the removable roost bar build. If you build one thing from this guide, build the bars to lift out.
How Far Should a Roost Be From the Wall and Ceiling?
Keep a roost bar at least 12 inches from any wall, leave 18 inches of clear headroom above it, and set parallel bars 12 to 18 inches apart. Those three clearances stop the fouled-wall problem, let a bird stand fully upright to shake and preen, and keep droppings from a higher bar off the birds below.
The wall setback is the one keepers skip and regret. Chickens sleep tail-out, and if the tail hangs against the wall the wall gets streaked nightly — you’re then scrubbing plywood instead of scraping a poop board. Twelve inches gives the tail clearance to drop straight down onto the board where it belongs. Headroom matters because a bird stands, flaps, and settles several times before sleep; a low ceiling means she’s knocking her comb on the roof, and a scabbed comb in winter is a frostbite entry point. For horizontal spacing between bars, 12 to 18 inches keeps a bird on the lower bar out of the drip line of the one above and gives wingroom for the shuffle up. Get the setback wrong and no amount of clever poop-board design saves your walls — I learned that with a 4-inch gap and a season of streaked plywood.
Does a Roost Change for Summer Heat?
In hot weather chickens want to spread out on the roost, not bunch, so the same 8-to-10-inch-per-bird spacing that lets them pack for warmth in winter also lets them separate for airflow in summer. The flat 2×4 helps here too — a bird can lie forward off her feet and dump heat through her legs and the bare skin under her wings.
This is the quiet advantage of sizing the roost generously and running it as a single level near good ventilation. In a July heatwave my flock stops touching each other on the bar; every hen claims her own stretch and holds her wings slightly out. If the roost were undersized they’d be forced into contact and the heat stress would climb. Position matters as much as size: a roost tucked up under a hot ridge with no cross-ventilation becomes a heat trap, because hot air rises to exactly where the birds sleep. Mine sits where the passive ridge-and-soffit flow pulls warm air up and out above the birds, not past their faces as a draft. Same bar, two seasons, opposite jobs — that only works if you built in the space.
How I Automated the Space Under the Roost
The most useful square foot in my coop isn’t the roost — it’s the poop board directly under it, and I run a PoE camera on it. Because 60-plus percent of a flock’s droppings land under the roost overnight, that one board is my daily health readout, and a camera means I read it without opening the pop door and chilling the coop at 6 a.m.
This is where the roost stops being carpentry and becomes part of a system. The bars are drop-in removable, the poop board slides out under them, and the whole zone is framed by a coop camera feeding my Home Assistant setup — the same automation brain that watches coop humidity and runs the auto-door on a sunrise offset. The camera does three jobs at the roost: it shows me who’s roosting where (a hen suddenly sleeping in a box flags a health or bullying problem), it lets me eyeball droppings for the color and consistency changes that mean call the vet, and its night IR catches the underside of the bars where red mite congregate. The 3D printer that makes my nesting-box brackets also printed the camera mount that clamps to the roost support. No single-niche coop guide is going to tell you to put a night-vision camera on your roost — but once you’ve watched a marten test the run wire at 2 a.m. on that feed, you don’t take it down.
The Roost Numbers I Build To
After all the rebuilds, here’s the spec sheet I actually cut wood to, and the numbers I keep coming back to are covered in depth across the guides above: flat 2×4 on the wide face, top edges eased with a sanding block, 30 inches off the floor, a clear foot above the highest nest box, at least 8 inches of length per standard bird sized to my biggest breed, single level for a mixed flock, and every bar drop-in removable over a poop board. The precise height, spacing, and setback measurements — the ones I mark on the lumber before the saw touches it — live in the roost bar height and spacing numbers.
Nail those and the coop gets quiet at night. That’s the tell. A coop with a badly designed roost is a noisy coop — shuffling, squabbling, a bird thumping down to the floor. Get the ergonomics right and by full dark you hear nothing but the soft settling sound of a flock that’s comfortable, warm-footed, and exactly where it wants to be.
How Do I Get a Flock to Use a New Roost?
To move a flock onto a new or relocated roost, physically place each bird on the bar after dark for three or four nights running. Chickens are creatures of habit and near-blind at night, so once they wake up on the new roost a few mornings in a row, it becomes “the spot” and they’ll return to it on their own at dusk.
The mistake is trying to herd them onto it at dusk while they can still see and argue. Wait until full dark, when they’re docile and sleepy, lift each hen off wherever she’s parked — the floor, an old roost, a nest box — and set her on the new bar. She’ll grumble and stay put. Do this for three or four consecutive nights and the habit locks in. If a stubborn bird keeps returning to a nest box, block the box entrance at night for a week; that removes the wrong option and the roost wins by default. I relocated my main bar a foot higher during a rebuild and had the whole flock retrained inside four nights of after-dark lift-and-place. It feels tedious on night two. It works by night four. Patience beats chasing a panicked flock around a coop in the dark every single time.
The Roost Mistakes I Made So You Don’t Have To
My worst roost decision wasn’t the round rod — it was mounting the first version too close to the wall. I set a bar 4 inches off the coop wall, and every morning the wall behind it was streaked because the birds’ tails hung against it and their droppings hit the wall, not the poop board. Keep a roost at least 12 inches off any wall and 18 inches of clearance above it so a bird can stand up without hitting the ceiling.
The second mistake was mixing heights in a small flock, thinking I was being generous with options. All I did was invent a prize for the top hens to fight over. The morning I found my quietest Australorp sleeping on the cold floor because she’d been bumped off every bar, I ripped out the ladder and ran one level. That’s the whole reason I now default to single-level for mixed flocks — I watched a good hen pay for my clever design.
How high should a chicken roost be?
For standard breeds, set the roost 18 inches to 3 feet off the floor and always higher than the top of the highest nest box. Heavy or short-legged breeds do best under 24 inches to avoid hard landings. Flighty light breeds will use a bar at 4 feet if you give them a clear landing zone.
How much roost space does each chicken need?
Give each standard-size hen 8 to 10 linear inches of roost bar. Bantams manage at 6 inches each and broad breeds like Brahmas want 10 to 12 inches. In a mixed flock, size to your biggest breed, not the average, so the lowest bird in the pecking order is never forced onto the floor.
Is a flat 2×4 or a round bar better for a roost?
A flat 2×4 laid on its wide 3.5-inch face is better, especially in cold climates. It lets a hen sit flat-footed so her belly feathers cover her toes overnight, which prevents frostbite. A round dowel forces the toes to grip and stay exposed to the cold air.
What material should a chicken roost be made of?
Untreated softwood lumber like a pine or spruce 2×4 is the best all-round choice: warm, cheap, and non-conductive. Debarked hardwood branches at least 2 inches thick also work. Never use metal, which wicks heat from the foot, or PVC and plastic, which are too slippery.
Why do my chickens sleep in the nest boxes instead of the roost?
Chickens sleep at the highest point they can reach. If the nest boxes are as high as or higher than the roost, the birds will choose the boxes. Raise the roost a clear 6 to 12 inches above the top box and the box-sleeping usually stops within a few nights.
How far apart should parallel roost bars be?
Space parallel roost bars 12 to 18 inches apart horizontally so tail feathers and droppings from one bar don’t hit the birds below. Keep any bar at least 12 inches from the wall and leave 18 inches of headroom above it so a bird can stand fully upright.
Keep Building the Coop
The roost is one system inside a coop that has to work as a whole. Once the bars are sorted, the next things to get right are the boxes below them and the air above them:
Related Guides
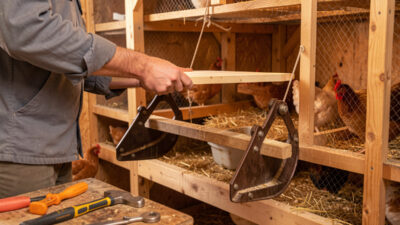
DIY Removable Roost Bars for Fast Cleaning and Mite Checks
The best roost you can build is one you can lift out in ten seconds without a tool. Removable roost…
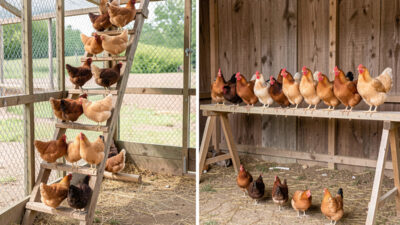
Ladder Roost vs Single-Level: Which Suits a Mixed Flock
For most mixed-size backyard flocks, a single-level roost wins. Putting every bird on one horizontal bar at the same height…
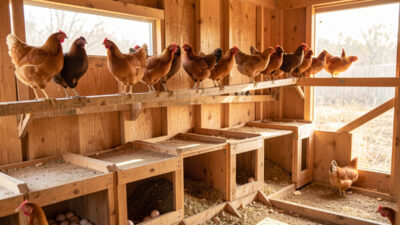
Roost Above the Nesting Box: The Height Rule for Floor Eggs
The rule is simple: the roost must sit higher than the top of your highest nesting box — ideally 6…