
You can retrofit a chicken coop smart in a single weekend for $400–$900 by adding a battery-powered automatic door, a 12V WiFi camera, two Zigbee sensors, and a small AC outlet — no rebuild required. The biggest constraint is structural: the door frame must be sound enough to mount a motorized opener, and the coop must be predator-tight before any automation goes in.
This guide walks through assessing your existing coop, choosing retrofit components that fit common builds, and the install order that minimizes downtime for the flock. For ground-up builds, see our complete smart chicken coop guide.
Is Your Coop a Good Retrofit Candidate?
Before buying anything, assess these five points. If three or more are problems, you are better off rebuilding than retrofitting:
| Check | Pass | Fail |
|---|---|---|
| Door frame | Solid 2×4 frame, square, no rot | Soft wood, gaps, racked frame |
| Predator-proofing | Hardware cloth (1/4″ or 1/2″), buried apron | Chicken wire, no apron, gaps under siding |
| Roof | No leaks, no daylight visible from inside | Active leaks, visible gaps |
| Floor / structure | Bottom plates intact, no soft wood | Rotted sill, sagging floor |
| Power access | Outlet within 50 ft, or sunny roof for solar | No nearby power and no solar exposure |
Coops that pass 4–5 are perfect retrofit candidates. Coops that pass 2–3 need targeted upgrades first (replace the door frame, swap chicken wire for hardware cloth, fix the sill). Coops that pass 0–1 are expired — automation will not save them.
The Standard Retrofit Stack
For a typical 4–8 bird existing coop, the smart retrofit is four components plus minor wiring:
- Automatic door ($150–$380) — the highest-impact upgrade. A battery-powered model with light sensor avoids any electrical work for the door itself.
- WiFi camera ($50–$120) — outdoor 1080p with night vision, mounted in the highest interior corner facing the roost and door.
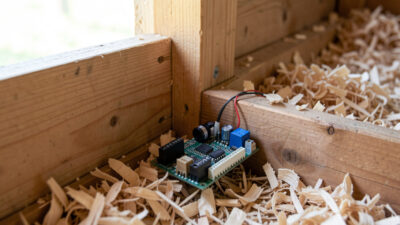
- Zigbee sensors ($30–$60 for two) — temperature/humidity inside, door-state sensor on the people door, both running on coin-cell batteries.
- Power supply / outlet ($60–$220) — either a single weatherproof outlet (if power is nearby) or solar + 12V battery (covered in our off-grid setup guide).
Total: $290–$780 for a hands-off automation stack that handles the door, monitoring, and basic sensors.

Choosing a Retrofit-Friendly Auto Door
Auto doors fall into three categories for retrofit purposes:
- Battery-powered with light sensor — bolts onto an existing door opening, runs on 4 AA or D batteries; ChickenGuard’s own battery guidance puts a standard AA set at 6–9 months (shorter in winter cold), with D-cell or lithium options stretching that toward a year or more. Examples: ChickenGuard, Run-Chicken, Omlet — the three I’ve mounted and run through a full season myself. $150–$280. The right choice for most retrofits.
- AC-powered with WiFi — needs a nearby 110V outlet. Adds smartphone control and remote door operation. $250–$400. Choose if you have power in or next to the coop.
- Solar-powered standalone — comes with its own panel and battery. Best for coops with no power and good south-facing sun. $280–$450.
Whichever you pick, measure the existing door opening before ordering. Most auto doors handle openings 9″–13″ wide and 12″–16″ tall. Coops with wider openings (some prefab and custom builds) need a smaller secondary chicken door cut into the larger access door.
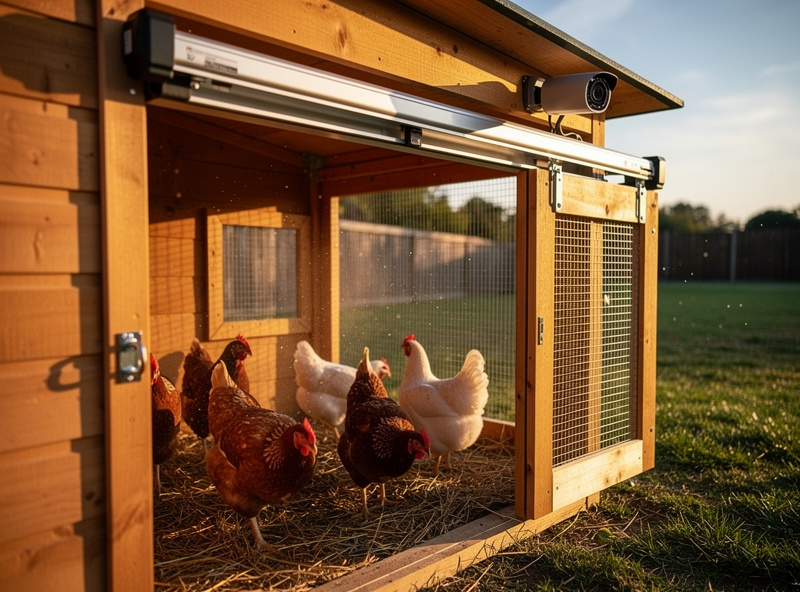
Where to Mount the Camera
Camera placement makes or breaks a retrofit. Aim for one camera that captures three things in a single frame: the roost, the door, and the feeder/waterer area. A high corner mounted at 60+ inches off the floor, angled down at 30°, usually gets all three. That single-frame framing is the same principle I use for the PoE cameras feeding my own Home Assistant NVR — one well-placed camera beats two badly-placed ones, both for signal reliability and for actually reviewing footage later.
Avoid these mistakes:
- Mounting in dust line. Chickens kick up dust at ground level. A camera below 4 feet needs cleaning weekly.
- Pointing at a window. Backlit shots wash out during the day and create glare from sunset that triggers motion alerts.
- Mounting on the same wall as the access door. You lose visibility of the chickens during entry and the chickens crowd around your feet, blocking the lens.
- Skipping night vision. Most coop activity happens at dawn and dusk. Without IR, you see nothing.
Adding Power Without Major Disruption
Most retrofits avoid pulling a new branch circuit by using one of three approaches:
- Existing nearby outlet + outdoor extension cord (temporary). Acceptable for a season but not long-term.
- Heavy-gauge outdoor extension to a weatherproof outlet on the coop exterior. Code gray area but common for under-50-ft runs from a garage.
- Small solar panel + 12V battery. Zero electrical work, works for 100% of locations with sun exposure. See our off-grid solar setup guide for sizing.
For a long-term retrofit with growth potential, the right answer is pulling a proper 20A branch circuit — covered in our smart chicken coop wiring guide. But the retrofit appeal is doing it without that work, and the solar option delivers full automation with zero permits or trenching for $400–$700 in panel + battery.
Install Order That Avoids Flock Disruption
Doing the retrofit in the wrong order means hours of chickens flapping around your work area. The right sequence:
- Day 1 (morning, flock free-ranging): Run any external power, mount the camera, install sensors. None of this disturbs the coop interior much.
- Day 1 (midday): Test camera, sensor connectivity, signal strength. Fix any WiFi gaps before going further.
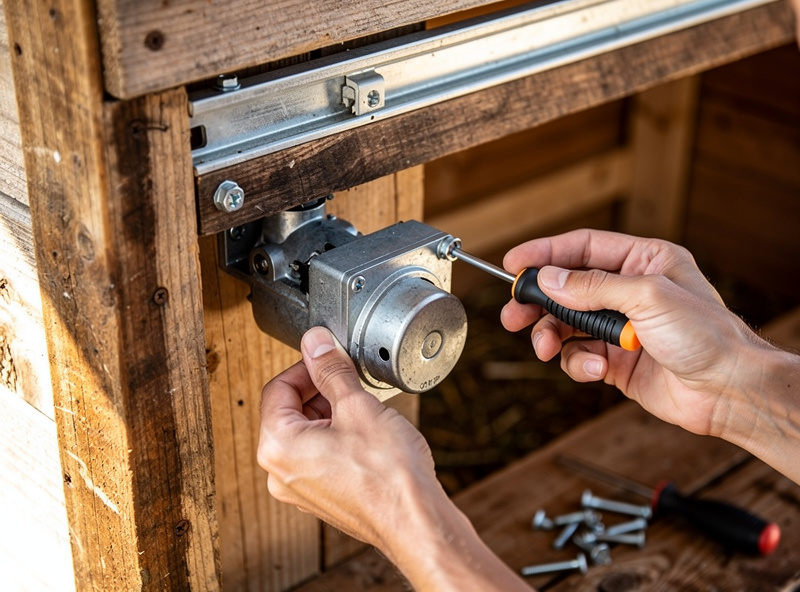
- Day 1 (late afternoon): Install the auto door. The flock will roost on its own as light fades — work done before they return.
- Day 2 (morning): Watch the auto door open via camera. Verify chickens go through it. Adjust sensitivity or timer if needed.
- Day 2 (evening): Verify auto door closes after every bird is in. Manually count from camera footage for first 3–5 nights.
The most common Day-2 problem is a slower bird getting trapped outside. Set the door to close 20–30 minutes after sunset rather than at sunset for the first month, then tighten as you trust the timing — I set mine too tight the first winter and shut a slow layer outside overnight in freezing weather; nothing happened to her, but it is not a mistake worth risking twice, and the sunrise/sunset offset in my automation now has a wider buffer than I originally thought I needed.
Common Retrofit Pitfalls
- Not measuring the door first. The single most common reason I hear about for a returned auto door is one that did not fit the existing opening. Measure twice.
- Mounting on hardware cloth, not framing. The motor housing needs solid wood underneath. Mounting screws into hardware cloth or thin siding fail within months.
- Ignoring weight on a sagging door frame. A 4 lb auto door will cause an already-out-of-square frame to bind. Reinforce the frame before mounting.
- Forgetting the manual override. Every auto door has a manual mode for power outages or motor failures. Test it before you trust the automation.
- Chicken-wire upgrades skipped. Adding cameras to a coop with chicken wire instead of hardware cloth still gets you predator losses — automation does not stop a raccoon, and extension predator-management guidance is unambiguous that chicken wire is a garden fence material, not a predator barrier. Upgrade the cloth first — my own run is welded frame with buried-apron hardware cloth on every side, and that came before any camera or door went in, not after.
Cost Tiers for Retrofit
| Tier | What It Includes | Cost |
|---|---|---|
| Minimum viable | Battery auto door + WiFi camera, no sensors | $200–$400 |
| Standard retrofit | Above + 2 Zigbee sensors + small power feed | $290–$780 |
| Full retrofit with new power | Above + new 20A circuit + LED light + heated waterer | $680–$1,200 |
| Off-grid retrofit | Standard + 100W solar + 50Ah LiFePO4 + charge controller | $820–$1,300 |
The standard retrofit is the right starting point. It delivers the core benefits — predator-safe door, monitoring, climate alerts — without the disruption or cost of pulling permits. The full retrofit adds $300–$500 for power that opens up a heated waterer and full lighting, useful for cold climates.
When Retrofit Is the Wrong Choice
Three situations tip the math toward rebuilding instead of retrofitting:
- Existing coop is undersized. If you are at 2 sq ft per bird inside, automation cannot fix the underlying space problem. Build a properly-sized coop using our chicken coop size guide first.
- Coop is over 8 years old with significant repair needs. Spending $700 to retrofit a coop that needs $1,500 in repairs throws good money after bad.
- You will move within 2 years. Retrofit value mostly stays with the coop. A new coop you take with you (a small portable build) is the better investment.
For everyone else — solid coop, predator-tight, decent location — retrofitting beats rebuilding by 60–70% on cost and by an entire weekend on labor.
What You Get at the End
A successful retrofit delivers the same daily benefits as a ground-up smart build: door opens at sunrise, closes at sunset (no rushing home), camera lets you check on the flock from anywhere, sensors text you if temperature drops or the door fails. The trade-off is missing the deeper integrations possible with a ground-up build (multi-camera coverage, full climate control, integrated automatic feeders).
For most backyard keepers with a working coop they like, that is the right trade. For everyone else, our best smart chicken coop devices guide covers the components that work in both retrofit and new-build scenarios.
Frequently Asked Questions
Can any chicken coop be retrofitted with smart automation?
Most coops less than 8 years old with sound framing, hardware cloth (not chicken wire), and a square door opening retrofit cleanly for $400–$900. Coops with rotted bottom plates, racked frames, or chicken-wire predator-proofing need structural fixes first.
How long does a smart coop retrofit take?
A standard retrofit (auto door, camera, two sensors) takes one weekend — about 6–10 hours of actual work spread across two days. Adding a new power circuit extends the project to 2–3 weekends because of permitting, trenching, and inspection.
Do I need to rebuild the door frame for an automatic door?
Only if the existing frame is racked, rotted, or under 1.5″ thick at the mounting points. Most prefab and DIY coops have 2×4 framing that holds a 4-lb auto door without modification. Reinforce the frame with corner brackets if it shows any flex.
Can I retrofit without running new electrical?
Yes. A battery-powered auto door (12–18 month battery life), a 12V solar setup for the camera and sensors, and Zigbee battery sensors give you full automation with zero new wiring. Cost is $400–$700 depending on the solar size.
What is the most important component to retrofit first?
The automatic door. It delivers the biggest single benefit — predator protection during dusk, the highest-risk hour for backyard flocks. A camera and sensors add convenience but the door is the only retrofit component that protects life.
Will a smart retrofit work in a prefab chicken coop?
Yes, but check three things: door frame thickness (auto doors need 1.5″+ wood to anchor), wall material (some prefabs use 3/8″ plywood that flexes under door weight), and predator-proofing (most prefabs ship with chicken wire that needs upgrading to hardware cloth).
Related Articles
Related Guides
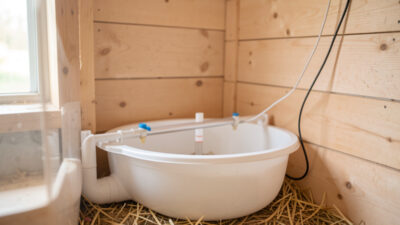
Water-Level and Flow Sensors: Knowing the Waterer Is Empty Before They Do
A coop water-level sensor tells you the drinker is going dry — or freezing solid — before the flock does,…
Ammonia Sensors for the Coop: Catching Air Problems Before You Smell Them
An ammonia sensor belongs at the birds’ breathing height, close to the litter where the gas is generated, because that…

Node-RED vs Home Assistant Automations for the Coop: When to Use Which
Use native Home Assistant automations for the coop’s simple, safety-critical rules — the sunrise door, the freeze-watch waterer — and…