A milk-crate retrofit for 4 hens runs about $5–$8 and 15 minutes — the cheapest real nesting box you can build. A four-cubicle plywood bank for 12–16 hens costs closer to $55 once you count the full plywood sheet, hinge, and hardware, and takes about 90 minutes. This guide gives you three core DIY nesting box builds — milk-crate, single plywood, and a 4-box plywood bank — plus two upgrades (an external lift-top egg door and a roll-away conversion) you can add to any of them, with cut lists, mounting hardware, and the mistakes that ruin first builds.
For sizing math, material trade-offs, and the "how many" question, start with our Chicken Nesting Boxes Complete Guide. For the broader DIY coop context, the DIY Chicken Coop Plans guide covers the structure these boxes mount into.
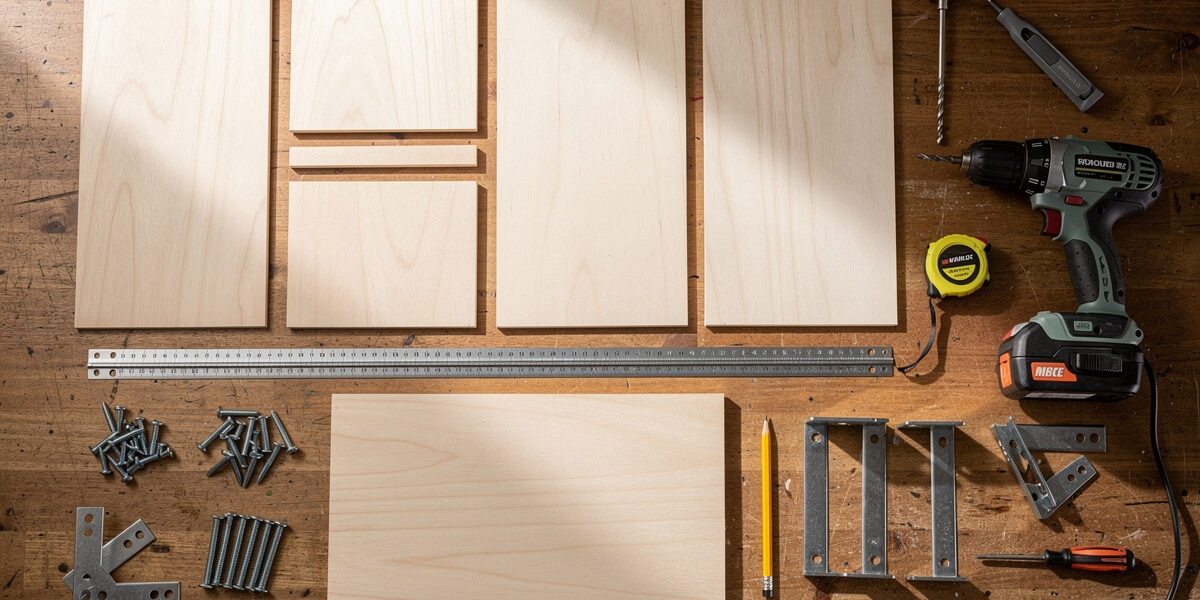
DIY Nesting Box Materials List
Every plan below uses the same core materials. Buying everything in the table below in one trip runs roughly $75–$80 at any hardware store — more than any single plan costs on its own, because it covers the plywood sheet, the hinge, the crate, and the mounting hardware for all three core builds plus both upgrades, with leftovers.
| Item | Spec | Approx Cost | Used For |
|---|---|---|---|
| 1/2" exterior plywood | One 4'×8' sheet | $28 | Plywood single, 4-bank, lift-top |
| Deck screws | 1-5/8" coated, ~50 ct | $6 | All plywood builds |
| L-brackets / shelf brackets | 4" or 6" steel, 4 ct | $12 | Wall mounting |
| Continuous hinge | 24" or 36" | $15 | Lift-top external builds |
| Standard milk crate | 13" × 13", plastic | $5–$8 | Milk-crate retrofit |
| Rubber matting | 1/4" thick, square foot | $4 | Crate liner, plywood floor |
| 1"×6" pine board | 4 ft | $6 | Front lip on plywood builds |
Skip pressure-treated lumber for the box itself — it’s fine for framing that birds and eggs never touch directly, but the surface hens and eggs sit on all day is exactly the wrong place for chemically treated wood, however low the modern leaching risk. Skip cedar — the aromatic terpenes are a recognized respiratory irritant risk at sustained exposure, even though the science on exact severity is debated. Skip OSB or particle board — both swell and mold the first time water touches them.
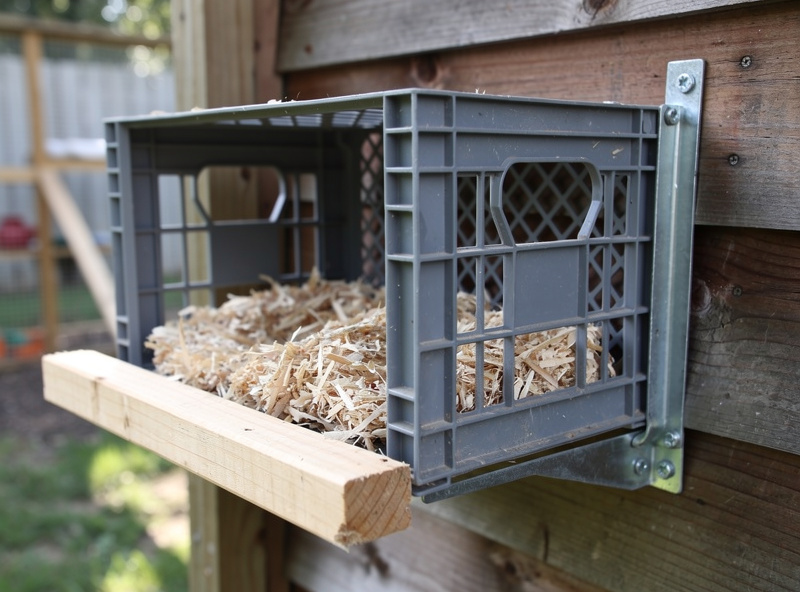
Plan 1: Milk-Crate Retrofit (15 minutes, $5–$8)
The fastest possible nesting box. Works for any flock under 8 hens with a coop wall to mount on.
Steps:
- Cut a 13" × 13" piece of 1/4" rubber matting and drop it in the bottom of the milk crate as a permanent liner. (This is what makes the crate cleanable — without the rubber, bedding catches in the crate's internal ribs.)
- Cut a 13" × 4" strip of plywood or 1/4" hardware board. Zip-tie it across the front opening of the crate as a 4" lip. Use four zip ties at the corners and middle.
- Mount one 6" L-bracket to the coop wall at 20" off the floor. Sit the crate on the bracket with the open side facing out. Run a single zip tie from the back-top of the crate through the bracket's top hole to lock it in place.
- Add 3" of pine shavings.
The crate's ventilation slots (the open sides) keep mites down and let the box breathe in summer. The trade-off is privacy — light comes through, which can discourage shy hens from laying. If you have shy breeds (Polish, Silkies), zip-tie a piece of feed-bag burlap across the side as a partial curtain.
Plan 2: Single Plywood Box (30 minutes, $8)
The single-box build is what you make when you only need one or two — for example, replacing a broken box in an existing bank, or starting a 4-hen flock.
Cut list (from one 4'×4' piece of 1/2" plywood):
- Floor: 12" × 12"
- Two sides: 14" × 12" each
- Back: 14" × 13" (overlaps the sides by 1/2" per side)
- Top: 13" × 13"
- Front lip: 12" × 4" (cut from a 1"×6" pine board, 1/2" ripped off the bottom)
Build: screw the back to the two sides (3 screws each side), screw the floor between the sides flush with the bottom (2 screws each side), set the top in place and either screw it down or hinge it for cleaning access. Screw the front lip across the bottom of the open face. Sand any rough edges. Optional: brush on one coat of polyurethane on the floor only — sealed floors wipe clean dramatically faster than raw plywood.
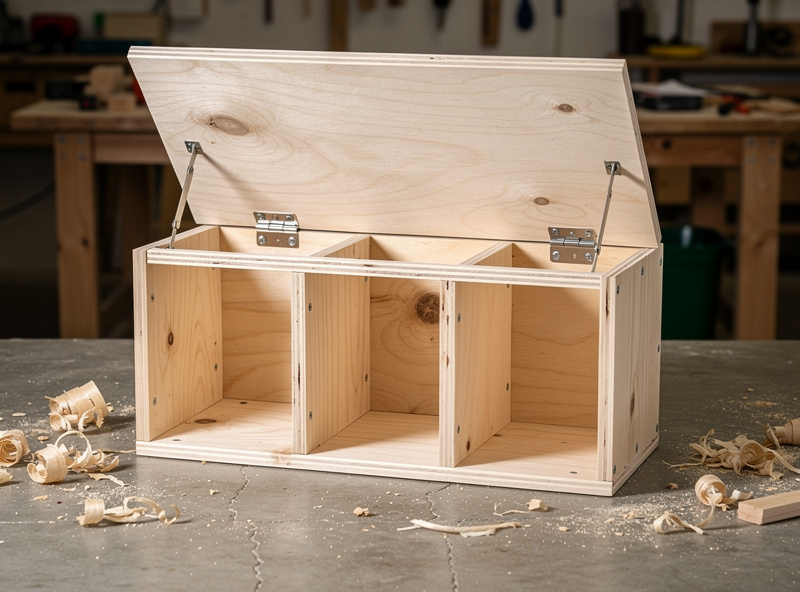
Plan 3: 4-Box Plywood Bank (90 minutes, ~$55)
The workhorse build. Suitable for flocks of 12–20 hens and dimensioned to fit on any wall over 50 inches wide. Materials run closer to $55 than a bargain-bin price once you total the full plywood sheet ($28), the continuous hinge ($15), the front lip board ($6), screws, and the mounting brackets — still well under half of most prefab roll-away banks this size.
Cut list (from one 4'×8' sheet of 1/2" plywood):
- Floor: 50" × 14" (one piece spanning all 4 boxes)
- Back: 50" × 18"
- Top: 52" × 15" (overhangs front by 1" for water shedding)
- Outer sides: two pieces, 14" × 18" each
- Inner dividers: three pieces, 14" × 16" each (slightly shorter than the outer sides so the top can hinge cleanly)
- Front lip: 50" × 4" (or two 25" sections joined at the middle divider)
Build: lay the back flat. Screw the floor onto the back along its bottom edge (8 screws). Stand the outer sides up against the back, screw through the back into the side edges. Insert the three inner dividers at 12.5" intervals (this gives four 12"-wide cubicles with 1/2" lost to each divider) and screw down through the floor and through the back. Hinge the top across the back — use a 36" continuous hinge for a single lift, or split into two 24" hinges if you want each half to lift independently. Screw the 50" front lip across the front edges of the dividers and outer sides.
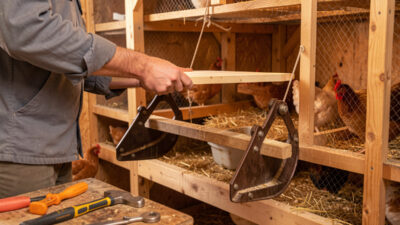
Mount: two 6" L-brackets at 20" floor height, spaced 36" apart. The bank weighs ~25 lb empty, ~35 lb with bedding and birds — well within the bracket spec. This is close to what I run in my own coop, screwed into wall studs rather than just the plywood siding — the one lesson from my first attempt was that siding alone works loose after a season of hens jumping in and out.
Plan 4: Lift-Top External Egg Door (extra 30 min on top of any plan)
An external lift-top is the upgrade that turns daily egg collection from "crawl into the coop" to "lift the side door from outside." It works with any of the plans above, and it’s the single upgrade I’d tell a new keeper not to skip — the difference between a 30-second daily task and a 5-minute one adds up over years, not days.
Cut a hole in the coop's outside wall sized to match the back of your nesting box bank. Slide the bank in from outside until the open front faces the coop interior. Screw a piece of 1/2" plywood across the back of the bank (this becomes your new lift door). Hinge the top of that plywood door to the coop wall above it. Add a barrel bolt or T-handle latch — predator-proof latches matter, see Raccoon-Proof Coop Latches.
This converts a standard interior bank into an external egg-collection design at the cost of one hinge, one latch, and 30 extra minutes.
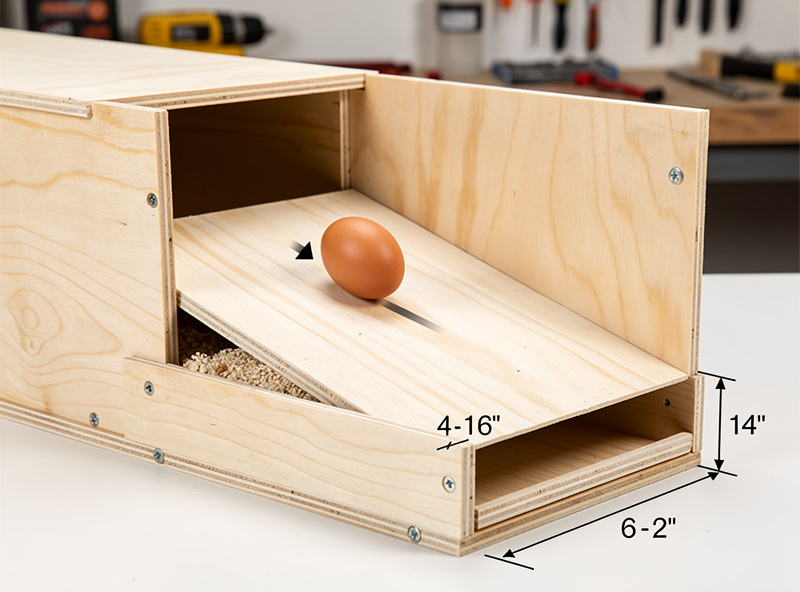
Plan 5: Roll-Away Conversion ($15 extra)
Any of the plywood plans above can become a roll-away by tilting the floor 8 degrees and adding a collection tray.
How: instead of a flat floor, cut a floor that is 1.7" shorter on the front side than the back (for a 12"-deep box). The hen entry side becomes higher; eggs roll toward the back. Drill a 2"-tall × 12"-wide opening at the bottom-back of the box wall. Screw a small tray (a wooden box, a plastic bin, or a piece of bent metal) below the opening to catch rolling eggs.
The whole box still mounts the same way. The only build differences: the floor is angled, the back has a slot, and you add the catch tray. For why roll-away matters and which prebuilt models compete with this DIY, see Roll-Away Nesting Boxes: Worth the Upgrade?.
DIY Mistakes That Cost Days
Three mistakes account for almost all DIY nesting box failures.
Skipping the front lip. Without the 4" front lip, bedding spills every time a hen scratches in or jumps out, and you refill every 3–4 days. Add the lip — it is the single highest-leverage feature on the entire box.
Mounting boxes higher than the roosts. Hens always sleep on the highest available surface. If your boxes are above the roost bars, hens roost in the boxes overnight and you wake up to soiled bedding and contaminated eggs every morning. Fix: either lower the boxes or raise the roosts so the lowest roost sits at least 4" above the highest box.
Using untreated plywood floors. Raw plywood absorbs urea and droppings within 6 months. By month 12 the floor smells regardless of cleaning. One coat of polyurethane on the floor (just the floor — walls do not need it) takes 5 minutes and adds 5+ years to the box's usable life — it’s the one step I skipped on my first build and regretted by the second summer.
Frequently Asked Questions
What is the cheapest DIY nesting box?
A milk-crate retrofit costs about 5 to 8 dollars and takes 15 minutes — line a 13×13 inch crate with rubber matting, zip-tie a 4-inch lip across the front, and mount on a shelf bracket 20 inches off the floor.
How long does it take to build a 4-box nesting box bank?
About 90 minutes from cut to mount, using one 4×8 sheet of 1/2 inch exterior plywood plus a continuous hinge and mounting hardware. Total material cost runs closer to 55 dollars once you count the full sheet and hinge, and the bank houses 12-16 hens at the standard 1-box-per-4-hens ratio.
Can I use pressure-treated wood for nesting boxes?
No — the chemicals in pressure-treated lumber leach into eggs over time. Use exterior-grade plywood for the boxes themselves and only use pressure-treated lumber for the framing or supports that do not contact the bedding.
Should I paint the inside of nesting boxes?
Skip paint inside the boxes — chickens peck at it. A single coat of food-safe polyurethane on just the floor is the right finish: it seals against urea absorption without giving hens anything tempting to peck.
How wide should each cubicle be in a multi-box bank?
12 inches wide for standard breeds. The 50-inch wide bank in this guide gives four 12-inch cubicles after subtracting 1/2 inch per divider. For heavy breeds like Brahmas, increase to 14 inches per cubicle.
Do I need a hinged lid on DIY boxes?
Highly recommended. Cleaning a fixed-top box requires reaching in through the front opening past the front lip, which is awkward and slow. A hinged top makes weekly cleaning a 2-minute job instead of 10.
Related Articles
- Chicken Nesting Boxes: Complete Sizing & Setup Guide
- Nesting Boxes For Hens: How Many You Actually Need
- DIY Chicken Coop Plans
- Building a Chicken Coop From Scratch
- Best Chicken Coop Bedding
Related Guides
DIY Removable Roost Bars for Fast Cleaning and Mite Checks
The best roost you can build is one you can lift out in ten seconds without a tool. Removable roost…
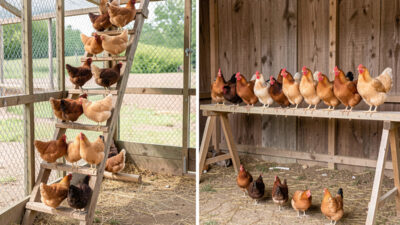
Ladder Roost vs Single-Level: Which Suits a Mixed Flock
For most mixed-size backyard flocks, a single-level roost wins. Putting every bird on one horizontal bar at the same height…
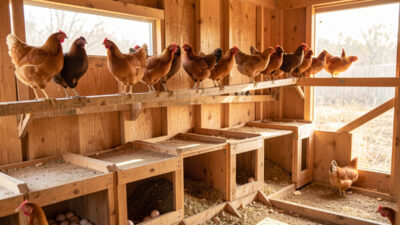
Roost Above the Nesting Box: The Height Rule for Floor Eggs
The rule is simple: the roost must sit higher than the top of your highest nesting box — ideally 6…