Fix every automatic coop door problem — dead batteries, stuck panels, sensor failures, grinding motors, and seasonal issues. Complete troubleshooting and maintenance guide.
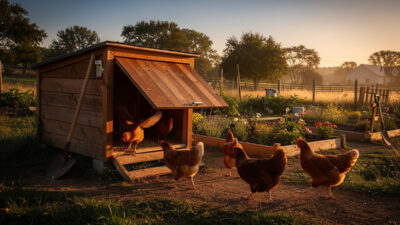
Your automatic coop door worked perfectly for months, and now something is wrong. The door sticks halfway, closes at the wrong time, or refuses to respond entirely. Every automatic coop door problem has a logical cause and a straightforward fix — most take under 10 minutes once you identify the culprit. This guide covers every common failure mode, diagnosis method, and repair procedure.
Quick Diagnosis: Identify the Problem Category
Before diving into specifics, narrow down which system is failing. Automatic coop doors have four subsystems, and problems in each present differently:
| Symptom | Most Likely System | Check First |
|---|---|---|
| Door does not move at all | Power / Controller | Battery voltage, controller LED |
| Door moves erratically or partially | Motor / Mechanism | String condition, track alignment, gear mesh |
| Door opens/closes at wrong times | Sensor / Timer | Light sensor cleanliness, timer settings, artificial light |
| Door makes grinding or buzzing sounds | Motor / Mechanism | Lubrication, obstruction, gear wear |
| Door works sometimes but not always | Intermittent power or sensor | Battery contacts, loose wiring, sensor connection |
Power Problems
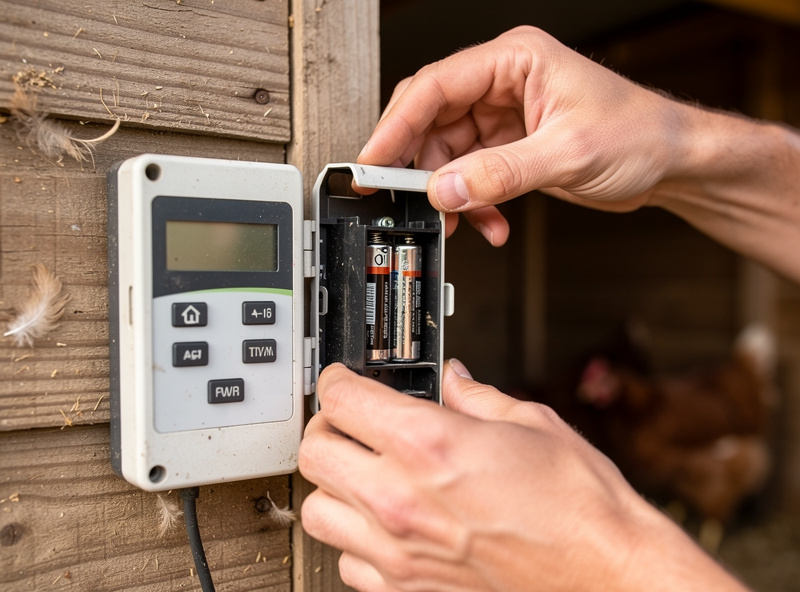
Dead Batteries
The most common automatic coop door failure is dead batteries. It is also the most preventable. Standard alkaline batteries (4×AA) last 3-6 months depending on door model, climate, and usage frequency. Cold weather accelerates battery drain dramatically — expect 30-50% shorter life below 0°C.
Diagnosis: No controller LED activity when pressing buttons. Door does not respond to any input. Some models show a flashing red LED when voltage drops below the operating threshold — if you see this, you have days (not weeks) before total failure.
Fix: Replace all four batteries simultaneously. Never mix old and new batteries — the weakest cell determines performance. In cold climates, switch to lithium AA batteries (Energizer Ultimate Lithium or equivalent). Lithium cells maintain voltage down to -40°C and last 2-3× longer than alkaline in cold conditions.
Prevention: Set a calendar reminder to check battery voltage monthly. Mark the installation date on the battery compartment with a permanent marker. Replace proactively at 80% of expected lifespan rather than waiting for failure.
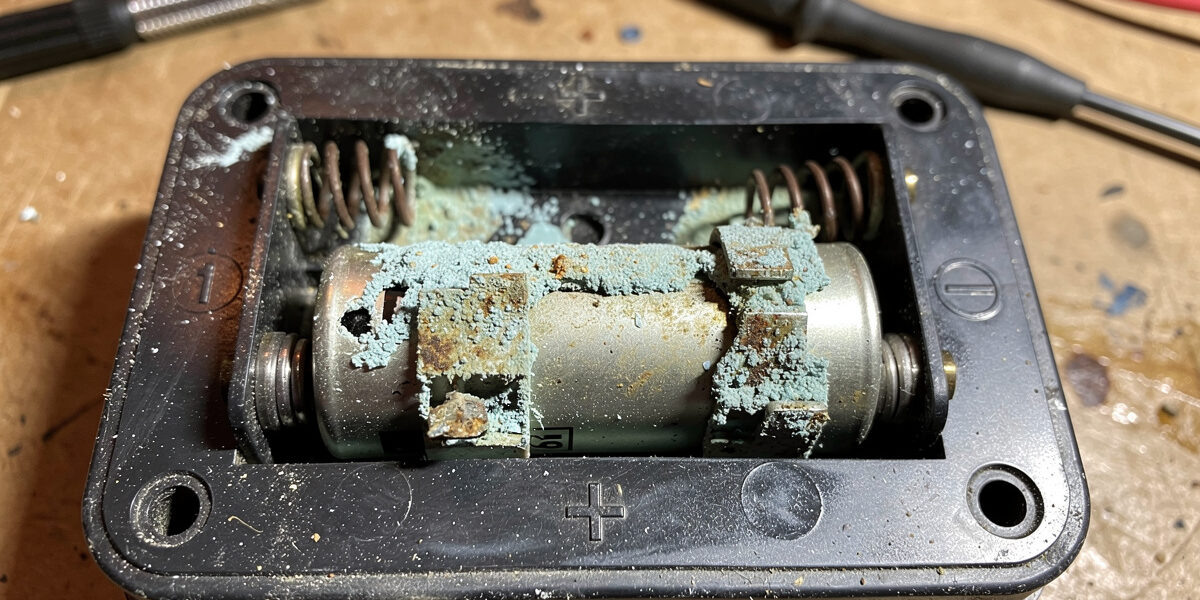
Corroded Battery Contacts
Humidity inside the coop causes battery terminal corrosion — a white or green crusty buildup on the metal contacts. Corrosion increases resistance, reducing effective voltage and causing erratic behavior before eventual failure.
Diagnosis: Controller powers on intermittently, door moves sluggishly, or battery life is dramatically shorter than expected despite new batteries.
Fix: Remove batteries. Clean contacts with white vinegar on a cotton swab, then dry thoroughly. For heavy corrosion, use fine sandpaper (220+ grit) to expose clean metal. Apply a thin coat of dielectric grease to contacts before reinserting batteries — this prevents future corrosion without impeding electrical contact.
Solar Panel Not Charging
Solar-powered doors depend on adequate sunlight reaching the panel. Charging failures build up gradually — the battery drains slightly more each day until the door stops working, usually at the worst possible time (extended cloudy period in winter).
Diagnosis: Check the solar charge indicator (LED or app readout). If the battery shows declining charge despite sunny days, the panel has an issue. Inspect the panel surface for dirt, bird droppings, dust, or leaf cover. Check the panel angle relative to the sun — panels flat against a coop roof in northern latitudes may receive too little winter sun.
Fix: Clean the panel with water and a soft cloth. Reposition or tilt the panel toward the winter sun angle (roughly 60° from horizontal at 45°N latitude). If the panel surface is scratched or clouded, efficiency drops permanently — replace the panel. Check the charging cable connection between panel and battery for corrosion or damage.
Mechanical Problems
Door Sticks or Binds Mid-Travel
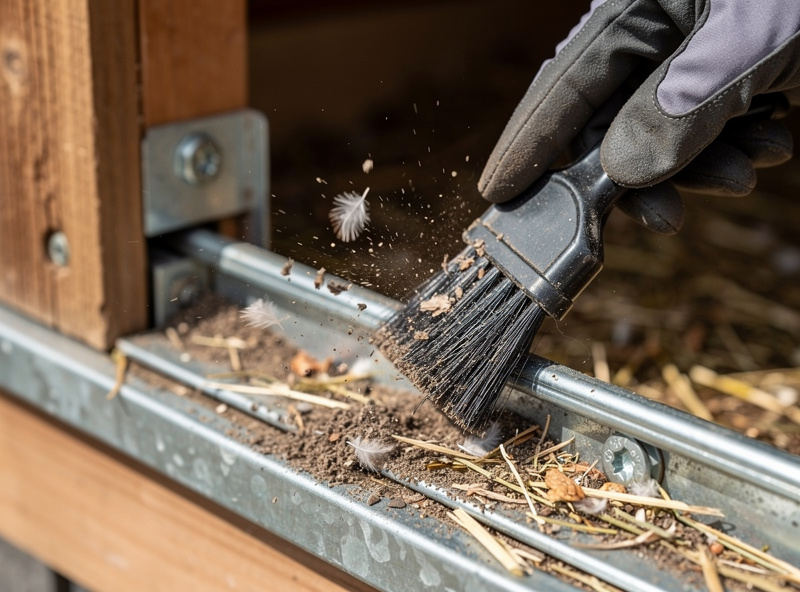
A door that stops partway through its travel has a mechanical obstruction or alignment issue. This is the second most common problem after dead batteries and is almost always caused by dirt, debris, or track misalignment.
Diagnosis: Disconnect the motor and slide the door panel by hand through the full travel range. Note where it catches. Feel for grit in the tracks. Check if the tracks are still vertical with a spirit level — wood warps seasonally, and mounting screws can loosen over time.
Fix by cause:
- Dirt or debris in tracks: Clean tracks with a stiff brush and compressed air. Chicken dust, feathers, and bedding material accumulate in the track channels and create friction. Clean monthly in dusty environments.
- Track misalignment: Loosen mounting screws, re-level with a spirit level, and re-tighten. Check that the coop wall itself has not warped — in severe cases, shim behind the track to compensate.
- Swollen wood: Humidity causes wood door panels to swell, increasing friction against the tracks. Sand the panel edges lightly and apply a thin coat of exterior wood sealer.
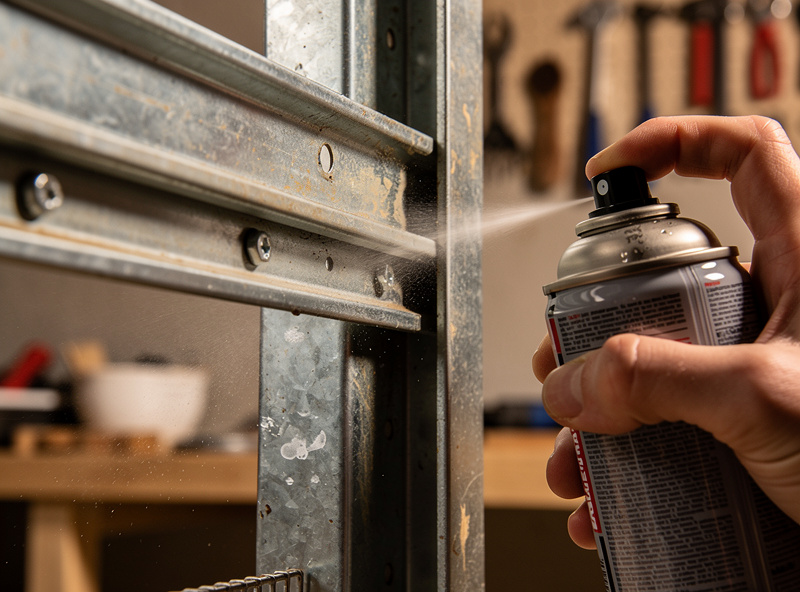
- Ice formation: In freezing climates, condensation freezes in the tracks overnight. Apply silicone spray (not WD-40, which attracts dust) to tracks before winter. For persistent icing, install a small drainage hole at the bottom of each track.
String Breakage (String-Lift Doors)
The lifting string is the weakest component in string-lift automatic doors. UV exposure, abrasion against the pulley guide, and moisture absorption all degrade the string over time. When it breaks, the door drops to closed position and cannot be lifted by the motor.
Diagnosis: Motor runs (you can hear it) but the door does not move. Visual inspection shows the string has snapped or frayed through.
Fix: Replace the string with braided nylon cord of the same diameter specified by the manufacturer. Braided nylon resists UV and moisture significantly better than the cotton or polyester string included with most budget doors. Thread the new string through the guide/pulley, attach to the door panel at the center point, and adjust tension per the installation instructions.
Prevention: Inspect the string monthly for fraying. Replace proactively at 12-month intervals or when any fraying is visible. Keep a spare string in the controller housing so you can replace it immediately when needed.
Motor Grinding or Buzzing
Grinding sounds indicate gear wear or foreign material in the gear train. Buzzing without movement means the motor is energized but cannot turn — either a seized gear, stripped teeth, or an overload condition.
Diagnosis: Remove the door panel from the tracks and run the motor unloaded. If it runs smoothly without the panel, the problem is mechanical friction in the tracks (see above). If it still grinds unloaded, the motor or gear train needs attention.
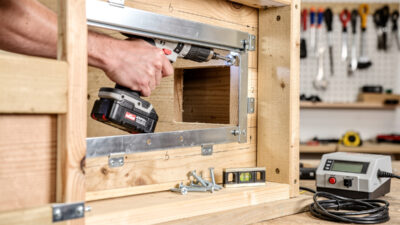
Fix: Open the motor housing (if accessible). Clear any debris from the gears. Apply white lithium grease to gear teeth — a small amount goes a long way. If teeth are visibly stripped or worn, the motor assembly needs replacement. Contact the manufacturer for replacement parts or upgrade to a rack-and-pinion door that eliminates gear train issues.
Sensor Problems
Door Closes Too Early
The door starts closing in mid-afternoon while chickens are still outside. This is usually a light sensor issue — the sensor reads “dusk” too early.
Causes:
- Dirty sensor: Dust, spider webs, or moisture film on the sensor lens reduces light readings, making the sensor think it is darker than reality.
- Sensor in shadow: A tree, building, or coop structure casting afternoon shadow over the sensor triggers false dusk.
- Overcast conditions: Heavy cloud cover on some sensors (usually older or budget models) drops light levels below the trigger threshold.
- Sensitivity too high: The sensor triggers at a light level that occurs well before actual dusk.
Fix: Clean the sensor lens with a soft cloth. Reposition the sensor to face open sky, away from shadows. Reduce sensitivity setting until the door closes 15-30 minutes after your chickens naturally roost. If false-trigger problems persist, switch to timer mode as a backup or upgrade to an astronomical timing door.
Door Does Not Close at Night
The opposite problem: dusk arrives but the door stays open. This is a serious security failure — predators have all-night access to your flock.
Causes:
- Artificial light: Street lights, security lights, porch lights, or neighbor illumination keeps the sensor reading “daytime.” This is the single most common cause of doors failing to close.
- Snow reflection: Fresh snow reflects enough moonlight or ambient light to prevent the sensor from detecting darkness.
- Sensor failure: A dead or disconnected sensor sends no signal to the controller, and the door defaults to staying open.
Fix: Identify and eliminate artificial light sources affecting the sensor. Install a small shade or hood over the sensor that blocks light from below (artificial sources) while allowing sky light from above. If environmental light cannot be controlled, switch to timer mode and reprogram monthly. Consider upgrading to a dual-mode or astronomical timing door.
Timer Drift and Seasonal Mismatch
Timer-based doors lose accuracy as seasons change. A door programmed for June sunset will close hours after dark in December, or hours before dark if adjusted for December and left through summer.
Fix: Set monthly calendar reminders to update open/close times. Use your local weather service or astronomy website for exact sunrise/sunset times. Program close time to 30 minutes after sunset for safety margin. Consider upgrading to an astronomical timing door that handles this automatically.
Year-Round Maintenance Schedule
Preventive maintenance catches problems before they become failures. This schedule covers everything, organized by frequency:
| Frequency | Task | Why | Time |
|---|---|---|---|
| Weekly | Visual check: door opens and closes correctly | Catches new problems early | 30 seconds |
| Monthly | Check battery voltage or solar charge level | Prevents unexpected power failure | 2 min |
| Monthly | Clean light sensor lens | Prevents false triggers from dirt buildup | 1 min |
| Monthly | Inspect string for fraying (string-lift only) | Catches wear before breakage | 1 min |
| Quarterly | Clean tracks and rails with stiff brush | Removes dust, feathers, and debris | 5 min |
| Quarterly | Lubricate mechanism (silicone spray or lithium grease) | Reduces friction and motor stress | 3 min |
| Quarterly | Test anti-crush function | Verifies safety feature works | 1 min |
| Quarterly | Check mounting screws for tightness | Wood shrinks/expands seasonally, loosening screws | 2 min |
| Bi-annually | Check weather sealing and gaskets | Prevents moisture damage to electronics | 3 min |
| Annually | Replace lifting string (string-lift only) | Prevents mid-use breakage | 10 min |
| Annually | Replace batteries proactively | Prevents failure during worst conditions | 2 min |
| Annually | Clean solar panel thoroughly (solar only) | Maintains charging efficiency | 5 min |
When to Replace vs Repair
At some point, repair costs or effort exceed the value of the door. Use this decision framework:
| Situation | Repair | Replace |
|---|---|---|
| String broke | ✅ $2-5, 10 min | Not needed |
| Dead batteries | ✅ $5-15, 2 min | Not needed |
| Corroded contacts | ✅ $0 (clean), 5 min | Not needed |
| Dirty sensor | ✅ $0 (clean), 1 min | Not needed |
| Motor grinding (gear wear) | ⚠️ $15-40 for motor, 30 min | Consider if door is 3+ years old |
| Controller board dead | ⚠️ $20-60 for board, 20 min | Consider — board + labor approaches new door cost |
| Track/frame damage | ❌ Difficult to repair accurately | ✅ Replace — alignment is critical |
| Multiple simultaneous failures | ❌ Cascading problems indicate age | ✅ Replace — the door has reached end of life |
A well-maintained automatic coop door lasts 5-8 years. String-lift doors trend toward the lower end due to motor wear from daily string tension cycles. Rack-and-pinion doors trend toward the upper end with less mechanical stress on the drive system.
Emergency Procedures
Door Stuck Open at Night
If your automatic door fails to close and you discover it after dark, close it manually using the manual override (pull pin and slide). If the manual override is stuck, block the opening with a solid board, heavy fabric, or hardware cloth secured with screws or clips. Any barrier is better than an open door with active predators.
Fix the door the next morning. Never attempt electrical or mechanical repairs in the dark by flashlight — you will miss details and potentially make things worse.
Door Stuck Closed During the Day
Less dangerous but stressful for confined chickens. Use the manual override to open the door. If the override mechanism has failed, remove the mounting screws holding the door frame and physically lift the entire assembly away from the pop hole. Chickens can then exit through the uncovered opening. Prop a temporary barrier (a board cut to size) over the opening at night until repairs are complete.
Power Failure (Mains-Powered Doors)
If your mains-powered door loses power, use the manual override immediately. Consider adding a small UPS (uninterruptible power supply, $30-50) to the door’s power circuit. A UPS provides 2-8 hours of backup power — enough to cover a typical outage and ensure the door closes at dusk regardless of grid status.
Why does my automatic coop door close too early?
Early closing is almost always caused by a dirty or shadowed light sensor. Clean the sensor lens, reposition it to face open sky, and reduce the sensitivity setting. Heavy overcast can also trigger early closing on budget sensors. If the problem persists, switch to dual-mode (light sensor + timer backup) so the timer prevents premature closing. Astronomical timing doors avoid this issue entirely by calculating sunset from GPS data.
How do I fix an automatic chicken door that will not open?
Check batteries first — dead batteries are the most common cause. If batteries are good, check for track obstructions (ice, dirt, debris), a broken lifting string, or a disconnected motor cable. Try manual override to open the door immediately while you diagnose. If the controller LED is off with fresh batteries, the controller board may have failed from moisture damage — check for corrosion.
How often should I replace automatic coop door batteries?
Replace alkaline batteries every 3-6 months depending on your climate and door model. Cold climates drain batteries faster — switch to lithium AA batteries for 6-12 month lifespan. Set monthly calendar reminders to check voltage. Mark the installation date on the battery compartment. Replace proactively at 80% of expected lifespan rather than waiting for the door to fail.
What causes an automatic coop door to make grinding noises?
Grinding noises indicate gear wear, foreign material in the gear train, or lack of lubrication. Remove the door panel and run the motor unloaded — if it still grinds, the motor or gears need attention. Apply white lithium grease to gear teeth. If teeth are stripped, the motor assembly needs replacement ($15-40 depending on model). Rack-and-pinion doors rarely develop grinding issues compared to string-lift models.
How long does an automatic chicken coop door last?
A well-maintained automatic coop door lasts 5-8 years. String-lift doors average 5-6 years due to motor wear from daily tension cycles, with annual string replacement needed. Rack-and-pinion doors average 6-8 years with less mechanical stress. Solar-powered doors last as long as the battery retains capacity (typically 5-7 years for lithium). Regular maintenance — monthly sensor cleaning, quarterly lubrication, annual battery replacement — maximizes lifespan.
Related Articles
- How Automatic Chicken Coop Doors Work: Sensors, Motors, and Safety — understand the systems you are troubleshooting
- Best Automatic Chicken Coop Doors: 7 Models Compared — if it is time to replace, compare current models
- Automatic Chicken Door Openers: Installation and Setup Guide — reinstall correctly after repairs
- How to Choose the Best Automatic Chicken Door — upgrade guide if your current door has reached end of life
- Smart Coop Monitoring: Cameras, Sensors & Apps — add monitoring to catch door failures before they become emergencies
Related Guides
Smart Coop Door Schedules: Alexa, Google, Home Assistant
A smart coop door scheduled to local sunrise and sunset spends roughly 365 hours a year transitioning between open and…
Automatic Chicken Door Openers: Installation and Setup Guide
Step-by-step guide to installing an automatic chicken door opener — tools, pop hole prep, mounting, sensor setup, testing, and troubleshooting…
How to Choose the Best Automatic Chicken Door for Your Flock
Choose the right automatic chicken door for your coop — pop hole sizing, sensor types, power sources, safety features, predator…