A reliable smart coop camera setup needs three things your default home Wi-Fi rarely provides: stable signal at the coop (typically 50-150 ft from the router), an isolated network segment that keeps the camera off your main LAN, and motion-alert latency under 5 seconds — the difference between catching a raccoon at the mesh and finding feathers in the morning. The default “plug it in to home Wi-Fi” setup misses on all three points and is why most keepers eventually turn off their predator alerts in frustration.
This guide is the network half of the smart-coop puzzle. I’m assuming you’ve already chosen a camera (PoE-capable Reolink, Amcrest, or UniFi Protect models are what I run and recommend; battery-only cameras like Wyze Outdoor are easier but worse for predator-grade reliability). The focus here is on the layer between the camera and your phone: the wiring, the segmentation, the alert pipeline, and the failure modes that make predator alerts trustworthy enough to actually act on at 2 AM.
Why Default Home Wi-Fi Fails for Coop Cameras
Three failure modes show up in nearly every “my coop camera keeps dropping” support thread. First is range: a 2.4 GHz signal that registers two bars at the coop loses 20-30% of packets to the wood, foil insulation, and metal latches between the router and the camera. Second is contention: your camera shares airtime with phones, smart TVs, and smart bulbs, all of which take priority in default consumer router configurations. Third is alert delivery: most cloud-camera systems route motion events through a vendor cloud, adding 4-12 seconds of latency before your phone buzzes. By then the predator is gone.
The fix is not a more expensive camera. It is dedicated infrastructure between the coop and your phone — specifically, a wired or PoE backhaul to the coop, a segmented IoT network with traffic prioritized for camera streams, and either a local NVR or a properly configured ONVIF integration to keep alert latency under 5 seconds.
The Three Network Topologies That Actually Work
Topology A: PoE Wired Backhaul (Most Reliable)
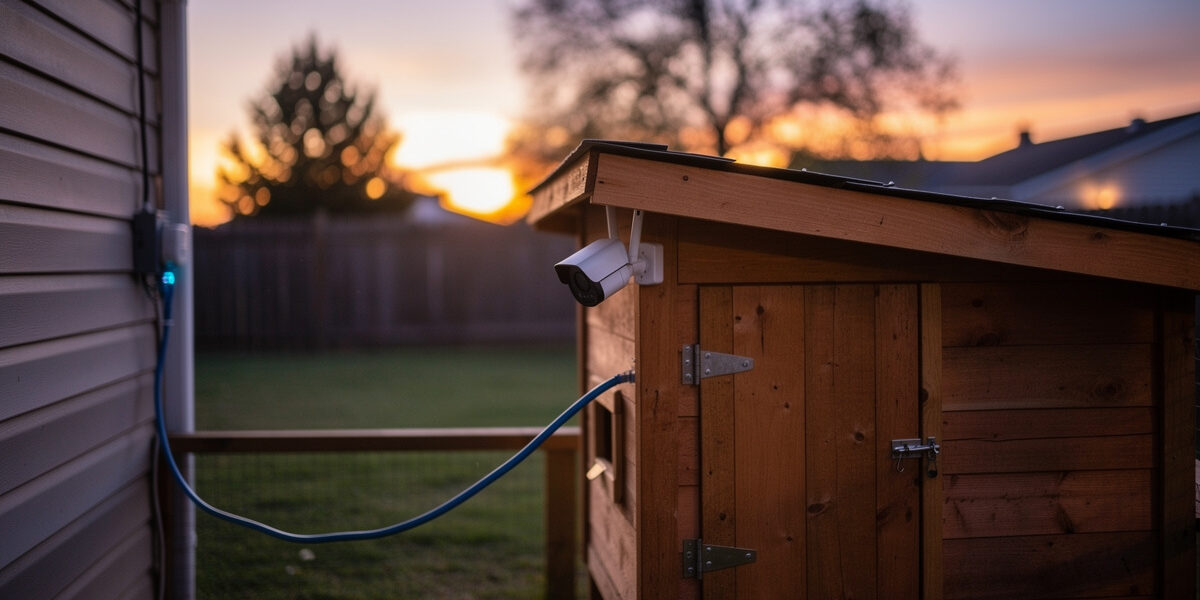
Run a single Cat6 cable from your home network’s PoE switch to the coop. Power and data travel together. A PoE camera mounted under the coop eave gets a stable 100 Mbps link, no Wi-Fi anxiety, and unlimited continuous streaming. Total cost over Wi-Fi: $40-$80 for the cable run; total time saved over 12 months: every false alert and every dropped recording.
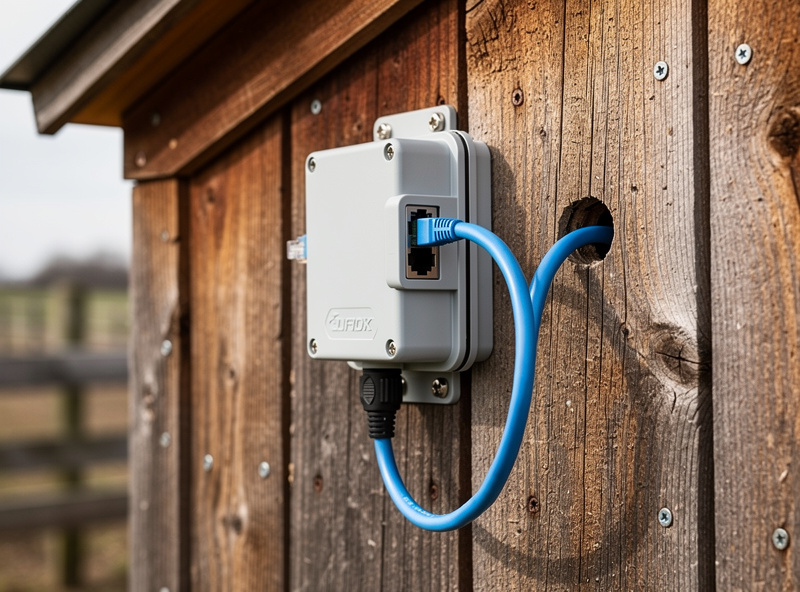
The cable run is the part that scares most keepers, but it does not have to be buried. I ran direct-burial Cat6 in a 12-inch trench from the house wall to my own coop, and it’s been the single most reliable piece of the whole automation stack — no dropped frames, no Wi-Fi anxiety on a stormy night. A pre-terminated outdoor patch cable run along a fence line and into the coop through a weatherproof gland is equally fine for backyard distances if you’d rather not trench. The PoE injector is the part that gets skipped most often — make sure your PoE source supports the camera’s class (most modern dome cameras need 802.3af or 802.3at).
Topology B: Mesh Wi-Fi with Outdoor Node (Compromise)
If a wired run is genuinely impossible, a mesh node mounted at the coop side of your house’s exterior wall (not inside the coop itself — the metal latches and wire mesh attenuate badly) gives the coop camera a strong dedicated link. Wi-Fi 6 mesh systems with a wired backhaul to the main node perform best; pure-wireless backhaul mesh adds 30-50 ms of latency that compounds with the camera’s own buffer.
Topology C: 4G/LTE Cellular Backup (For Remote Coops)
A coop more than 200 ft from the house, or a coop on a property with no usable home Wi-Fi at all, is best served by a small cellular gateway with its own data plan. Cost is $15-$30 a month for a 5-10 GB plan; coverage is whatever your phone gets at that location. This topology is also the right resilience layer for any setup — a $20 4G failover SIM means a power-cut house does not blind you to the coop.
Network Segmentation: Why Your Coop Camera Belongs on Its Own VLAN
Internet-of-Things cameras have a documented history of being the entry point for home network compromises. CISA’s own guidance on protecting network edge devices recommends segmenting IoT devices onto a dedicated VLAN with inter-VLAN traffic blocked by default, allowing only the specific, whitelisted connections a device actually needs (CISA) — cameras and smart-home devices should live on a network segment that cannot reach your laptops, phones, or NAS. For most home setups this means setting up a dedicated VLAN — a virtually separated network that uses the same physical wiring but enforces firewall rules between zones.
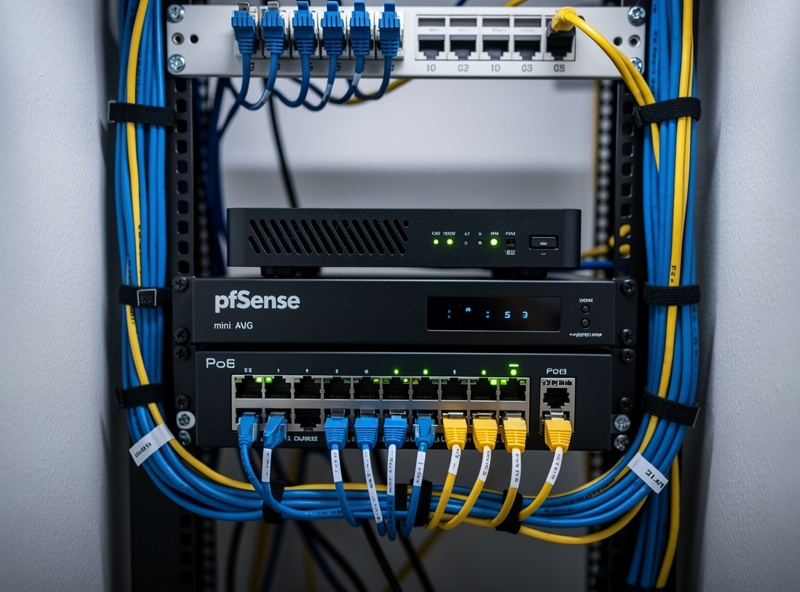
The setup is not as exotic as it sounds. A pfSense or OPNsense router (running on a $200-$300 mini PC) does VLAN segmentation in the GUI, and the firewall rule set is six lines of “block IoT to LAN, allow IoT to internet for cloud features, allow LAN to IoT for management.” Step-by-step instructions are in HomeLabRouter’s pfSense firewall rules tutorial — that guide is the network half of this article and walks the configuration through from default to a production-ready rule set you can drop the coop camera VLAN into.
Alert Pipelines: Local NVR vs Cloud vs Hybrid
The alert pipeline is what determines whether your phone buzzes in 3 seconds or 30. Three pipelines dominate.
Local NVR with push notifications. An NVR (Network Video Recorder) running locally — a Reolink home hub, a UniFi Protect appliance, or a self-hosted Frigate or Shinobi instance — receives the camera’s RTSP stream and runs motion detection on your hardware. Alerts dispatch via push notification through the NVR’s app. Latency: 2-4 seconds. Best reliability, no monthly fee.
Cloud-only camera apps. Wyze, Ring, and most consumer brands push motion events to a vendor cloud, which then dispatches your phone notification. Latency: 5-15 seconds, occasionally 30+. Acceptable for general security, marginal for predator alerts where the predator is gone within 60 seconds of arrival.
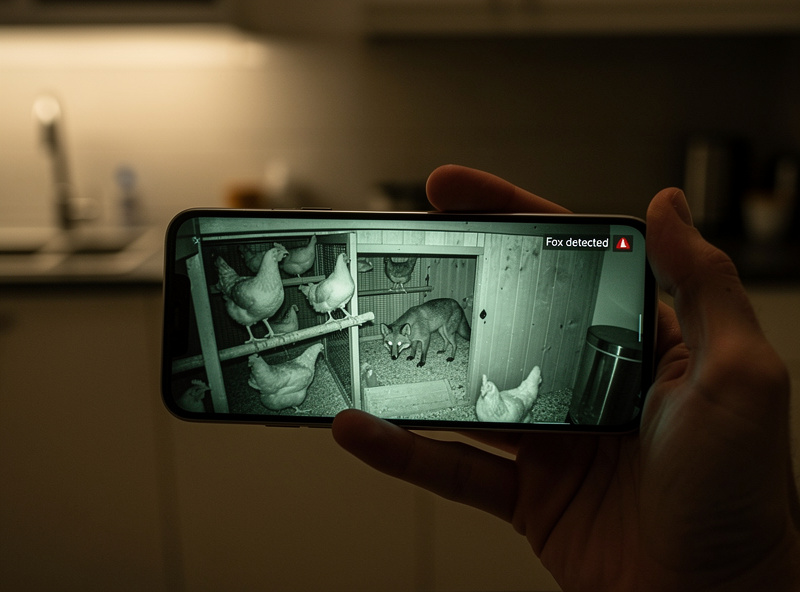
Home Assistant with ONVIF integration. This is the setup I run. Home Assistant ingests the RTSP feed, runs Frigate’s object detection, and pushes notifications via the HA app straight to my phone. Out of the box, Frigate’s standard detection model recognizes person, dog, cat, and a handful of other general classes — it does not distinguish fox from raccoon by default. Getting predator-specific classes means training or downloading a custom model, which is worth the weekend for a coop setup but isn’t a checkbox feature. Latency: 2-3 seconds. Highest false-positive filtering once tuned. Steepest setup curve.
Whichever pipeline you choose, prioritize the QoS rule on your router so camera streams beat general-purpose traffic during peak load. The pfSense traffic shaping configuration in HomeLabRouter’s tutorials handles this in the same VLAN setup mentioned above.
Predator Alert Tuning: Reducing False Positives
An alert system that wakes you up for every passing cat trains you to ignore alerts entirely. The single highest-leverage tuning is moving from generic motion detection to AI object detection. Most modern cameras (Reolink Duo, Amcrest AD410, UniFi G5) include person and animal detection in firmware. Frigate (open source, runs on a $100 mini PC) takes this further with model-trained predator-specific classes if you self-host.
For free-tier setups, three settings do most of the work: set motion zones tightly to the run perimeter and coop entrance (not the whole frame), enable “human/animal only” filters where available, and add a 10-second debounce so a single bird flying past does not trigger ten alerts. Tightening my own motion zones to just the run perimeter and pop-door approach was the single change that took my setup from “notification fatigue, alerts muted” to alerts I actually trust enough to check at 2 a.m.
Power Resilience: What Happens When the House Loses Power
A predator strike at 2 AM during a thunderstorm is exactly the scenario in which the camera and the network fail at the same time. A small UPS on the home network rack ($150-$250) keeps the router, switch, and PoE source up for 15-30 minutes — long enough to ride out most outages. On the coop side, I run a small LiFePO4 battery bank with a UPS/transfer relay sized specifically to bridge an outage — it keeps the auto-door, cameras, and my Home Assistant hub itself running through a grid outage, not to charge daily off solar, just to ride out the dark. For longer-duration resilience, my battery backup guide for smart coops covers coop-side power in depth, and my off-grid smart chicken coop article walks through full solar-and-battery setups for keepers without reliable mains power — solar sizing math I’ve run for other keepers, not my own coop’s daily setup given how little usable winter sun Sweden gets.
Choosing the Camera Itself
The camera is downstream of the network design, not the other way around. Once you have decided on PoE wired (Topology A) or mesh-extended Wi-Fi (Topology B), the camera shortlist is small:
- PoE wired: Reolink RLC-820A (4K, $80-$110, ONVIF support), Amcrest IP4M-1041B ($95, very good night vision), UniFi G5 Bullet ($129, best ecosystem if already using UniFi)
- Wi-Fi: Reolink Argus PT (battery + solar, $90-$130), Wyze Cam OG ($30, weakest reliability), Eufy SoloCam S40 ($150, local-first, low cloud dependency)
For deeper coverage of camera selection specifically (model comparisons, 4K vs 1080p tradeoffs, night vision performance), see my smart chicken coop monitoring cameras and sensors hub.
Frequently Asked Questions
Do I really need a separate VLAN for my coop camera?
Strongly recommended. IoT cameras have a documented history as entry points for home network compromise. A dedicated IoT VLAN with a six-rule firewall set blocks the camera from reaching your laptops or NAS while still allowing internet for cloud features and management from your phone.
What is the maximum reliable Wi-Fi distance for a coop camera?
Plan for 50 to 80 feet of clear line of sight on 2.4 GHz, 30 to 50 feet on 5 GHz. Wood and metal-mesh coop walls cut effective range by 30 to 50 percent. Beyond those distances, mount a mesh node on the house exterior wall facing the coop or run a wired Cat6 link.
What latency should predator alerts have?
Under 5 seconds from camera trigger to phone notification. A local NVR or Home Assistant with Frigate hits 2 to 4 seconds reliably. Pure cloud-app pipelines like Wyze or Ring run 5 to 15 seconds and miss most predator events that resolve within a minute.
Can I run a coop camera on battery only without wiring?
Yes for casual monitoring, no for predator-grade reliability. Battery cameras sleep between events and miss the first 1 to 2 seconds of any incident. Reolink Argus with the solar panel attachment is the most workable battery option, but a wired PoE camera is the only setup that records continuously.
What is the cheapest reliable setup?
A $200 used mini PC running pfSense, a $40 PoE switch, $30 of Cat6 cable, and a $90 Reolink RLC-820A. Total under 400 dollars including the camera, and gives you VLAN-isolated continuous recording with sub-5-second alerts. Adds about 8 watts of always-on power consumption.
Should the coop camera record to the cloud or locally?
Local-first if you can. A microSD card in the camera plus an NVR on your home network gives you redundancy without monthly fees. Add cloud as a third copy if you want offsite backup, but do not depend on cloud as the only recording target — vendor outages and account suspensions are real risks.
Related Articles
- Predator-Proof Chicken Coop: Complete Defense Guide
- Smart Coop Monitoring: Cameras, Sensors and Apps
- Chicken Coop WiFi: Range, Mesh and Cellular
- Smart Coop Battery Backup for Power Outages
- Off-Grid Smart Chicken Coop
Related Guides
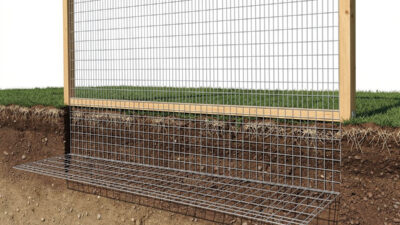
Underground Predator Barriers: Apron & Footer Designs
Foxes and coyotes can dig under an unprotected chicken run wall in well under an hour once they commit to…
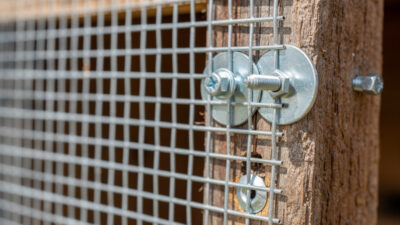
Hardware Cloth vs Chicken Wire: Why It Matters
Chicken wire keeps chickens IN. Hardware cloth keeps predators OUT. 1/2-inch galvanized hardware cloth is the only mesh that reliably…
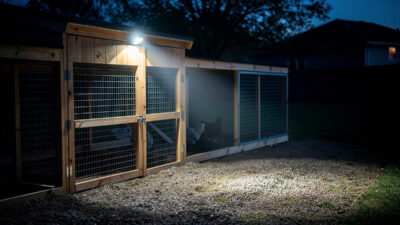
Motion-Sensor Coop Lights for Predator Deterrence
A 200+ lumen motion-activated light mounted at the chicken run perimeter is a genuine short-term deterrent for raccoons, foxes, and…