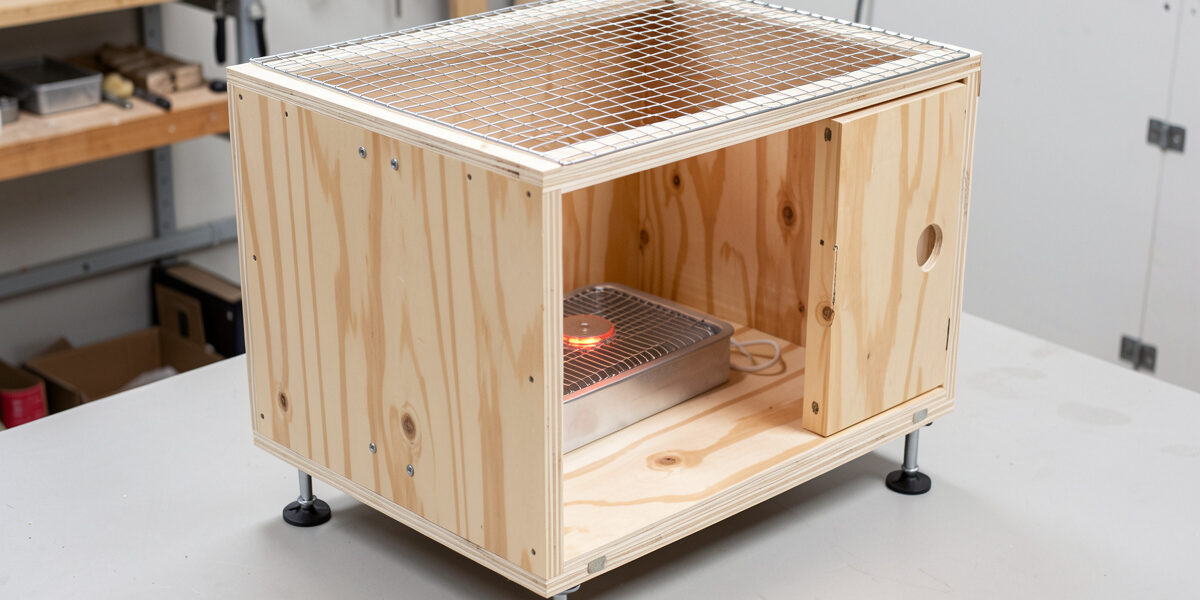
A DIY chick brooder is a draft-free box, a thermostatically controlled heat source held at 95 °F in week one, shallow drown-proof water, chick starter, and absorbent non-slip bedding. Built from plywood or a large tote, it costs a fraction of a commercial unit and lets you size the heat zone and floor to your batch. The build is simple; the details that keep chicks alive are where it pays to be deliberate.
I build my own brooders rather than buy plastic kits, because the same workshop that welds my run frame and 3D-prints the coop’s door guides makes short work of a proper brooder box. This is the maker’s version of the brooder — how I actually construct one and wire the heat — rather than a general care overview. If you want the care-and-routine side, my chick brooder setup guide covers raising day-olds; here I am focused on building the thing.
Why Build Your Own Brooder
Commercial brooders are fine, but they are small, expensive for the space they give, and rarely sized to your actual batch. A homemade brooder solves all three. You build it to the footprint your chicks need — roughly half a square foot per chick in the first weeks, more as they grow — out of materials you likely already have, and you design in the heat source, ventilation, and cleanout that suit you.
The simplest build is a large plastic storage tote: cheap, wipe-clean, and contained. The better long-term build is a plywood box, which holds heat more evenly, gives you room to mount a heat plate at an adjustable height, and can be cut down and reused. Either way the goal is the same: a space that holds a stable warm zone, blocks drafts at chick level, keeps predators and curious pets out, and is dead simple to clean. None of it requires fancy tools — the plywood version is an hour with a saw and screws.
The Box: Size, Material, and Keeping Drafts Out
Size for growth. A dozen chicks are fine in a couple of square feet for the first week or two but quickly need far more — crowded chicks pile, peck, and foul their space fast. Build bigger than you think, or plan to expand. Walls need to be tall enough that chicks cannot flutter out by week three; around 18 to 24 inches works, and a wire mesh lid keeps them in and pets out while letting heat and moisture escape.
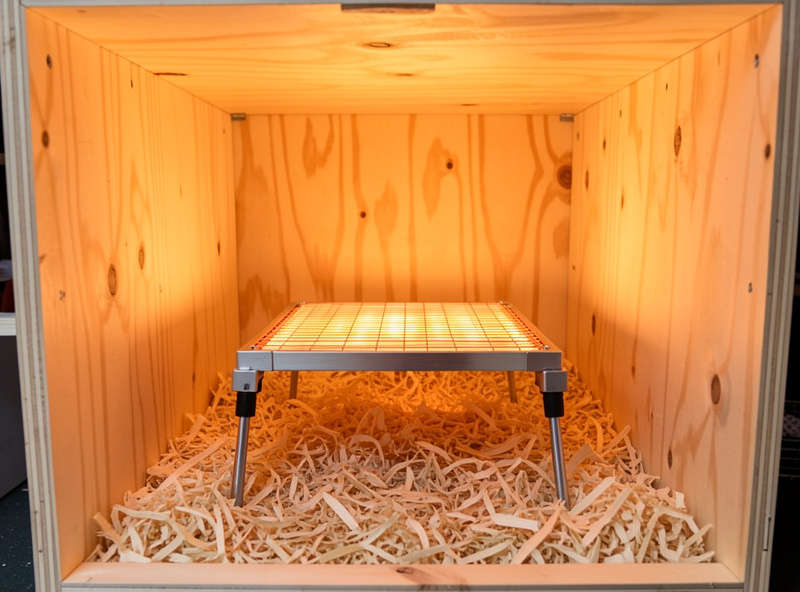
The critical detail is drafts versus ventilation — the same distinction that matters in the coop. Chicks need fresh air, but a draft blowing across the floor chills them even when the air is warm. Solid lower walls block floor-level drafts; ventilation comes from the open or mesh top. A plywood box does this naturally; with a tote, the high sides do the work and the mesh lid handles airflow. Keep the brooder indoors or in a secure outbuilding for the first weeks, away from temperature swings and out of reach of anything that hunts.
Heat: Plate vs. Lamp, and Wiring It Right
The heat source is the heart of the brooder and the part worth getting right. A radiant heat plate — an adjustable-height panel the chicks warm under by contact, mimicking a hen — beats a heat lamp on every axis I care about: far lower fire risk, lower power draw, and a natural day-night rhythm because it does not blast light around the clock. Heat lamps are cheaper up front but are a genuine fire hazard and a notorious cause of brooder disasters.
| Feature | Heat plate | Heat lamp |
|---|---|---|
| Fire risk | Very low | High — a real hazard |
| Power draw | Low (~12–60W typical) | High (250W typical) |
| Light at night | None — natural dark | Constant bright light |
| How chicks use it | Warm under by contact | Bask in radiant heat |
| Adjustability | Raise as chicks grow | Raise/lower the lamp |
I run a heat plate, mounted on adjustable legs so I can raise it as the chicks grow. You can compare adjustable chick brooder heat plates on Amazon. As an Amazon Associate I earn from qualifying purchases. Whatever you choose, give the chicks a temperature gradient: heat at one end, cool at the other, so they self-regulate by moving toward or away from the warmth. The full case for the heat plate is in my heat plate vs. heat lamp comparison. If you do use a lamp, secure it with two independent supports — never rely on the clamp alone.
Floor, Bedding, Food, and Water
The floor must not be slippery. Day-old chicks on a slick surface develop splayed legs, so for the first few days I lay paper towels or a textured shelf liner over the bedding for grip, then switch to a deeper absorbent litter once they are steady. Pine shavings are the standard; avoid cedar (the oils are an irritant) and avoid slick newspaper as a primary surface.
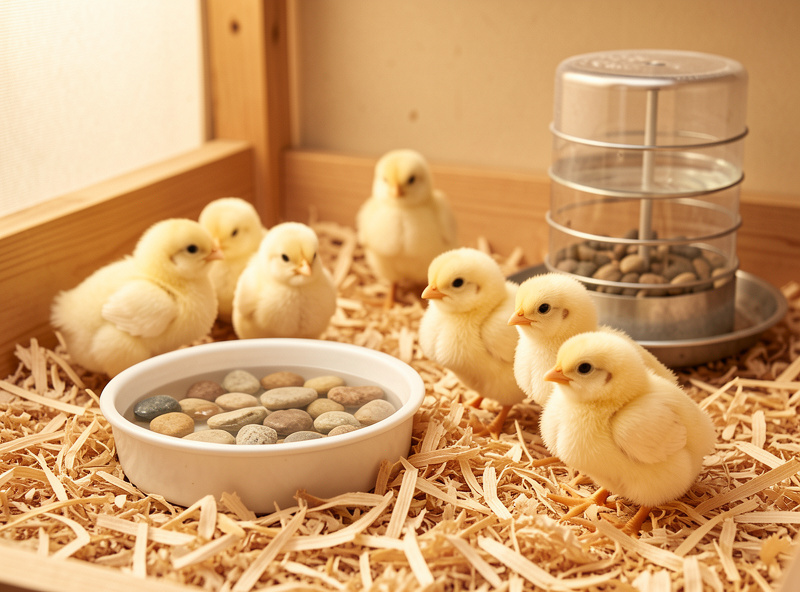
Water is the other danger. Chicks can drown in surprisingly little water, so use a shallow chick waterer, and add clean marbles or pebbles to the trough for the first days so they can drink but not fall in. Keep food and water at the cooler end, away from directly under the heat, and raise them slightly as the chicks grow to cut down on bedding kicked into them. Chick starter feed goes in a proper chick feeder to limit waste and keep it clean. The feeding side across the weeks is covered in my chick feed stages guide.
Temperature by Week
Hold the warm zone at about 95 °F in week one, then drop it roughly 5 °F each week — 90 in week two, 85 in week three, and so on — until you reach ambient temperature and the chicks are fully feathered around week five or six, when the heat comes off entirely. With a heat plate you adjust the height rather than chase a precise air temperature, which is more forgiving.
The chicks themselves are the best thermometer. Chicks huddled tightly under the heat are cold; chicks pressed to the far corners away from it are too hot; chicks spread evenly, eating, drinking, and sleeping in little scattered piles, are just right. Watch behavior more than the number. This is the same read-the-animal approach I use in the coop — the gauge confirms, the birds decide.
The Automation Touch
Because the rest of my setup already reports into Home Assistant, the brooder gets the same treatment: a temperature sensor in the warm zone with an alert if it drifts too cold or, with a lamp, dangerously hot. It is the same logic as the coop and the incubator — it does not replace checking on the chicks, it just catches the failure I would otherwise sleep through. A heat plate makes overheating nearly impossible, which is one more reason I prefer it for an automated, walk-away-safe brooder. For where these chicks came from, see the hatching and incubation guide and the broader rearing path once they outgrow the box.
Brooder Mistakes That Kill Chicks
A brooder is simple, which lulls people into the handful of errors that actually kill day-old chicks. The first is chilling: a heat source that fails overnight, or a draft blowing across the floor, and you wake to piled, lifeless chicks. Build solid lower walls, give a generous warm zone, and if you can, put a sensor on it so a heat failure wakes you instead of the silence doing it.
The second is the opposite — overheating, almost always with a heat lamp set too low or in too small a box with no cool end. Chicks panting and jammed into the far corners are overheating; without a gradient to escape to, they cook. Always give heat at one end and cool at the other. The third killer is drowning: an open waterer deep enough for a chick to fall into and not climb out. Use a proper shallow chick waterer and pebbles in the trough for the first days.
The fourth is slick flooring causing splayed legs in the first 48 hours — lay paper towels or textured liner over the bedding until the chicks are steady. The fifth is pasty vent (droppings caking over the vent), which is worsened by chilling and stress; gently cleaning it and fixing the temperature is general care, but a chick that is genuinely failing to thrive is a question for an avian vet, not a build guide. And the last is using cedar shavings — the aromatic oils irritate chick respiratory systems; stick to pine. Get the box, the heat gradient, the water, and the floor right, and a homemade brooder raises chicks every bit as well as a bought one, for a fraction of the price.
What It Costs to Build
The appeal of building your own is the math. A tote-based brooder can come together for the price of the tote, a bag of pine shavings, a chick feeder, and a shallow waterer — with the heat plate being the one real expense, and the part worth not cheaping out on. A plywood box costs a little more in material but reuses scrap most makers already have, and it lasts batch after batch rather than cracking like a brittle tote. Either way you land well under what a commercial brooder kit costs for the same usable space, and you end up with something sized to your flock and easy to clean. Spend the money on the heat plate and the water setup; improvise the rest from what is in the workshop.
Frequently Asked Questions
How do I make a cheap DIY chick brooder?
The cheapest reliable brooder is a large plastic storage tote with tall sides, a wire mesh lid, a radiant heat plate, a shallow chick waterer, a chick feeder, and pine shaving bedding with paper towels on top for the first few days of grip.
How big should a brooder be for chicks?
Allow roughly half a square foot per chick in the first weeks and increase it as they grow. Build bigger than you think you need, since crowded chicks pile, peck, and foul their space quickly. Walls of 18 to 24 inches keep older chicks contained.
What temperature should a chick brooder be?
Hold the warm zone at about 95 degrees Fahrenheit in week one, then drop it roughly 5 degrees each week until the chicks are fully feathered around week five or six. Provide a heat gradient so chicks can move toward or away from the warmth.
Is a heat plate or heat lamp safer for a brooder?
A heat plate is far safer. It has very low fire risk, draws much less power, and gives chicks a natural day-night cycle since it does not emit constant light. Heat lamps are a well-known fire hazard and should be secured with two independent supports if used.
Related Guides
Related Guides
How to Improve Your Chicken Egg Hatch Rate
Improving your hatch rate comes down to four levers: temperature, humidity, egg quality, and turning. A home incubator running calibrated…
Broody Hen Hatching: Letting a Hen Hatch Her Eggs
Letting a broody hen hatch eggs means waiting for a hen to commit to sitting, slipping fertile eggs under her…

Candling Eggs During Incubation: A Day-by-Day Guide
Candling during incubation means shining a focused light through the egg on day 7, again around day 14, and a…