A DIY chicken pen — the smaller daytime enclosure that holds chickens for free-range hours — can be built for under $100 in materials using PVC, hardware cloth, and basic hardware. Unlike a full coop or run, a pen is typically smaller (16–48 sq ft), often portable, and used for situations like introducing new birds, separating broody hens, or temporary daytime confinement when you cannot watch a free-ranging flock. The build takes 4–8 hours.
This guide covers three free DIY pen plans under $100, plus the differences between a pen, a run, and a tractor. I keep a wood-frame version of this on hand for integration and the occasional broody hen — cheap enough that it’s not a big deal to have it sit unused most of the year. For full coop builds, see our DIY chicken coop plans guide.
Pen vs Run vs Tractor: What’s the Difference?
| Type | Size | Use Case | Permanence |
|---|---|---|---|
| Pen | 16–48 sq ft | Daytime confinement, temporary holding, broody isolation | Often portable |
| Run | 50+ sq ft | Full-time outdoor space attached to coop | Permanent |
| Tractor | 20–60 sq ft | Mobile coop+run combo, pasture rotation | Mobile (wheels or skids) |
The terminology overlaps — what some call a “pen” others call a “run.” This guide focuses on smaller, often-portable enclosures sized for 2–6 birds in daytime use. For larger permanent enclosures, see our chicken run guide. For mobile setups, see our portable chicken coops guide.
Why Build a Chicken Pen?
Five common reasons backyard keepers build pens in addition to their main coop and run:
- Introducing new birds. A pen lets new birds see and be seen by the existing flock for 1–2 weeks before integration, reducing fights.
- Broody hen isolation. Broody hens block nesting boxes for the rest of the flock. A small pen lets you isolate the broody for 1–3 days to break the broodiness.
- Sick/injured bird recovery. Separating an injured bird for healing prevents pecking and gives controlled feeding.
- Daytime free-range alternative. When you cannot supervise free-range, a pen gives birds outdoor time without total exposure to predators.
- Chick rearing. Older chicks (4–6 weeks) need outdoor air without full predator access. A pen with finer mesh keeps them safe.
Most established backyard keepers eventually build at least one pen for these scenarios. The cheapest path keeps total investment under $100.
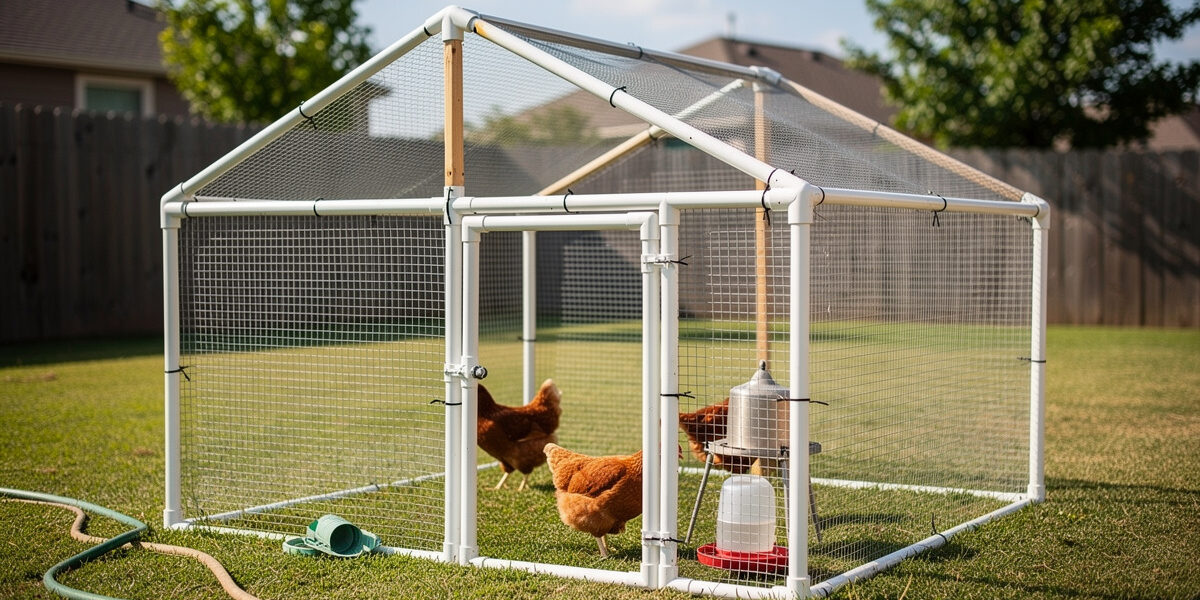
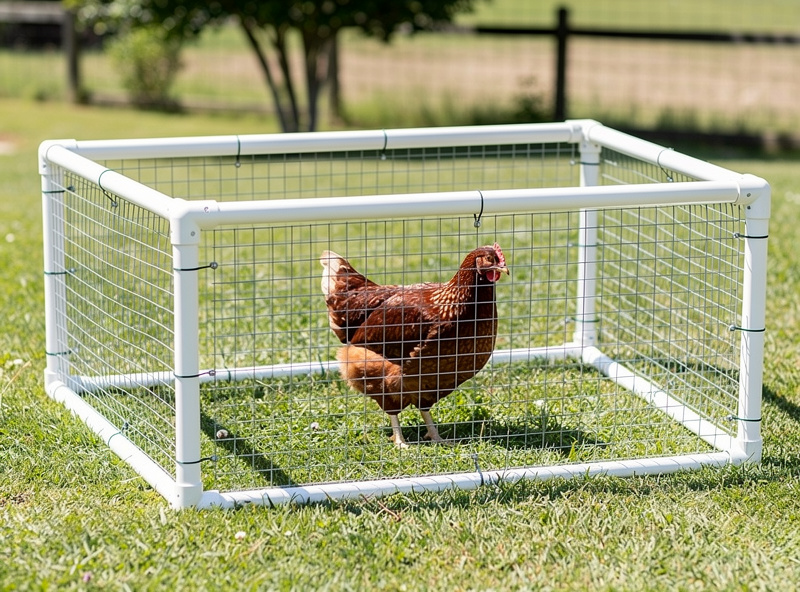
Plan 1: PVC Pipe + Hardware Cloth Pen (Under $80)
The cheapest functional pen design: 4-foot-tall walls of 1/2″ hardware cloth zip-tied or wired to a frame of 1/2″ or 3/4″ PVC pipes connected with elbows and tees.
Materials list (4×4 ft pen):
| Item | Quantity | Cost |
|---|---|---|
| 3/4″ PVC pipe (10 ft) | 4 sticks | $30–$50 |
| 3/4″ PVC elbows | 8 ea | $5–$10 |
| 3/4″ PVC tees | 8 ea | $5–$10 |
| 1/2″ hardware cloth (50 sq ft) | 1 roll | $28–$45 |
| Heavy-duty zip ties | 1 bag | $5–$10 |
| PVC cement | 1 small can | $5–$8 |
| Hinges + latch (for door) | 1 set | $10–$15 |
| Total | $88–$148 |
Build time: 4–6 hours. The pen is light enough that one person can pick up an empty 4×4 pen and move it. Lasts 4–7 years before UV degradation requires PVC replacement.
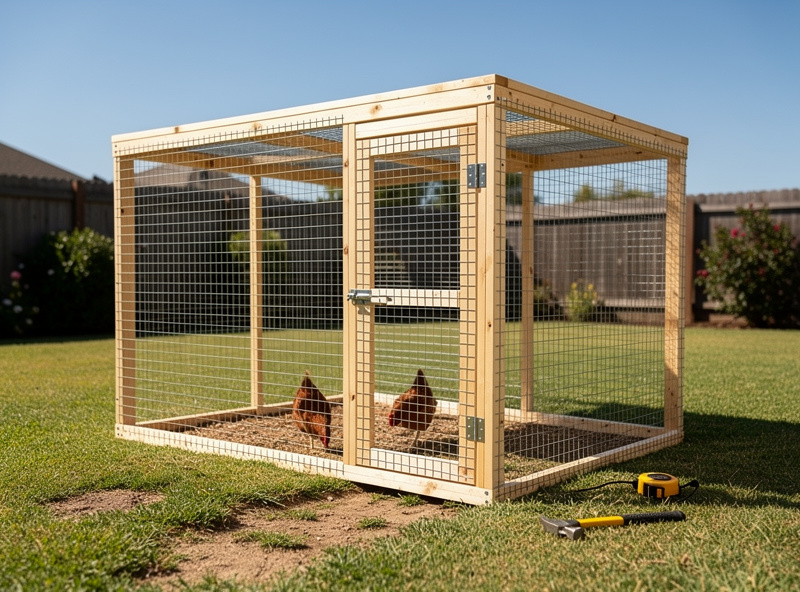
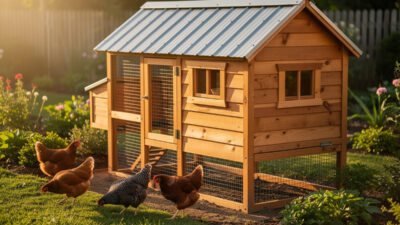
Plan 2: Wood Frame + Hardware Cloth Pen ($80–$130)
For more durability and predator strength, build a wood-frame pen with treated 2x2s for the frame and hardware cloth for the walls and top.
Materials (4×4 ft pen):
- Pressure-treated 2x2x8 lumber: 8 boards ($30–$50)
- 1/2″ hardware cloth, 50 sq ft: $28–$45
- Hinges, latch, screws: $20–$35
- Heavy-duty staples for hardware cloth: $5–$10
Total: $80–$130. Build time: 5–8 hours. Lasts 8–12 years.
The wood-frame approach is heavier but more predator-resistant than PVC. Easy to add a covered top of the same hardware cloth or a piece of corrugated roofing. Better for permanent or semi-permanent setups.
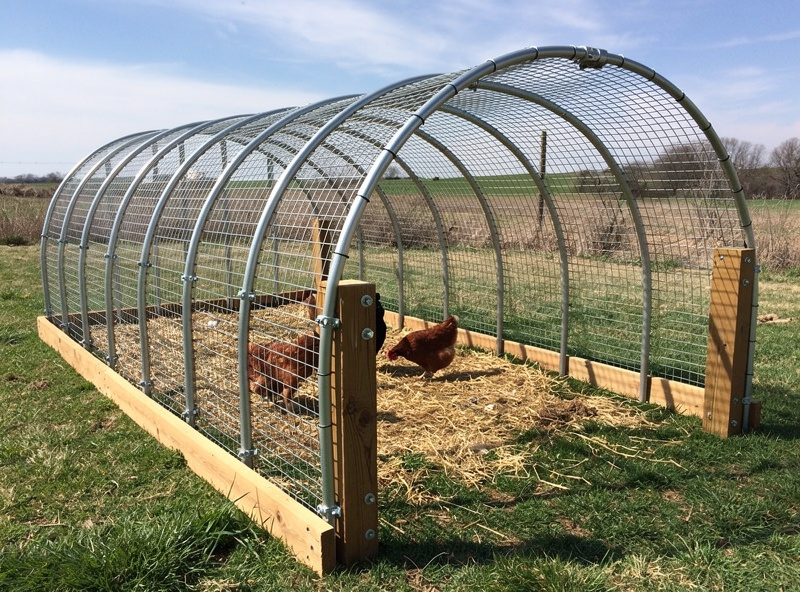
Plan 3: Cattle Panel Hoop Pen ($60–$100)
One 16-ft cattle panel arched between two anchor points forms a self-supporting hoop. Lined with hardware cloth, this gives you 8 ft of length, walk-in height, and curved profile that sheds rain.
Materials:
- 1 cattle panel (16 ft x 50″): $25–$45
- 1/2″ hardware cloth, 60 sq ft: $35–$55
- 2×2 or 2×4 anchor lumber: $10–$20
- Heavy-duty zip ties or fence wire: $5–$10
Total: $75–$130. Build time: 4–6 hours. Lasts 10–15 years.
The hoop pen is the most-bird-friendly cheap design — birds get walk-in height, the curve sheds weather, and the cattle panel structure is essentially indestructible. The downside is it requires a flat space at least 8 ft long to deploy.
Build Steps for Any Pen Plan
Whichever plan you choose, the build sequence is similar:
- Plan dimensions. Measure the space, decide on door location.
- Frame the structure. Whether PVC, wood, or cattle panel, build the skeleton first.
- Attach hardware cloth. Wrap walls and top with 1/2″ hardware cloth, secured every 4–6 inches with zip ties (PVC) or staples (wood).
- Build the door. Frame the door opening, attach hinges, install latch.
- Predator-proofing. If permanent, bury hardware cloth apron 12 inches outward. If portable, accept that the pen needs daytime supervision.
- Test the pen. Check for gaps, sharp edges, and door alignment before introducing chickens.
Hardware Cloth Specifications
The choice of mesh size matters:
| Mesh Size | Stops | Use Case |
|---|---|---|
| 1/4″ (0.6 cm) | Mice, snakes, weasels | Required for chick pens, recommended everywhere |
| 1/2″ (1.25 cm) | Adult predators (raccoons, foxes) | Standard for adult-bird pens |
| 1″ (2.5 cm) | Large dogs only | Insufficient — do not use |
| Chicken wire (1.5–2″) | Chickens leaving | Never use for predator-facing surfaces |
For chick pens (birds under 8 weeks), 1/4″ mesh is mandatory because larger mesh allows young birds to stick their heads through and become predator targets. For adult-only pens, 1/2″ works but 1/4″ is still better insurance.
Pen Sizes by Use Case
| Use Case | Recommended Size | Capacity |
|---|---|---|
| Broody hen isolation | 3×3 (9 sq ft) | 1 bird, 1–3 days |
| Injured bird recovery | 3×4 (12 sq ft) | 1 bird, 1–3 weeks |
| New bird quarantine | 4×4 (16 sq ft) | 1–2 birds, 1–2 weeks |
| Bird integration (“see-don’t-touch”) | 4×6 (24 sq ft) | 2–3 birds, 1–2 weeks |
| Daytime alternative to free-range | 4×8 to 6×8 (32–48 sq ft) | 4–6 birds, daily |
| Older chick (4–6 wk) outdoor pen | 4×4 to 4×6 (16–24 sq ft) | 5–10 chicks for 2–3 weeks |
Most established keepers build a 4×4 pen first as their general-purpose pen, then add a smaller broody pen later if needed.
Portable vs Permanent Pen
The portability decision matters for design:
- Portable pen — light enough to lift and move. PVC + hardware cloth typical. No buried apron (so daytime supervision required).
- Permanent pen — heavier wood frame, fixed location, buried predator apron. Suitable for overnight use.
Most “pens” in the strict sense are portable — they get used during specific situations (broody, sick, integration) and then stored when not needed. Permanent pens are essentially small runs and follow the run-build approach detailed in our chicken run guide.
Common DIY Pen Mistakes
Most of these show up the first time you actually need the pen in a hurry, not while you’re building it calmly on a weekend.
- Using chicken wire. Universal beginner mistake. Hardware cloth or no pen.
- Skipping the top. Open-top pens lose chicks and small birds to hawks within weeks. Always include a roof of hardware cloth or shade cloth.
- No floor predator protection. Even portable pens need the bottom secured — either a wire-mesh floor or a buried apron extension if used in one spot for more than a day.
- Sharp edges. PVC cuts and hardware cloth ends are razor-sharp. Sand or fold all edges that birds (or your hands) could contact.
- Underweight for outdoor use. A light pen blows over in a storm. Add weight to corners (concrete blocks, sandbags) or stake it down.
- Pen too small for use case. A broody hen in a 2×2 pen does badly. Match pen size to the realistic time the bird will spend in it.
Pen + Coop Integration
If you are using the pen as a “see-don’t-touch” introduction pen, place it adjacent to (but not inside) the main coop or run. Birds on both sides see and hear each other through the wire without physical contact. After 1–2 weeks the integration goes much faster than direct introduction — this is the step I skip at my own risk, since the one time I rushed it I ended up with a bullied new bird and a week of re-separation instead of the two I’d planned for.
For broody-breaking, a wire-bottom pen with no nesting material, elevated so air moves underneath, is the standard humane method keepers rely on — the airflow cools the brood patch and interrupts the hormonal drive to sit, usually within 2–4 days. Once she stops the broody behavior, return her to the main coop.
Adding a Pen to Existing Setups
If you already have a coop and run, adding a pen takes one weekend and $80–$130. Three placement options:
- Inside the existing run — wire mesh divider creates a sub-area without affecting the larger run.
- Adjacent to the existing run — pen shares a wall with the run, allowing visual contact.
- Standalone in the yard — separate location used only for specific situations.
The standalone approach is most common because pens get stored when not needed. Most keepers stash the pen against a fence or in the garage between uses.
Maintenance
Pens require less maintenance than coops because birds are in them less often. Check:
- Hardware cloth tension monthly (sags lead to gaps)
- UV damage on PVC annually (hairline cracks indicate replacement time)
- Hinges and latches every use (catastrophic failure if a latch breaks)
- Sand or wipe down between uses to prevent disease transfer between birds
Cost Comparison: DIY Pen vs Buying One
| Path | Cost | Build/Setup Time |
|---|---|---|
| DIY PVC pen (4×4) | $80–$130 | 4–6 hrs |
| DIY wood pen (4×4) | $80–$130 | 5–8 hrs |
| DIY cattle panel hoop pen | $75–$130 | 4–6 hrs |
| Petmate Premium Hutch (small) | $120–$180 | 1 hr assembly |
| Pawhut Walk-In Poultry Cage (~6.6×10) | $280–$400 | 3–5 hrs assembly |
| OverEZ Walk-In 8 ft. Chicken Run (6’6″x7’6″, 15-bird capacity) | See current listing — premium tier, well above DIY cost | 3–6 hrs assembly |
DIY beats commercial options on cost for small pens, and it isn’t close — a $340–$480 “run extension” isn’t a real buying path here anyway, since OverEZ’s extension kits only attach to an existing OverEZ run and list for well over $1,800 on their own; the standalone walk-in run above is the honest commercial comparison. For larger pens (6×10+), a commercial walk-in run saves enough labor that it can still win despite the price gap. The DIY pen sweet spot stays sizes 3×3 to 5×6, where the cost gap against any commercial option is largest.
Frequently Asked Questions
How much does it cost to build a DIY chicken pen?
Under $100 in materials for a basic 4×4 pen using PVC pipe and hardware cloth. Wood-frame pens run $80–$130 for the same size. Cattle panel hoop pens deliver walk-in height for $75–$130. All three options take 4–8 hours to build with basic tools.
What is the difference between a chicken pen and a chicken run?
A pen is smaller (typically 16–48 sq ft) and often portable, used for daytime confinement, broody isolation, or new-bird integration. A run is the larger permanent outdoor enclosure attached to the coop where chickens spend most daylight hours. All pens are enclosures; not all enclosures are pens.
Can I use chicken wire for a DIY pen?
No. Chicken wire keeps chickens contained but does not stop predators — raccoons reach through it, weasels squeeze through, and hawks can grab birds against it. Use 1/4 inch or 1/2 inch hardware cloth on every surface, even on portable pens used only during the day.
What size should a DIY chicken pen be?
For broody isolation, 3×3 ft is enough. For new-bird quarantine or integration, plan 4×4 or 4×6 ft. For daytime free-range alternatives, 4×8 to 6×8 ft handles 4–6 birds. Match pen size to use case — most established keepers build a 4×4 general-purpose pen.
Do I need a roof on my chicken pen?
Yes. Open-top pens lose chicks and small birds to hawks within weeks even in suburban settings. The roof can be hardware cloth (cheapest), shade cloth (lighter), or corrugated roofing (best for rain). Never leave a pen open-top, even for daytime use only.
Can I use a DIY chicken pen overnight?
Only if it has a buried predator apron and proper double-latched gates. Most portable DIY pens are sized and built for daytime supervised use only. For overnight use, build the structure with the predator-proofing details from our chicken run guide instead of treating it as a portable pen.
Related Articles
- DIY Chicken Coop Plans: 12 Free Designs by Skill Level
- Chicken Run Guide: Sizing, Materials & Best 2026 Models
- Portable Chicken Pen: 5 Best Picks for Daily Setup
- Portable Chicken Coops & Tractors: Complete 2026 Guide
- Chicken Enclosure Types: Open vs Covered Runs
Related Guides
Wood Chicken Coops: Traditional Picks Compared
Wood is the default chicken coop material for backyard flocks because it's cheap upfront ($200–$500 for an 8-bird coop), insulating,…
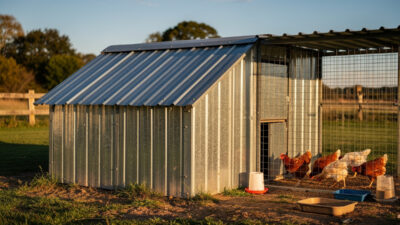
Metal Chicken Coops: Durability & Heat Concerns
A metal chicken coop costs roughly $300–$700 for a 4–8 hen setup, is commonly rated 15–25 years by the manufacturers…
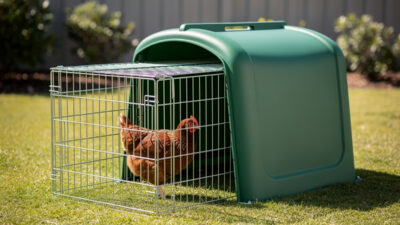
Plastic Chicken Coops: Pros, Cons & Best Models
A high-quality plastic chicken coop runs roughly $400–$900 for a 4–8 hen setup, is commonly rated 15–20 years by the…