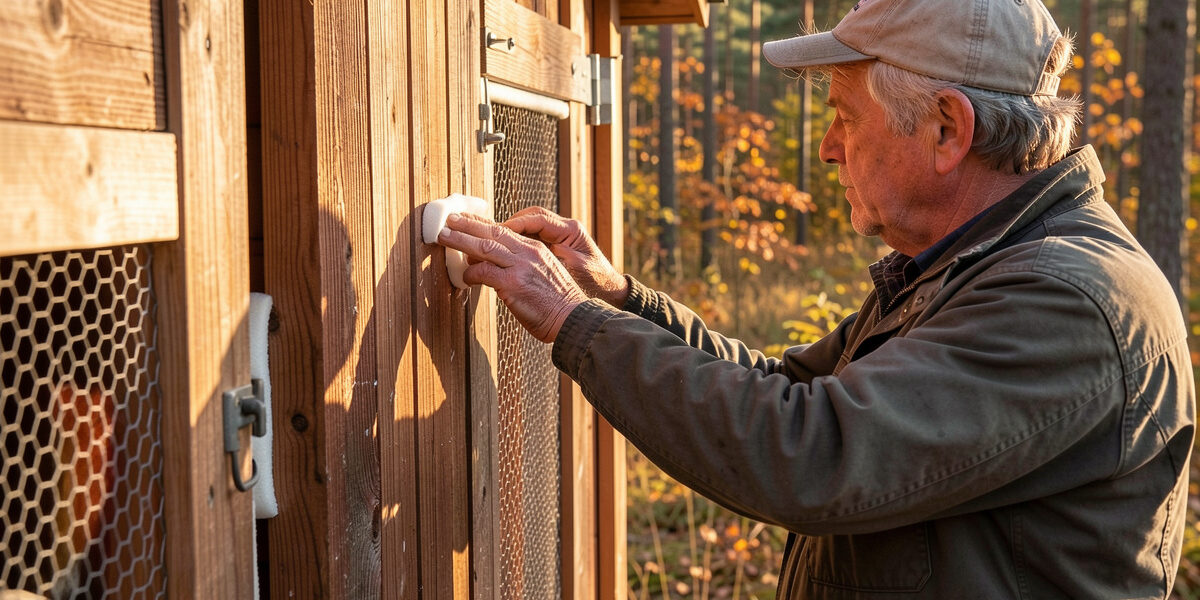
Winterizing a chicken coop before first frost takes about half a day and prevents every major cold-season failure: frostbite from drafts at roost height, respiratory problems from trapped moisture, frozen waterers, and hardware failures discovered at −15 °C on a January morning. I go through the same checklist every October on my coop in Sweden, and the years I’ve been disciplined about it are the years I’ve had zero frostbite, zero waterer failures, and zero early-morning emergencies.
This guide runs through the four categories of winterization in order of priority: draft elimination, ventilation confirmation, litter management, and hardware inspection. Do them in this sequence — fixing draft before you address ventilation is the right order because the two changes interact.
As an Amazon Associate I earn from qualifying purchases.
Step 1: Eliminate Drafts at Roost Height
Drafts at roost height are the most direct frostbite trigger in a cold coop. A draft blowing across the birds at 3 a.m. at −10 °C will frostbite combs and wattles faster than static cold air at −20 °C. The first step in winterization is identifying and sealing every air gap at or below the level where birds sleep.
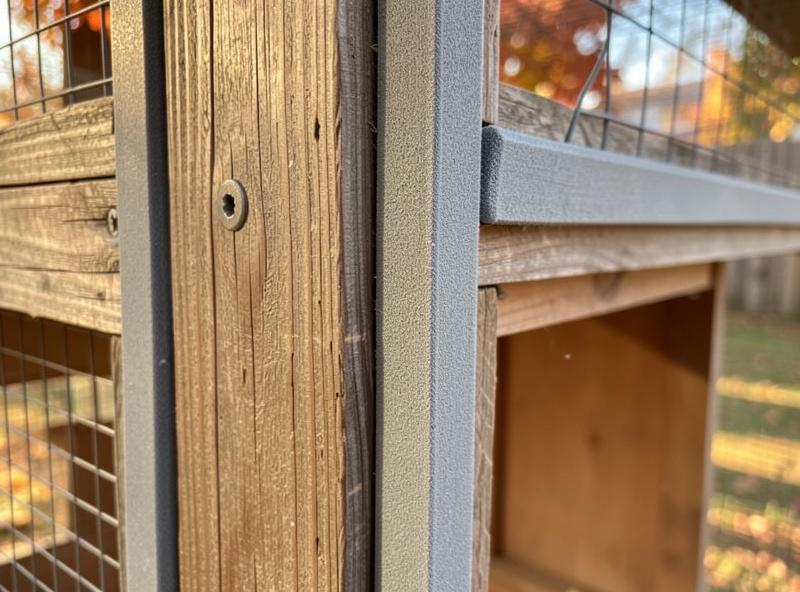
Walk the coop interior after dark with a flashlight while it is cold outside — you will feel or see where cold air infiltrates. Common problem areas: gaps at the bottom of the pop door (even a 1 cm gap lets in a channel of cold air that hits the roost directly if the roost is positioned low), gaps where hardware cloth meets the coop frame, loose-fitting windows, and the junction between walls and roof on older plywood construction. Seal gaps at and below roost height with weatherstripping, foam backer rod, or a stapled patch of hardware cloth backed with foam. Do not seal anything above roost height — that is your ventilation zone.
On my coop, the pop door has a foam-lined frame that compresses to a tight seal when the auto-door closes. I tested this by pushing a piece of tissue paper around the door frame while it was closed — no flutter anywhere. That test takes 30 seconds and tells you more than guessing. The auto-door itself is a Run-Chicken unit that has never failed in four winters of Swedish cold, so I trust that seal; a manually latched pop door on a cheap frame is more likely to warp and gap over time.
Step 2: Confirm Ventilation Is Adequate (and Open)
After sealing drafts, the second step is confirming you have enough open ventilation above roost height. This step trips up keepers who go too far in the seal-everything direction — a fully draft-proofed coop with inadequate ventilation is a humidity trap that causes frostbite, respiratory problems, and ammonia buildup more reliably than any draft would.
The minimum ventilation standard is 1 square foot of opening per 10 square feet of floor area, positioned well above the birds. My coop has a continuous ridge vent that runs the full length of the roof peak plus soffit vents on the low side of each wall — a cross-ventilation system that keeps air moving even in still conditions. In winter, the ridge vent stays cracked 2–3 cm year-round. The soffit vents close at sunset and reopen at dawn on a mechanical damper, but even at their most closed position they leave a 5 mm gap.
Test your ventilation by checking for condensation on the ceiling or walls on a cold morning before the pop door opens. If the walls are wet or you can see breath vapor hanging in the air, you need more ventilation — not less cold. That condensation is what freezes on combs. The fix is opening or enlarging the high vents, not adding a heater. For the full ventilation vs. draft calculation — sizing, placement, and emergency fixes for already-built coops — see the winter chicken keeping guide hub and the dedicated winter coop ventilation vs. draft article.
Step 3: Start or Refresh Deep Litter Before the Cold
Deep litter started before first frost performs better all winter than litter switched over in December. The microbial colony that makes deep litter work — the aerobic bacteria that generate warmth and process moisture — needs time to establish, and it establishes faster in mild conditions than in cold ones. Start in October with 15–20 cm of fresh pine shavings and you will have an active, warm, dry floor by the time temperatures drop.
If the existing litter from summer is still in reasonably dry condition, you can add a fresh layer on top and start the winter cycle without a full cleanout. If summer litter went wet or compacted — and in a humid climate it often does — do a full cleanout before adding winter bedding. Wet compacted litter does not magically become good deep litter; it becomes an anaerobic ammonia source. The full management sequence, turning schedule, and how to read litter health by color, smell, and temperature are covered in the deep litter method for winter warmth guide.
Step 4: Hardware Inspection — Find Failures Before January
Hardware failures at −15 °C are genuine emergencies. A waterer heat cord that stops working, a pop door mechanism that jams in the cold, a roof section that leaks onto the litter — any of these found in January requires an emergency fix in the dark and cold. Found in October, they are an afternoon repair.
The inspection checklist I run every pre-winter:
- Waterer heat cord: plug in and verify it draws current (a clamp meter or plug-in outlet tester with a load indicator). Check the thermostat probe position — it must be in the water, not just near the reservoir wall.
- Auto-door mechanism: cycle it manually five times and watch the obstruction sensor respond. Clean any accumulated debris from the door track. On the Run-Chicken and ChickenGuard units, check the battery level on units running on their internal pack — cold weather reduces battery capacity significantly.
- Roof and wall seals: check the interior ceiling for water stains from summer rain. Any water intrusion must be sealed before snow load arrives.
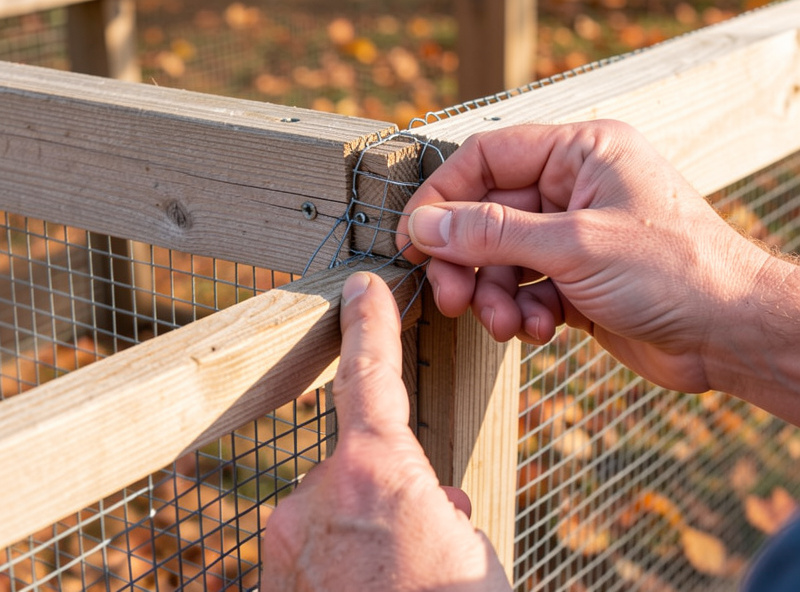
- Hardware cloth integrity: pull and press every panel. Look for rusting at fastener points — this is where chicken wire and thin mesh fail first, and a weakened panel at a corner seam is an invitation for a determined predator to push through in winter when the ground is frozen solid and the flock is confined 15 hours a night.
- Electrical connections: check all exterior connections for corrosion. Exterior-rated wire nuts and junction boxes rated for damp locations; any standard indoor connection exposed to moisture is a fire risk in a wooden structure.
Insulation: What Actually Helps and What Wastes Money
Insulation in a chicken coop is primarily a moisture management tool, not a heat management tool. A well-insulated coop keeps the interior temperature closer to the warmth generated by the birds themselves, which means less condensation on surfaces and a drier environment. It is not designed to keep the coop at a human-comfortable temperature — that would require a heat source.
Effective insulation placement: walls and ceiling, on the interior face, with a vapor barrier between the insulation and the interior surface. Without the vapor barrier, moisture migrates into the insulation, where it condenses, compresses the insulation, and eventually develops mold. I used 50mm rigid foam board on the interior face of my double-wall construction, taped at seams and covered with 12mm plywood on the interior side. Zero mold after four winters.
What not to insulate: the floor (deep litter is the floor management strategy, not foam), any opening at roost height or above (those are ventilation, not heat loss), or the coop walls from the exterior only (moisture migrates inward through cold exterior walls and condenses inside the insulation layer). The most common DIY mistake is insulating the walls from outside without addressing the moisture vapor that moves through wood in winter.
Waterer Winterization Before Freeze-Up
The waterer setup that works in summer becomes a problem the first morning the temperature drops to −3 °C. Open trough systems freeze solid; gravity-fed plastic containers crack. The time to switch to a winter-capable system is October, not the morning you find a block of ice where the water was.
My winter waterer is a 10-liter horizontal-nipple reservoir with a thermostatic heat cord wound in a coil inside the reservoir. The thermostat activates at 2 °C and shuts off at 8 °C, drawing 25–40 W only when needed. The nipples themselves are made from stainless horizontal-nipple fittings rated for outdoor use — the cheap plastic horizontal nipples crack in the cold. For complete waterer system selection — heated base vs. heat cord vs. thermostatic reservoir, the automation overlay that catches a failed cord, and the one installation mistake that causes the heat cord to cook the water instead of merely preventing freezing — see the heated chicken waterer guide.
Pre-Frost Timeline: When to Do What
| Task | Timing | Priority | Time Required |
|---|---|---|---|
| Draft elimination (seal roost-height gaps) | 6 weeks before first frost | Critical | 1–2 hours |
| Ventilation check and adjustment | 6 weeks before first frost | Critical | 1 hour |
| Hardware inspection (door, cloth, roof, electrical) | 4–6 weeks before first frost | High | 2–3 hours |
| Deep litter fresh start | 4 weeks before first frost | High | 1 hour |
| Waterer switch to heated system | 2 weeks before first frost | High | 30 minutes |
| Supplemental lighting install (if using) | 2 weeks before days drop below 14 hours | Optional | 1 hour |
| Freeze-watch automation test | 1 week before first frost | High (if using smart home) | 30 minutes |
Frequently Asked Questions
When should I start winterizing my chicken coop?
Start 6 weeks before the first expected frost in your region. Draft elimination and ventilation checks come first, then hardware inspection, then litter refresh, then waterer switch. Starting in October for northern climates gives time to find and fix problems before temperatures make repairs miserable.
Should I insulate my chicken coop for winter?
Insulation helps by keeping interior temps closer to the warmth the birds generate, which reduces condensation. Use rigid foam board on the interior wall face with a vapor barrier, covered by plywood. Do not insulate without a vapor barrier — moisture migrates into insulation and causes mold and structural failure in 2–3 winters.
How do I stop drafts without blocking ventilation?
Seal every gap at or below roost height with weatherstripping or foam. Leave all openings above roost height open — those are ventilation, not drafts. The test is simple: stand at roost height in the dark with a light source; any cold air movement you feel is a draft to eliminate.
Can I use a heat lamp instead of winterizing properly?
A heat lamp is a fire risk in a wooden coop and creates cold-acclimatization dependence — the flock never builds winter tolerance, and a power outage becomes an emergency. Proper draft elimination, ventilation, and cold-hardy breeds are more reliable and safer. Heat lamps have caused numerous coop fires.
How deep should deep litter be for winter?
Start at 15–20 cm (6–8 inches) in October. By spring after regular additions and turning, depth will reach 25–35 cm. Minimum 15 cm is needed to achieve the microbial mass that generates warmth and manages moisture. Shallow litter below 10 cm does not have enough active colony to perform either function reliably.
Further Reading
Related Guides
Winter Chicken Keeping Guide: Cold-Climate Flock Management
Keeping chickens through a northern winter comes down to three things you can actually control: moisture, frostbite risk, and water…
Chicken Coop Vent Placement Guide
Coop vent placement follows one rule above all: high exhaust, low intake, roost out of the line between them. Put…
Cooling a Chicken Coop in Summer: Beat the Heat
Cooling a chicken coop in summer comes down to shade, airflow, and cool water — in that order. Chickens cannot…